150s User Manual
10
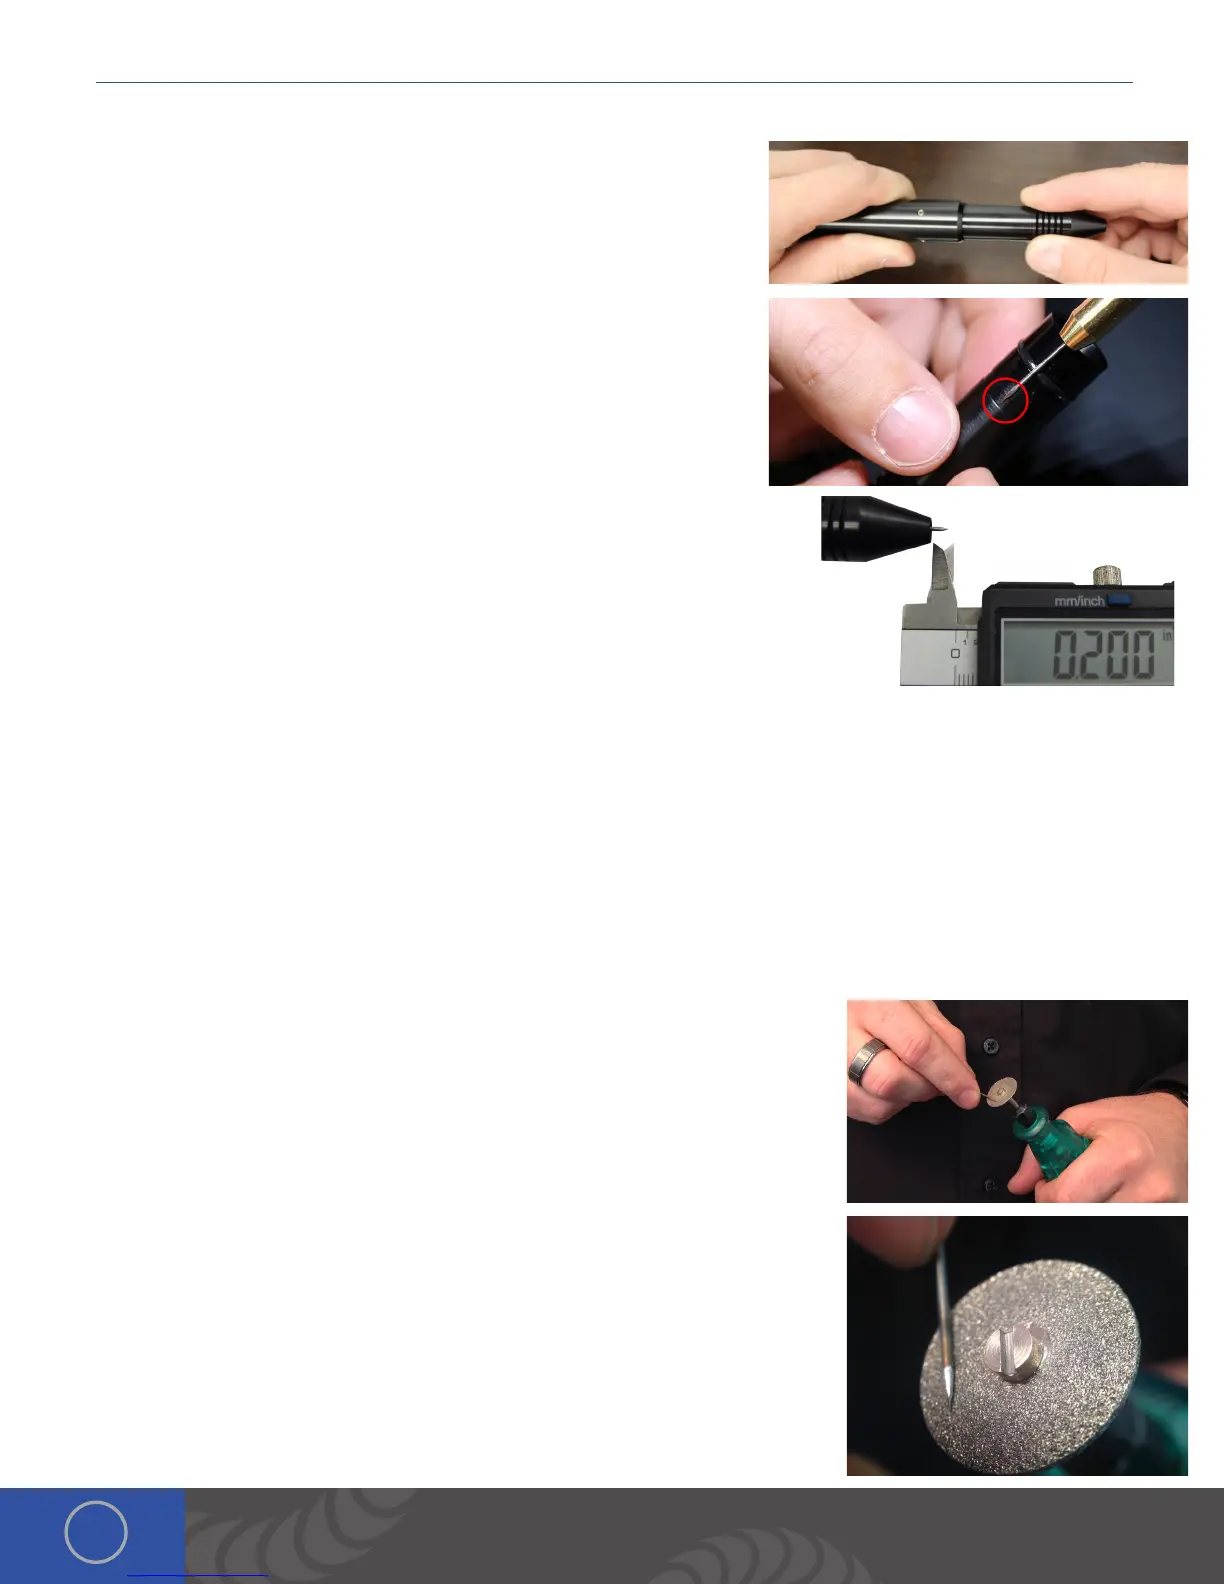
INSTALL THE TUNGSTEN ELECTRODE ONTO THE WELDING STYLUS
Follow these steps to properly install the tungsten electrode.
• Remove the stylus hull by pulling it away from the stylus shaft.
• Loosen the collet cap by twisting it counter-clockwise.
• e welder comes with 2 electrode collets. One that fits 0.5mm
electrodes and one that fits 1.0mm electrodes. e electrode stylus will
be shipped with the 1.0mm electrode collet installed.
• Insert a 1.0mm electrode into the collet. Helpful Tip: ere is a groove cut
around the stylus hull that will help measure the electrode length. Place
the end of the stylus hull up against the collet cap, then make sure the
electrode tip falls between groove.
• ere should be between 0.6 - 0.7in (1.5 – 2cm) of the electrode
protruding from the stylus shaft. is will allow the electrode enough
room to stick out from the stylus once the stylus hull is placed back on
the stylus.)
• Lock the electrode into place by hand tightening the collet cap in a clockwise
direction.
• Replace the stylus hull by pushing it in until you feel it snap back into place
(the electrode should stick out between 1/8 – 1/4in (3.75 – 6.75mm) after the
stylus hull is snapped back into place).
WORK PIECE TO ELECTRODE PRESSURE
Touch the work piece to the electrode with very light pressure. Too much pressure will cause the work piece to stick to
the electrode and in turn cause the electrode to be contaminated (work piece material on the electrode). We recommend
cleaning or changing the electrode any time it gets stuck to the work piece
WHEN TO SHARPEN THE ELECTRODE
It is recommended that the user pay close attention to the electrode condition. An electrode that appears to be dark
colored or covered with material from previous welds can lead to inconsistent welding and poor igniting of the weld. When
this occurs, simply sharpen the electrode with the included diamond disk. e diamond disk can be attached to a flex shaft
or Dremel tool. Follow these steps for sharpening the electrode.
• Completely remove the electrode from the stylus.
• Pinch the electrode between the thumb and index and/or middle finger with the
shaft going perpendicular to the fingers.
• Power on the Dremel or flex shaft then hold it with the opposite hand. *Place the
electrode tip in the diamond disc in such a way that the grit of the disk is moving
parallel with the electrode shaft and moving towards the tip.
• is will affect the quality of the weld if not done as explained above.
• Set the electrode on the diamond disk at a 10-degree angle and begin to spin
the electrode with the thumb and middle finger. *A helpful way to get a sharp
electrode is to push down on the electrode with your index finger while twisting
the electrode with the thumb and middle finger.
• Once the electrode is sharp and clean, turn the Dremel off and insert the
electrode back into the stylus as explained above.
*As a general rule of thumb we recommend a freshly sharpened electrode anytime a
new work piece is being welded.
*See Chapter 5 for additional information on the Tungsten Electrodes
 Loading...


