150s User Manual
12
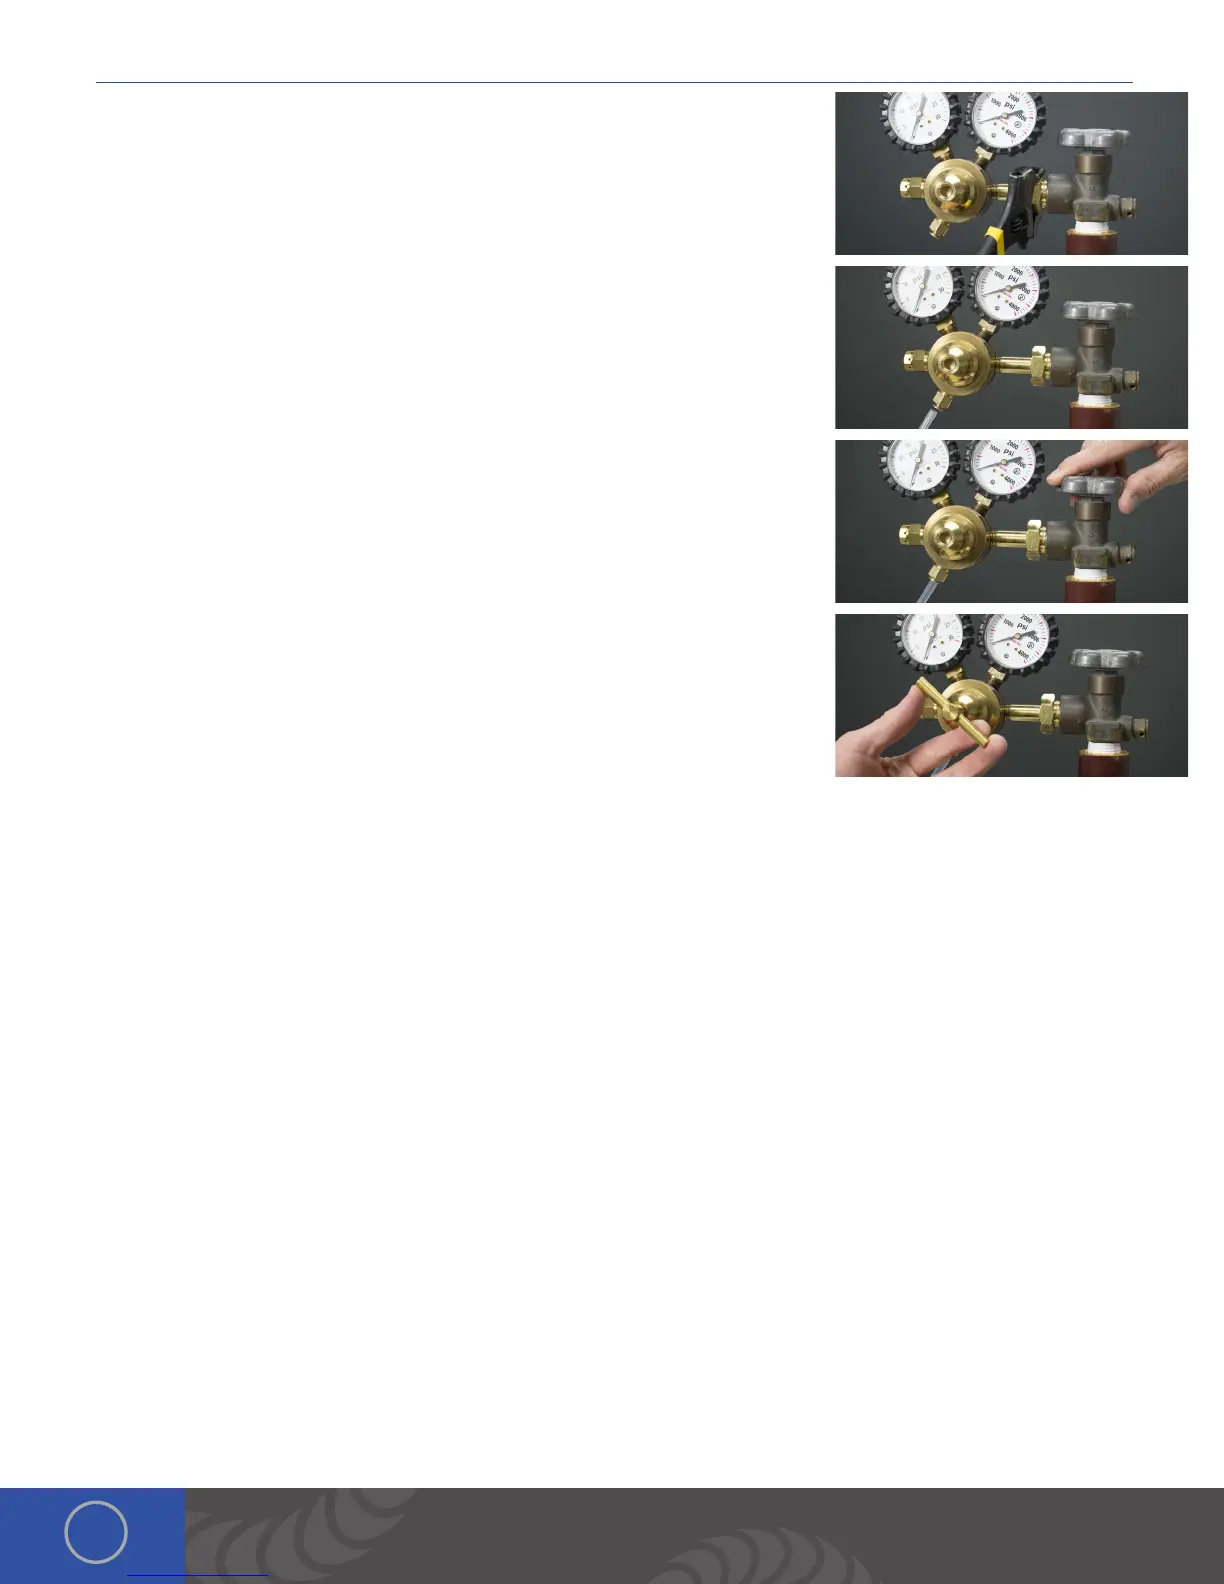
• Screw the gas regulator onto the shielding gas tank.
• Connect one end of the gas tubing to the gas regulator.
• Insert the other end of the gas tubing into the gas port on the back of the power
supply. It will stop when it is fully connected. Tug gently on the tube to verify a
tight fit.
• Open the gas tank slowly. e dial on the right should pressurize and the dial on
the left should remain at zero (when the regulator dial is fully backed out or the
dial becomes loose).
• Slowly turn the regulator dial CLOCKWISE until the gas pressure reads between
7-10 psi. (is will adjust the dial on the left side of the regulator.)
Chapter 2: The Touch Screen Interface
Below is an explanation of all the various buttons and options found on the Orion user interface.
Basic Screen
1. Screen Select Drop Bar: is allows users to switch between the different welding screens; Basic, Arc, Tack.
2. Media Screen Button: is allows users to access the multimedia screen.
3. Save / Load Screen Button: is allows users to access the save load screen.
4. Settings Button: is allows users to access the settings screens.
5. Power per division graph: Depending on the current weld bank you are in, displays the energy limits.
6. Graph PSI: Displays the PSI of the unit in real time.
7. Graph Estimated Spot Size: Displays the estimated spot size that will be produced.
8. Graph Energy: Displays the energy based on current settings of the welder.
9. Graph Weld curve: A graphical representation of the weld curve that will be produced.
10. Graph Agitation: A graphical representation of the agitation of the weld.
11. Graph Length of Weld: Displays the length of the weld based on current settings.
12. Graph Weld Settings: Shows the ignition setting, agitation setting, weld length and welds per second of the current weld
settings.
13. Metal Select Scroll View : Unique to the basic screen this allows a user to select the metal they are going to weld and
load recommended settings based on Sunstone’s experienced welders.
14. Application Selector Button: Large Joint: Unique to the basic screen, users can select the application that they are going
to weld and receive recommended settings based on Sunstone’s experienced welders.
15. Application Selector Button: Small Joint: Unique to the basic screen, users can select the application that they are going
to weld and receive recommended settings based on Sunstone’s experienced welders.