150s User Manual
8
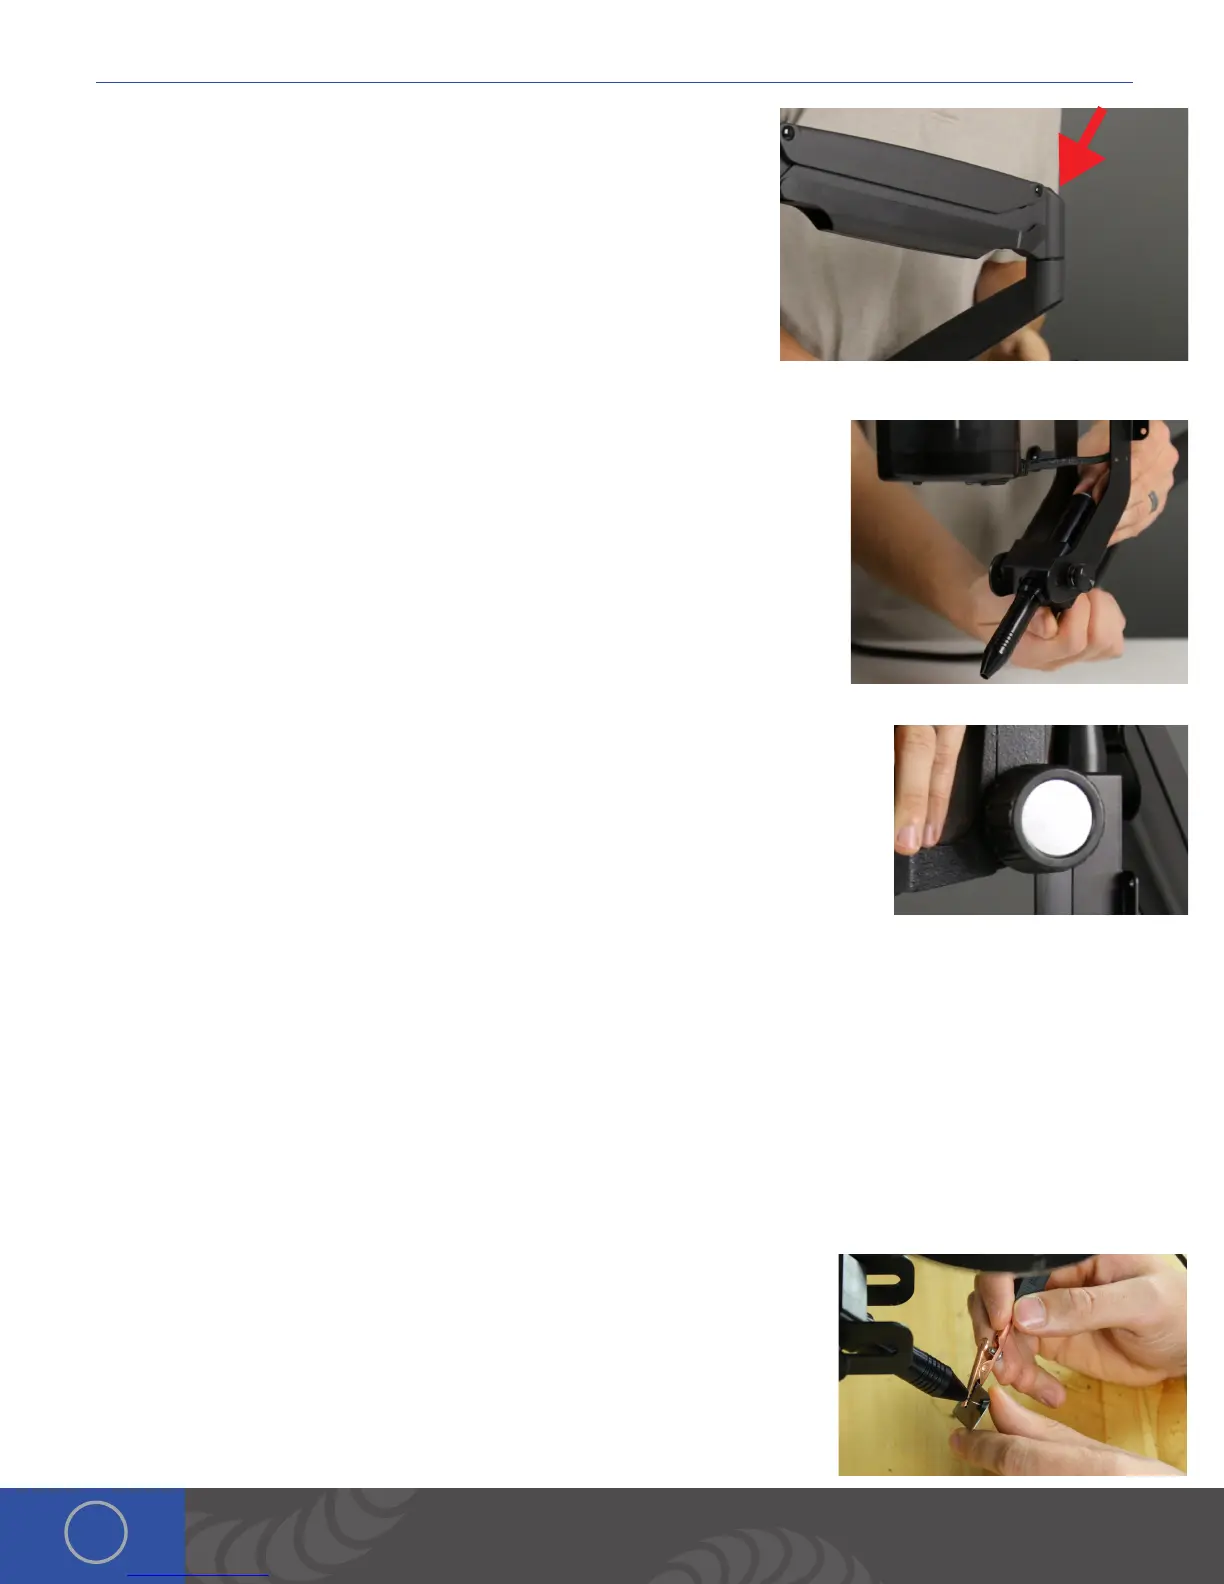
• Loosen/tighten the allen on the microscope arm to adjust the spring
pressure. Turn the allen clockwise if the arm does not hold the microscope
up. Turn the allen counter clockwise if the arm does not allow the
microscope to come down.
ADJUST WELDING STYLUS POSITION
• Loosen the screws on either side of the stylus holder.
• Adjust the welding stylus to a 45-degree angle then slightly tighten the screws
on the sides just enough to hold the stylus in place at a 45-degree angle.
• While looking through the microscope, slide the welding stylus forward and
backward until the tip of the stylus is in the center of your focus.
• Now securely tighten the stylus holder by tightening the screw on the bottom of
the stylus holder.
ADJUST THE MICROSCOPE FOCUS
• Twist the knob on the microscope forward and backward to raise and lower the head.
is will allow you to focus the microscope on the welding stylus.
• Place your finger under the welding electrode to help judge the correct focus location.
Focus the microscope until the texture on the skin of your finger is clearly visible.
Microscope LCD Filter Shutter
e microscope LCD filter shutter allows an unobstructed working view before welding and completely protects the user’s
eyes during the welding process. e Orion’s internal computer verifies the microscope LCD filter shutter has been closed
before allowing the weld to take place. In the case that the shutter does not close, the microscope lens is equipped with >UV
16 and >IR 16 for maximum eye protection.
Become Familiar with the Microscope
e Orion Microscope has been designed to provide maximum visual clarity, eye protection and ease of use. One challenge
using the microscope is getting used to bringing the work piece to the welding electrode while looking through the
microscope. is is an easy challenge to overcome. To begin, follow these steps with the welder on pause. *While the welder
is on pause, it will not be able to make a weld when the work piece touches the electrode.
• Rest your hands on the table and position the work piece close to the welding
electrode before looking into the microscope.
• Make sure your focus is at the tip of the electrode.
• Use slow, controlled movements.
• It is helpful to have your hands resting and to only use your fingers to move the
work piece up to the electrode.
• Place the work piece surface perpendicular to the point of the electrode. *As
discussed in later chapters, the angle of the electrode tip relative to the work
piece surface is very important and will take practice.