9
CAUTION
Detectors can be seriously damaged if this protection is ignored.
3. SYSTEM CONNECTION
3.1. What You Will Learn in this Chapter
In this chapter you will learn how to:
Connect a single-detector/single-computer spectroscopy system.
Add multiple detectors to the basic system.
3.2. Building a System
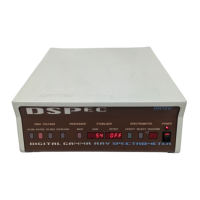
3.2.1. Single-Detector, Non-Networked System
1. Connect the detector preamplifier power, using the 9-pin D-type connector and the supplied
power cable. The DSPEC provides this power from its rear-panel PREAMP POWER
connector.
2. Connect the detector high-voltage bias. This is usually an SHV-type high-voltage coaxial
connector on the detector preamplifier. The DSPEC supplies this bias voltage from its rear-
panel 0–5 kV OUTPUT connector.
3. Connect the bias voltage shutdown circuit. Most cryogenic detectors signal if they are
warming up and should have the bias removed.
4. Connect the Preamplifier Energy Output to the DSPEC rear-panel INPUT connector. The
cable used is normally 100- coaxial cable with BNC type connectors.
5. Connect the data link from the DSPEC to the computer. The normal connection is Ethernet
standard 50- cable with BNC type connectors. Alternatively, the ORTEC Dual-Port
Memory connection can be used. This connection requires that the ORTEC interface card be
installed in your computer. ORTEC can supply the special cable, with 37-pin D-type
connections.
6. Plug in the power and you are ready to take data!
If your detector has a pulsed-reset type preamplifier (ORTEC’s “PLUS” Series), use BNC
coaxial cable to connect the detector’s INHIBIT or RESET output to the DSPEC rear-panel
INHIBIT input.