10.3 Safety mode
The product automatically switches to safety mode if a critical fault occurs (e.g. failure of a sensor signal). Safety
mode remains in effect until the error has been rectified.
In this mode, the product sets the stance phase damping value (parameter 'STP Flexion Damping') but does not
trigger a swing phase. This ensures the safety of the patient even if the product is not active.
Default damping values are activated in safety mode. This makes limited walking possible for the user even though
the product is not active.
The switch to safety mode is announced by beep signals immediately prior to the switch (see Page82).
Pressing the top button on the joint unit for 5 seconds again starts a check of the sensor. If there is a sensor signal
(e.g. contact with the spring was established, or the connection with the sensor screw was established), the
product switches back to 1st mode and can be used.
Loss of connection spring / Sensor Ankle
The connection to the sensor may be unintentionally disconnected, for example when putting on trousers or boots.
This activates safety mode.
The beep signals can be muted by pressing the top button (5 seconds) on the joint unit. The product remains in
safety mode.
Pressing the top button on the joint unit for 5 seconds again starts a check of the sensor. If there is a sensor signal
(e.g. contact with the spring was established, or the connection with the sensor screw was established), the
product switches back to 1st mode and can be used.
The product remains in safety mode when there is no sensor signal.
11 Cleaning
1) Clean the product with a damp cloth and mild soap (e.g. Ottobock 453H10=1 Derma Clean) when needed.
Ensure that no liquid penetrates into the leg orthosis.
2) Dry the product with a lint-free cloth and allow it to air dry fully.
Textile component
1) Remove the textile component from the product.
2) Fasten all hook-and-loop closures.
3) Hand wash the textile component in warm water at 30°C/86°F with a standard mild detergent. Rinse thor
oughly.
4) Allow to air dry. Do not expose to direct heat sources (e.g. sunlight, stove or radiator).
Sensor Ankle
1) Clean the product with a damp, soft cloth.
2) Dry the product with a soft cloth.
3) Allow to air dry in order to remove residual moisture.
12 Maintenance
INFORMATION
Each time the Spring Element/Sensor Ankle is replaced, the settings of the joint unit have to be checked (see
Page61).
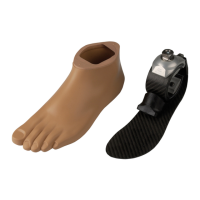
12.1 Replacing the spring element
INFORMATION
Configuring an improper spring stiffness increases the amount of energy expended by the patient while walking.
The spring element is available with various levels of bending strength depending on patient requirements. The
spring elements can be trimmed to the corresponding length.
76
Cleaning
C-Brace

 Loading...