5
Assembly
IMPORTANT!
• TOOLS NEEDED FOR ASSEMBLY: Medium size flat blade or Phillips/Crosspoint screwdriver,
adjustable spanner or metric spanner set.
• Remove any internal component or packaging from the barbecue body.
• Whilst every care is taken in the manufacture of this product, care must be taken during assembly in
case sharp edges are present.
• Please read the Important Information section carefully before assembly and use of your
barbecue.
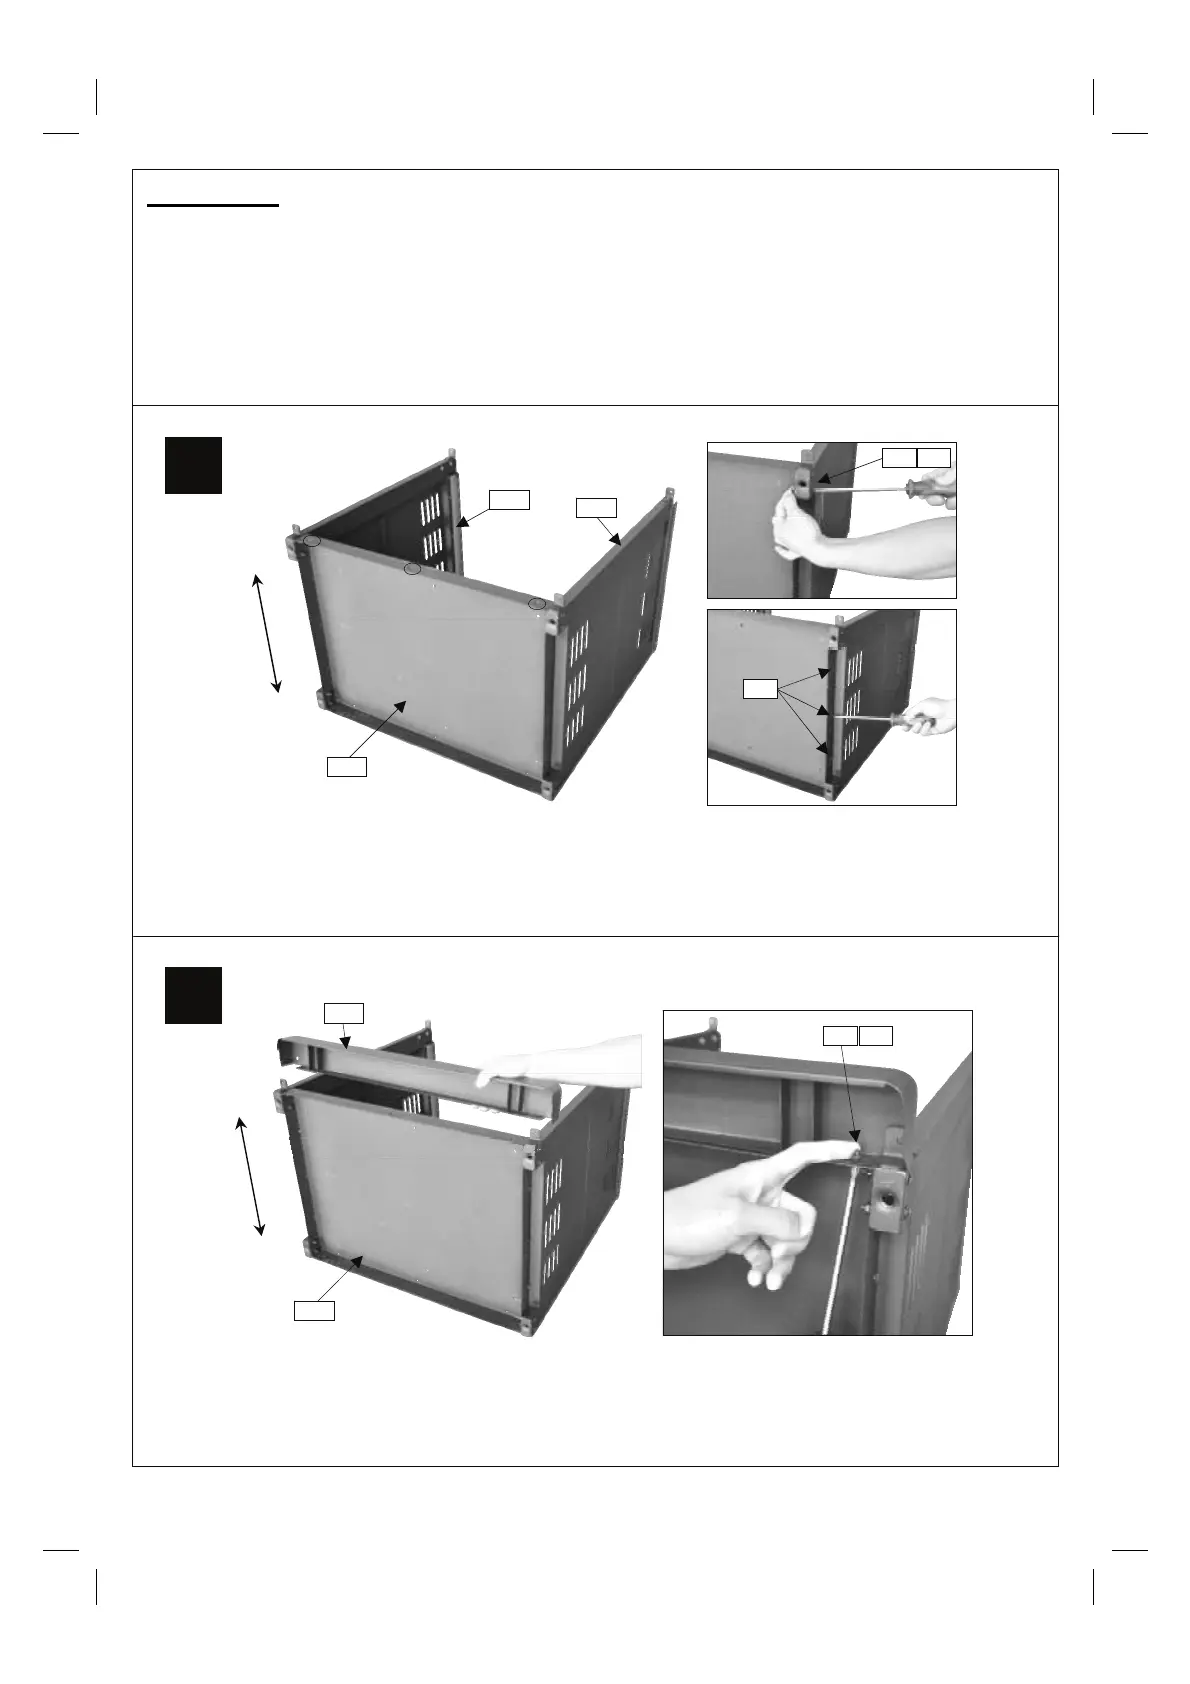
1
2
Attach the Left Cabinet Panel (C10) and Right Cabinet Panel (C11) to the Bottom Panel (C17)
using M6x35 Bolts (D1x8pcs) and M6 Nuts (D4x8pcs), ST4.0x10 Screw (D2x6pcs) as shown.
Please note: Three small holes on bottom panel should be located at the front of BBQ.
C17
Attach the Front Wheel Skirt (C18) onto the Bottom Panel (C17) using M4x10 Bolts
(D5x3pcs) and M4 Nuts (D6x3pcs) as shown.
C18
C10
C11
D1
D5 D6
D4
C17
D2
Front
Rear
Front
Rear