Make sure that the foot-activated switch is not permanently pressed. A single
DC pulse is only triggered when the foot-activated switch is pressed during
an acoustic contact signal. Permanent activation of the foot-activated switch
may cause unintended triggering of a DC pulse.
When removing material residue from the instrument tip through a DC pulse,
the instrument tip must be shielded from patient, user and any third parties
because sparks might occur.
If user suffers from red-green color blindness, make sure that the user
understands the status display.
For use of the product, the following steps have to be observed:
1. Guide the endoscope to the clip to be removed.
2. Insert the remOVE DC Cutter through the working channel and establish
contact with the clip. A continuous audible signal indicates sufficient elec-
trical contact with the clip.
3. When a continuous audible signal appears, trigger the cutting process by
pressing one time on the foot switch. The audible signal stops and the
status display flashes green for about six seconds when the cutting pro-
cess is complete. Afterwards, the audible signal sounds three times and
the status display shows that it is ready for use.
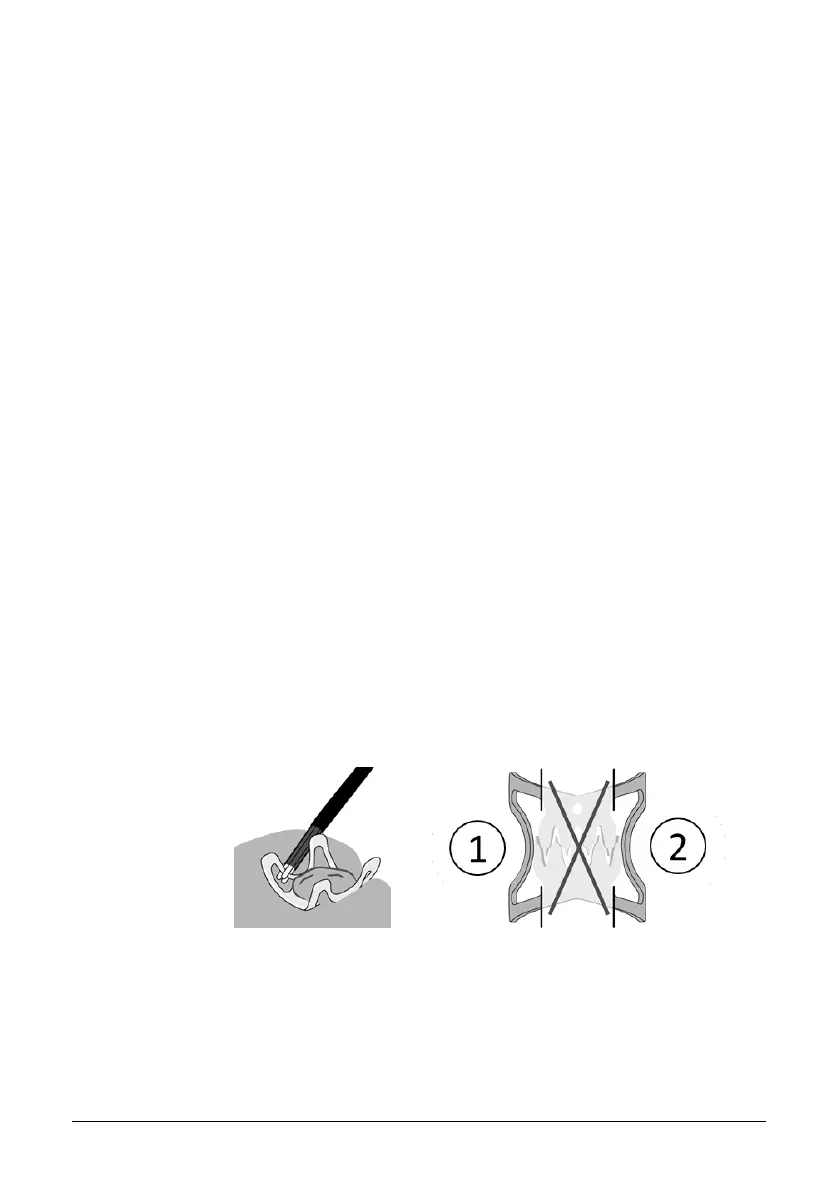
To make clip removal easier, the clip should ideally be cut at two spots
on opposite sides of the row of teeth.
Figure 9: Spots on the clip for fragmentation: Make first cut at (1), and sec-
ond cut on the opposite side (2)
After the cutting process, residues of the clip material can get caught at
the instrument tip of the remOVE DC Cutter and create a permanent con-
nection between the electrodes. This is indicated by a constant audible
signal without clip contact. The remains can be removed by applying a