OWC Mercury Rack Pro Chapter 1 - Introduction
Cable Connections:
➀ Verify the voltage switch is set properly, to 115V or 230V.*
➁ Plug the power cable into the wall and into the OWC Mercury Rack Pro.
➂ Connect the eSATA, FireWire 800, FireWire 400, or USB 3.0 cable - appropriate for the
interface that your computer supports - into the drive and computer. (eSATA or USB 3.0
interfaces are recommended for maximum performance)
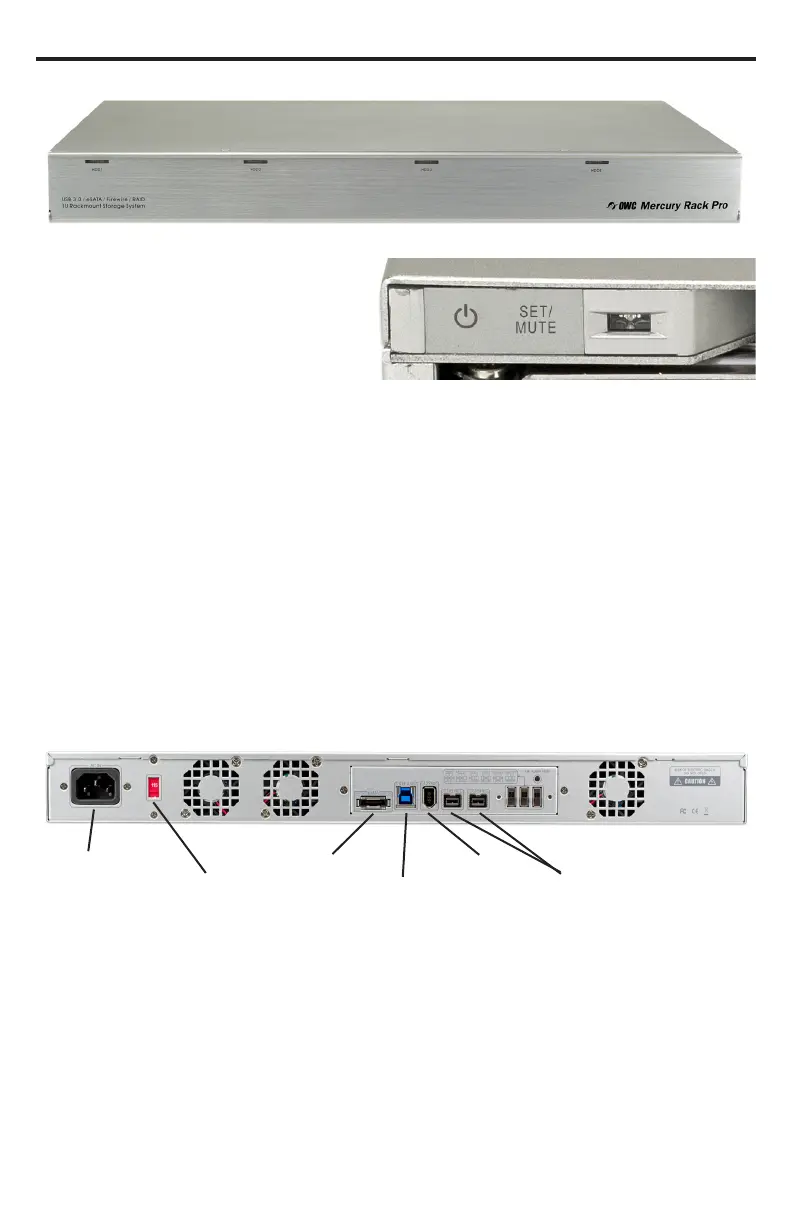
1.4 Front View
1.5 Rear View
Each drive bay has a multicolor LED indicator.
Power:
• O = Power o
• Blue = Power on (all 4 drive bays)
Access:
• Flashing Purple = Drive being accessed
Rebuild:
• Slow Blinking red = Rebuilding RAID array
• Solid Red = Faulty drive
Power On/O and SET/MUTE button are
inside the front door on the left side.
The SET/MUTE button is used for setting
the RAID modes (covered in section 1.6
RAID Settings) and disabling the audible
alarm when there is a drive failure.
* The majority of North America uses 115V. If you are outside of North America or have adapted the
power plug in any way, confirm which voltage is appropriate for your use before powering on.
If sold as a precongured solution, your OWC Mercury Rack Pro is preset as a RAID 5,
using the “Mac OS Extended” format and is ready to use. If you want to change this
conguration, please follow the instructions in Chapter 3 to do so.
1.4.1 Buttons
1.4.2 LED Drive Bay Indicators
Power Input
Voltage Switch*
eSATA
USB 3.0
FW400
FW800
1.5.1 Connections