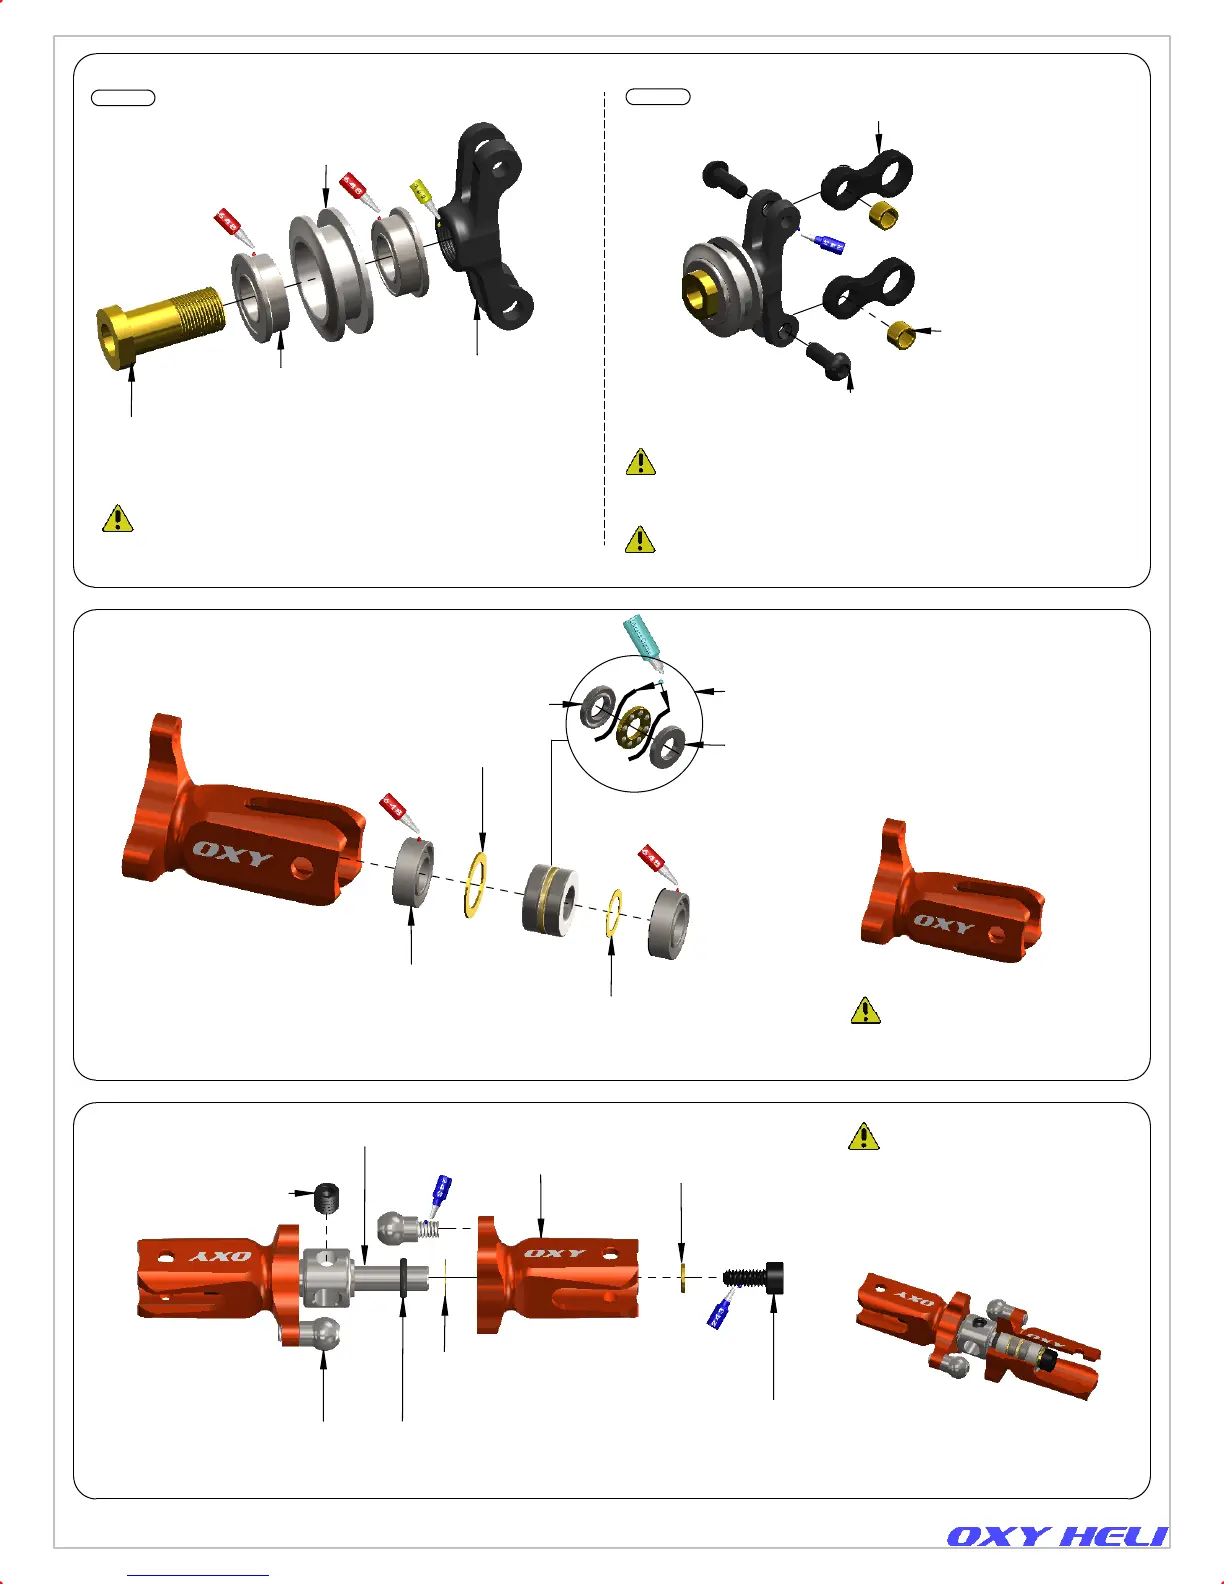
F3-6G-W3.5
Thrust Bearing 3x6 W3.5
Thrust Washer(Larger ID)
Thrust Washer(Smaller ID)
OXY0060
Tail Slider Bushing
2 x MF74-2GS
Flange Bearings
4x7x2.5
OXY0063
Tail Pitch Slider
Half Moon
DR0810
Tail Pitch Slider Ring
2 x OXY0062
Bushing 2 X 3 H2
2 x OXY0064
Link Control
2 x TBEM2X5
Button Hex Cap
Screw M2X5
OXY0054
3x4x0. 1 Shim Washer
2 x MR63
Radial Bearing 3X6X2
OXY0053
Washer 4.2X6X0.2
2 x TCEM2X5
Hex Cap Screw
M2X5
2 x OXY0055
Shim Washer
2X3.5 W 0.5
OXY0054
3x4x0. 1 Shim Washer
Note: each side
of the the hub
OR-2X1
O-RING ID 2 - W1
Note: each side
of the hub
SCM3X3 Set Screw M3X3
(loctite will be added
to the set screw during
the tail assembly step)
OXY0049
Tail Hub
2 x OXY0050
Linkage Ball
4 X 3 M2
2 x OXY0051
Tail Grip
Tail Pitch Slider Assembly.
(Box 02 / Bag 1)
Page 5
Step 1
Tail Grip Assembly.
(CNC components)
Important Note:
This part, for tuning reasons,
comes factory pre assembled
with grease and loctite. It is
ready to use.
Tail Hub Assembly.
(CNC components)
Important Note:
This part, for tuning reasons,
comes factory pre assembled
with grease and loctite. It is
ready to use.
Important Note:
This part comes pre assembled
WITHOUT thread lock. Follow
the instruction for final assembly.
Ensure thread lock does not
contaminate the bushings. In
case of friction, clean then
reassembly.
Step 2
Important Note:
This part comes pre assembled
WITHOUT thread lock. Follow
the instruction for final assembly.
Chapter 5, Tail Assembly
 Loading...