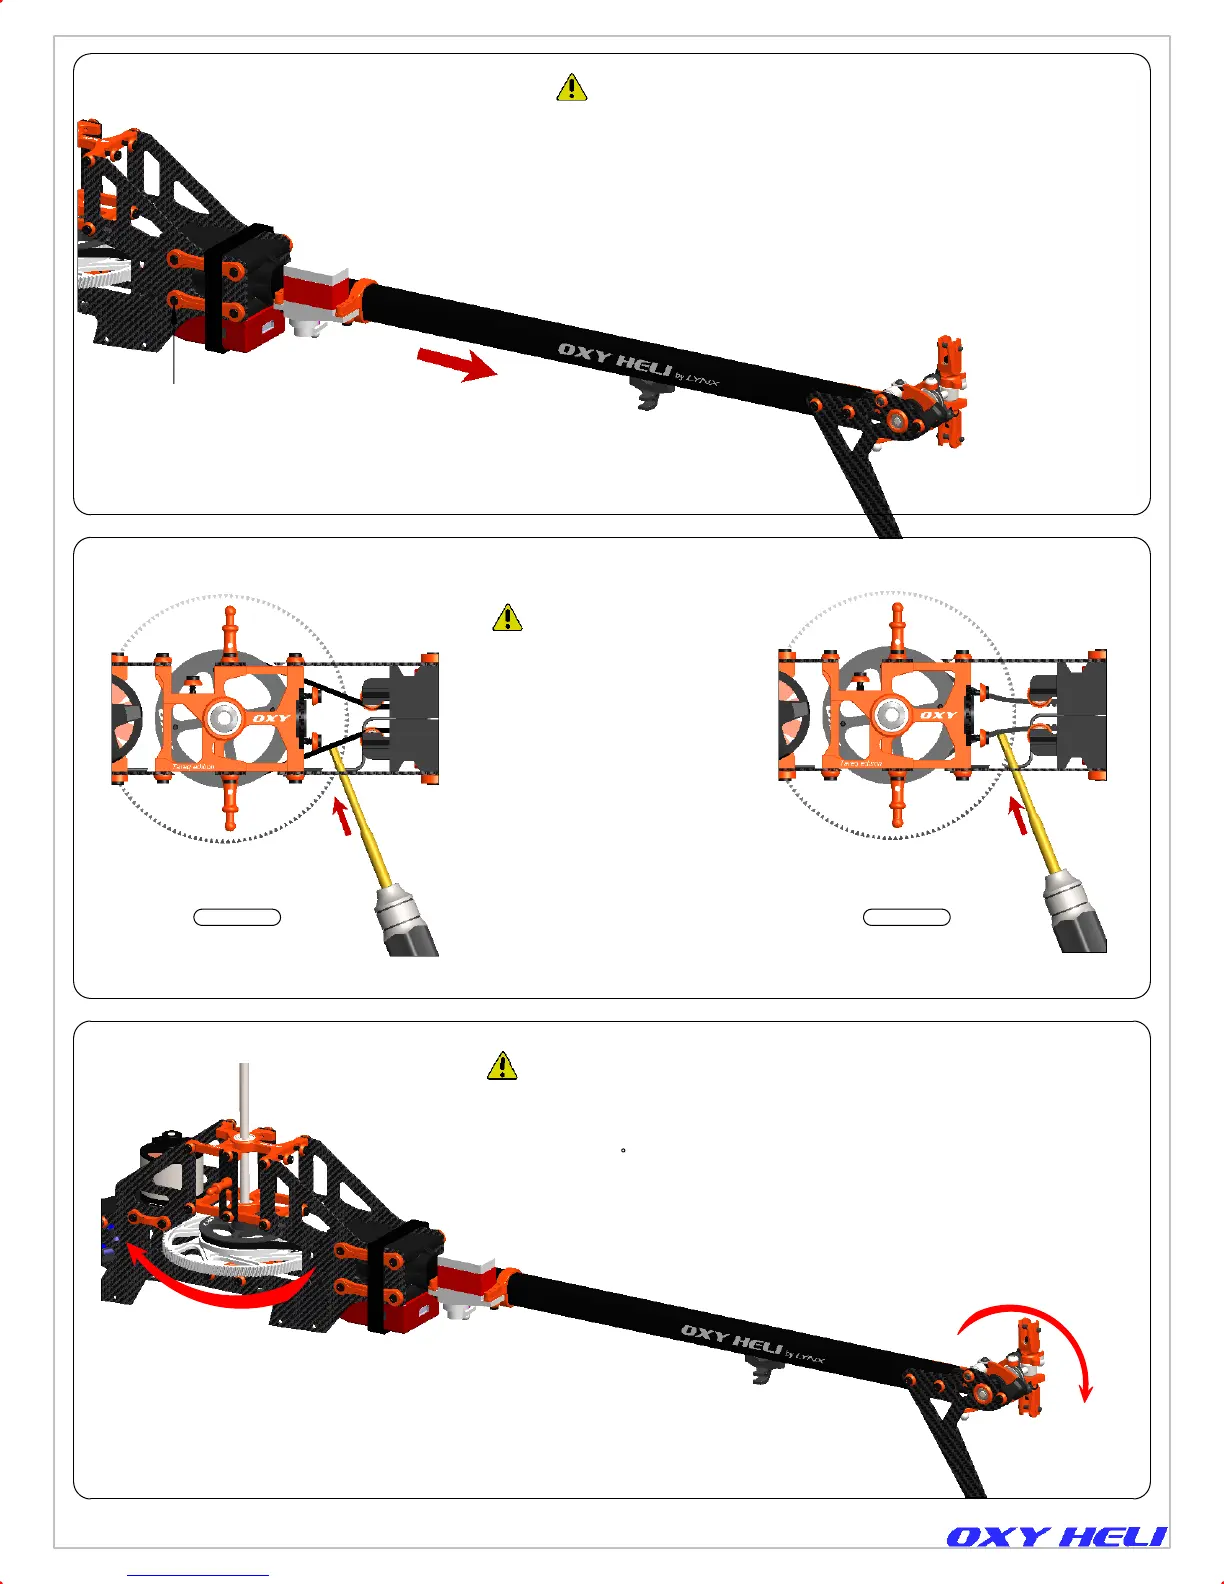
Rotate Main Gear as shown
8 x TCEM2X8
M2x8 Hex cap screw
Page 22
Belt Tension Check.
- Be sure the boom is assembled and installed correctly.
- Loosen the tail boom by loosening the eight M2x8 hex cap screws.
- Adjust the belt tension by pulling on the tail boom
- Tighten the eight M2x8 hex cap screws.
- The belt must have good tension. We suggest re-checking after a few
flights. We suggest to check belt tension often, before each flying session.
- If the belt is often loose, you should check the lock system or belt integrity.
- Tests show that a hard 3D pilot can perform over 400 flights before the belt
will fail. We recommend replacing the Tail Belt after 300 flights, even if it
does not show wear, to avoid it breaking unexpectedly in flight.
- After a crash, spend some time checking Belt integrity and replace if any
teeth are missing.
Belt Tension Note:
Belt Tension.
- Use a Screw Driver to check
Belt Tension (suggested max
deflection is 1mm)
- Note: We recommend a tight
belt tension.
- Check the belt tension again
after the first 2 flights.
- With a new Tail Belt, when the
head is rotated slowly, it is normal
to hear a tooth sound as the belt
engages with the Main Pulley. This
sound is normal and will disappear
after a few flights and the necessary
"break-in".
Top View Top View
In order to check the belt installation, we
recommend to follow two simple steps:
1- Check with light, look inside the boom
from the tail case and check the belt is
only twisted 90
degrees.
2- Rotate the main gear in the flight direction
(as shown) and check the tail hub rotates
in the direction shown. If the Tail Rotor rotates
in the wrong direction, go back to the previous
instructions and double check your work.
Tail Rotor Rotation Direction Check.
Chapter 14, Belt Tension & Adjustment
Instruction Manual Rev 1
 Loading...