Do you have a question about the Panasonic AJ-SDX900p and is the answer not in the manual?
| Sensor Type | 3 CCD |
|---|---|
| Sensor Size | 1/3 inch |
| Viewfinder | Color LCD |
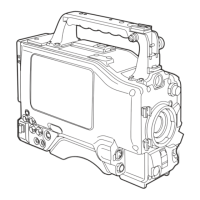
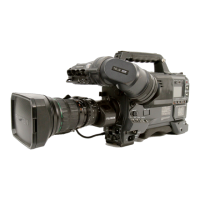
| Type | Camcorder |
| Recording Format | DVCPRO / DV |
| Effective Pixels | 410, 000 |
| Lens Mount | Bayonet |
| Video Resolution | 720 x 480 |
| Shutter Speed | 1/60 to 1/2000 sec |
| Audio Channels | 4 channels |
| Optical Zoom | N/A (Interchangeable lenses) |
| Recording Media | DVCPRO tape |
Details the features of the 3-CCD camera unit with on-chip lens, progressive drive, storage type high-sensitivity, digital zoom, etc.
Outlines VTR features like DVCPRO/DVCPRO50 support, power-saving, PRE REC, INTERVAL REC, NEWS REC, RETAKE, SDI output, etc.
Illustrates the system configuration with various optional accessories and their connections.
Details the power supply and accessory mounting points on the camera unit, including power switch, battery mount, DC IN, etc.
Details audio input jacks, level controls, selector switches, and connectors for audio channels.
Explains audio output connectors, monitor controls, speaker, and volume adjustments for audio monitoring.
Covers camera unit controls for shooting like CC/ND filter, white/black balance, shutter, and gain selectors.
Covers camera unit controls for shooting like CC/ND filter, white/black balance, shutter, and gain selectors.
Explains the MENU button, JOG dial, and setup card insertion slot for menu operations.
Details connectors and switches related to time code generation, input, output, and display.
Describes the warning lamps, tally lamps, and display window indicators for operational status.
Explains the various displays in the viewfinder and on the unit, including tape/battery status, audio levels, and error codes.
Explains the various displays in the viewfinder and on the unit, including tape/battery status, audio levels, and error codes.
Covers the viewfinder's functions, controls, and adjustments like tally lamps, peaking, contrast, and brightness.
Explains how to load, eject, and prevent accidental erasure of cassette tapes.
Covers basic steps for shooting and recording, including power supply, cassette loading, and switch settings.
Details methods for maintaining continuity between scenes, especially during rec pause mode.
Explains the NEWS REC function for news gathering to avoid missing shooting opportunities.
Describes the PRE-RECORDING function for capturing seconds before actual recording starts.
Explains interval recording modes, including ON, ONE SHOT, and OFF settings.
Explains interval recording modes, including ON, ONE SHOT, and OFF settings.
Details the RETAKE function for easily deleting unwanted takes and ensuring continuity.
Explains the Rec review function for checking the last few seconds of recorded tape.
Covers normal and variable speed playback options for viewing recorded content.
Details the procedure for adjusting white and black balance to achieve high picture quality under various lighting.
Provides step-by-step instructions for automatically adjusting white balance using the camera's controls and menus.
Details the procedure for adjusting white and black balance to achieve high picture quality under various lighting.
Provides step-by-step instructions for automatically adjusting white balance using the camera's controls and menus.
Details the procedure for adjusting white and black balance to achieve high picture quality under various lighting.
Details the procedure for automatically adjusting black balance to optimize image quality.
Explains the electronic shutter's modes, speeds, and how to set them for optimal shooting.
Lists available shutter modes (Standard, SYNCHRO SCAN, SUPER V) and their applications.
Guides on how to select shutter modes and adjust speeds using the SHUTTER switch and menu.
Explains the electronic shutter's modes, speeds, and how to set them for optimal shooting.
Explains how to set the SYNCHRO SCAN mode and adjust shutter speed with its buttons.
Covers selecting video input signals and VTR recording formats (DVCPRO50/25).
Details how to select recording signals (CAM, VIDEO) and camera modes (60i, 30P, 24P).
Explains how to select the VTR recording system and format (16:9/50M, 4:3/50M, etc.).
Guides on selecting audio inputs and manually adjusting recording levels for CH1/CH2 and CH3/CH4.
Explains how to use the AUDIO IN switch to select input signals for different channels.
Details the procedure for manually adjusting audio recording levels using LEVEL controls and meters.
Guides on selecting audio inputs and manually adjusting recording levels for CH1/CH2 and CH3/CH4.
Explains how CH3/CH4 recording levels are set based on menu settings and input levels.
Covers setting the user's bit and internal clock date/time for recording metadata.
Details how to record memos and information using the user's bit in hexadecimal notation.
Covers setting the user's bit and internal clock date/time for recording metadata.
Provides steps to set the internal clock's date, time, and time zone, including a time zone table.
Covers setting the user's bit and internal clock date/time for recording metadata.
Explains how to set the time code using the TC MODE and TCG switch.
Details the procedure for externally locking the unit's time code generator using reference signals.
Covers setting the user's bit and internal clock date/time for recording metadata.
Details the procedure for externally locking the unit's time code generator using reference signals.
Guides on setting UMID metadata, including country, organization, and user name.
Explains the viewfinder menu configuration, including USER, MAIN, and OPTION menus.
Describes the organization and access methods for USER, MAIN, and OPTION menus.
Details how to navigate and operate the unit's menus using the MENU button and JOG dial.
Explains the viewfinder menu configuration, including USER, MAIN, and OPTION menus.
Details how to navigate and operate the unit's menus using the MENU button and JOG dial.
Explains how to customize the USER MENU by selecting desired items.
Covers the various indicators and information displayed on the viewfinder screen.
Explains the meaning and behavior of viewfinder lamps like TALLY/REC, !LED, BATT, and VTR SAVE.
Shows the layout of all items that can be displayed on the viewfinder screen.
Guides on enabling or disabling specific display items on the viewfinder using menu settings.
Covers the various indicators and information displayed on the viewfinder screen.
Explains how to control the display of setting changes and adjustment result messages in the viewfinder.
Covers the various indicators and information displayed on the viewfinder screen.
Explains how to control the display of setting changes and adjustment result messages in the viewfinder.
Covers the various indicators and information displayed on the viewfinder screen.
Covers the various indicators and information displayed on the viewfinder screen.
Covers the various indicators and information displayed on the viewfinder screen.
Covers the various indicators and information displayed on the viewfinder screen.
Guides on selecting center, safety zone, and frame markers for display in the viewfinder.
Explains how to set the camera ID using alphanumeric characters for identification.
Covers the various indicators and information displayed on the viewfinder screen.
Details how to check unit settings and modes via STATUS, !LED, FUNCTION, and AUDIO screens.
Explains how to check marker statuses (A/B) and aspect ratios using the MARKER SELECT button.
Describes how to view the GENLOCK IN return video signal on the viewfinder by holding the RET button.
Covers setting up various functions via the unit's menus.
Explains how to set USER SW GAIN for analog and digital gain increases for high sensitivity.
Details how to select video output signals for VIDEO OUT and MON OUT connectors, including SDI output.
Covers setting up various functions via the unit's menus.
Explains how to enable the F.AUDIO LEVEL control for input signals.
Details how to assign functions like S.GAIN, S.IRIS, and D.ZOOM to user buttons.
Covers setting up various functions via the unit's menus.
Guides on manually setting color temperatures for PRST, A, and B white balance modes.
Covers managing setup card data, including handling, formatting, and saving/loading.
Explains how to insert, remove, and care for setup cards (SD/Multimedia).
Covers managing setup card data, including handling, formatting, and saving/loading.
Details operations for the setup card, including formatting, saving, and selecting file numbers.
Covers managing setup card data, including handling, formatting, and saving/loading.
Details operations for the setup card, including formatting, saving, and selecting file numbers.
Covers managing setup card data, including handling, formatting, and saving/loading.
Details operations for the setup card, including formatting, saving, and selecting file numbers.
Covers managing setup card data, including handling, formatting, and saving/loading.
Explains how to write and read user data in the unit's internal memory for setup statuses.
Covers managing setup card data, including handling, formatting, and saving/loading.
Explains how to write and read user data in the unit's internal memory for setup statuses.
Covers writing, reading, and resetting scene file data for quick setup.
Covers managing setup card data, including handling, formatting, and saving/loading.
Covers writing, reading, and resetting scene file data for quick setup.
Covers managing setup card data, including handling, formatting, and saving/loading.
Covers writing, reading, and resetting scene file data for quick setup.
Covers managing setup card data, including handling, formatting, and saving/loading.
Explains how to restore menu settings to user-defined standards.
Guides on resetting all menu settings back to the original factory defaults.
Details using lens file data for white shading compensation and flange back adjustments.
Covers using battery packs and AC power sources for unit operation.
Explains how to attach batteries (Anton Bauer, Panasonic, Sony) and set their types in the menu.
Covers using battery packs and AC power sources for unit operation.
Explains how to attach batteries (Anton Bauer, Panasonic, Sony) and set their types in the menu.
Covers using battery packs and AC power sources for unit operation.
Explains how to attach batteries (Anton Bauer, Panasonic, Sony) and set their types in the menu.
Covers using battery packs and AC power sources for unit operation.
Details connecting and using the AJ-B75 AC adapter for power.
Guides on attaching the viewfinder and adjusting its front-back and left-right positions.
Guides on attaching the viewfinder and adjusting its front-back and left-right positions.
Covers attaching the lens, adjusting flange back, and performing initial white shading.
Covers attaching the lens, adjusting flange back, and performing initial white shading.
Covers attaching the lens, adjusting flange back, and performing initial white shading.
Covers attaching the lens, adjusting flange back, and performing initial white shading.
Guides on connecting audio components for signal input.
Details attaching and connecting the front microphone (AJ-MC700P).
Explains how to attach and connect an external microphone using a mic holder.
Guides on connecting audio components for signal input.
Guides on attaching and connecting wireless receivers (externally connected and UniSlot®).
Explains how to connect an audio component using XLR cables and set input switches.
Details mounting the unit on a tripod using the tripod attachment.
Explains how to attach and secure the shoulder belt for carrying the unit.
Guides on adjusting the shoulder pad's position for optimal balance and comfort.
Shows how to attach a rain cover (SHAN-RC700) for weather protection.
Explains connecting the AJ-EC3P for remote control operations.
Details attaching an accessory knob to the FRONT AUDIO LEVEL control for easier operation.
Outlines essential inspections before starting a shooting session to ensure proper functioning.
Details the initial preparation steps, including inserting a charged battery and checking power status.
Covers inspecting camera functions like zoom, aperture, gain, and extender operation.
Outlines essential inspections before starting a shooting session to ensure proper functioning.
Covers inspecting camera functions like zoom, aperture, gain, and extender operation.
Guides on inspecting VTR functions like tape travel, audio levels, and earphone/speaker output.
Outlines essential inspections before starting a shooting session to ensure proper functioning.
Guides on inspecting VTR functions like tape travel, audio levels, and earphone/speaker output.
Explains how to use the self-diagnosis function and check color output levels.
Covers essential maintenance tasks for the unit.
Covers essential maintenance tasks for the unit.
Explains condensation phenomena and precautions to prevent tape sticking to the drum.
Details the process of cleaning video heads using a cleaning cassette.
Provides instructions for cleaning the viewfinder lens and mirror.
Explains "Smear" which can occur with very bright subjects and fast shutter speeds.
Guides on replacing the backup battery when it discharges and the backup function fails.
Covers essential maintenance tasks for the unit.
Details various connectors and their corresponding signals, including audio, power, and control interfaces.
Explains the warning system that alerts users to errors or problems.
Provides tables detailing warnings for SLACK, BATTERY END, TAPE END, and REC WARNING.
Explains the warning system that alerts users to errors or problems.
Provides tables detailing warnings for SLACK, BATTERY END, TAPE END, and REC WARNING.
Explains the warning system that alerts users to errors or problems.
Lists error codes that may appear in the display window and their descriptions.
Explains how to eject a cassette using the emergency eject screw if normal eject fails.
Outlines the structure of the unit's menus, including USER, MAIN, and OPTION menus.
Details settings within the SYSTEM SETTING menu, including REC SIGNAL, CAMERA MODE, and REC MODE.
Explains options for REC SIGNAL, CAMERA MODE, V.RES, REC MODE, SETUP, and REC TALLY.
Details settings within the SYSTEM SETTING menu, including REC SIGNAL, CAMERA MODE, and REC MODE.
Lists settings for OPTION MODE, including GPS data, component output, and 26-pin control.
Details settings for REC FUNCTION, covering INTERVAL REC, REC TIME, PAUSE TIME, and NEWS REC.
Details settings within the SYSTEM SETTING menu, including REC SIGNAL, CAMERA MODE, and REC MODE.
Explains how to select video output signals for VIDEO OUT and MON OUT connectors.
Details GENLOCK settings for synchronizing camera signals with external references.
Covers PAINT menu settings for image adjustments like ROP and MATRIX color correction.
Details ROP settings for master pedestal, detail, gamma, knee, and gain adjustments.
Explains MATRIX settings for R-G, R-B, G-R, G-B, B-R, B-G color adjustments and color tables.
Covers PAINT menu settings for image adjustments like ROP and MATRIX color correction.
Details color correction settings for various color ranges and saturation/hue adjustments.
Covers LOW SETTING parameters like master gain, H/V detail, gamma, and black stretch.
Covers PAINT menu settings for image adjustments like ROP and MATRIX color correction.
Explains MID SETTING parameters for gain, detail, gamma, and black stretch.
Details HIGH SETTING parameters for gain, detail, gamma, and black stretch.
Covers PAINT menu settings for image adjustments like ROP and MATRIX color correction.
Covers settings for additional detail adjustments like KNEE APE LEVEL, CHROMA DTL, and DTL GAIN.
Explains SKIN TONE DTL settings for adjusting skin tones, including zebra and luminance controls.
Covers PAINT menu settings for image adjustments like ROP and MATRIX color correction.
Details KNEE/LEVEL settings for master pedestal, manual knee, and auto knee adjustments.
Explains GAMMA settings, including master gamma and film-like characteristics.
Covers FLARE settings for R, G, and B channels.
Covers VF (Viewfinder) settings, including display options and markers.
Details VF display settings like DISP MODE, VF OUT, VF DTL, ZEBRA, and LOW LIGHT.
Covers VF (Viewfinder) settings, including display options and markers.
Explains settings for VF MARKER, including center marker, safety zone, and frame marker.
Covers settings for the USER BOX display, including width, height, and position.
Details VF INDICATOR1 settings for extender, shutter, filter, white balance, gain, iris, and camera ID.
Covers VF (Viewfinder) settings, including display options and markers.
Explains VF INDICATOR2 settings for tape, battery, audio level, time code, and VTR warnings.
Covers settings for displaying status, !LED, FUNCTION, AUDIO, and P.ON IND during MODE CHECK.
Details !LED settings for gain, shutter, preset white balance, extender, and black stretch.
Covers OPERATION menu items like CAMERA ID, shutter speed, and shutter select.
Explains how to set camera ID settings (ID1, ID2, ID3).
Details settings for shutter speed modes like SYNCHRO SCAN and SUPER V.
Covers selecting specific shutter speeds for different positions and SUPER V mode.
Covers OPERATION menu items like CAMERA ID, shutter speed, and shutter select.
Explains how to allocate functions to USER MAIN, USER1, and USER2 switches.
Details SW MODE settings like RET switch, super black level, AUTO KNEE, and color bars.
Covers OPERATION menu items like CAMERA ID, shutter speed, and shutter select.
Covers WHITE BALANCE MODE settings for filter, shockless AWB, AWB area, and color temperature.
Explains USER SW GAIN settings for enabling/disabling SUPER GAIN and DS.GAIN increases.
Covers OPERATION menu items like CAMERA ID, shutter speed, and shutter select.
Details IRIS settings including level, peak/average, mode, gain, and value.
Covers FILE menu operations for card read/write and card R/W select.
Explains how to read, write, format, and read titles from setup cards.
Covers FILE menu operations for card read/write and card R/W select.
Explains how to read, write, format, and read titles from setup cards.
Details selecting which menu items to handle during CARD READ/WRITE operations.
Covers selecting lens file numbers and setting titles for lens data.
Explains how to create, write, read, and reset scene files.
Details initializing the unit by reading factory data or writing user data.
Covers MAINTENANCE menu items like system check, diagnostic, and lens adjustment.
Explains how to perform system checks, including color check.
Details diagnostic information for software versions of CCD drive, flash memory, font ROM, etc.
Covers lens adjustments for iris settings at f/2.8 and f/16.
Covers MAINTENANCE menu items like system check, diagnostic, and lens adjustment.
Explains how to perform digital black shading compensation.
Details how to perform white shading compensation.
Covers VTR MENU settings, including VTR function and battery settings.
Explains VTR function settings like HUMID OPE, REC START, PAUSE TIMER, and ECU REC CHK SW.
Covers VTR MENU settings, including VTR function and battery settings.
Details BATTERY/TAPE settings, including battery selection, near-end alarms, and tape status.
Explains BATTERY SETTING1 for enabling/disabling battery selection and setting voltage thresholds.
Covers VTR MENU settings, including VTR function and battery settings.
Explains BATTERY SETTING1 for enabling/disabling battery selection and setting voltage thresholds.
Details BATTERY SETTING2 for various battery types, enabling/disabling selection and setting voltage thresholds.
Covers VTR MENU settings, including VTR function and battery settings.
Details BATTERY SETTING2 for various battery types, enabling/disabling selection and setting voltage thresholds.
Covers VTR MENU settings, including VTR function and battery settings.
Covers MIC/AUDIO1 settings for input control, low-cut filters, limiters, and auto level.
Covers VTR MENU settings, including VTR function and battery settings.
Covers MIC/AUDIO1 settings for input control, low-cut filters, limiters, and auto level.
Details MIC/AUDIO2 settings for front/rear mic power, audio output, monitor select, and levels.
Explains TC/UB settings for UB mode, time code display, and TC OUT output.
Covers VTR MENU settings, including VTR function and battery settings.
Guides on setting UMID information, including country, organization, and user name.
Details VTR DIAG for displaying software versions and operating times.
Covers OPTION MENU settings like ENG SECURITY and P.HALF SHUT.
Explains OPTION settings for ENG SECURITY, P.HALF SHUT, ID MIX INH, and 24P VITC UB.
Provides general specifications for the unit, including power, temperature, dimensions, and weight.
Lists specifications for the camera unit, such as pickup devices, filters, quantizing, gain, and shutter speeds.
Lists specifications for the camera unit, such as pickup devices, filters, quantizing, gain, and shutter speeds.
Details VTR unit specifications for video system, audio system, and signal-to-noise ratio.
Lists all audio input, audio output, video input, video output, and time code connectors.
Lists included accessories like shoulder strap and screws.