19
Piping direction
Right
Right
Rear
Right bottom
Left
Rear
Left bottom
Left
(Front side)
Attention not to bend
up drain hose
Insulation of piping connections
• Carry out insulation after
checking for gas leaks and
secure with vinyl tape.
Attaching the remote control holder to
the wall
Remote control holder
Remote
control
Remote
control
holder
* Vinyl Tape
• This illustration is for explanation purposes only.
The indoor unit will actually face a different way.
Installation parts you
should purchase (*)
Installation plate
Brushing-Sleeve (*)
Sleeve (*)
Putty (*) (Gum type Sealer)
Bend the pipe as closely on the wall as possible,
but be careful that it doesn’t break.
Vinyl tape (wide) (*)
• Apply after carrying out a drainage test.
• To carry out the drainage test, remove the air
filters and pour water into the heat exchanger
Saddle (*)
Connecting cable
Liquid side piping (*)
Gas side piping (*)
Additional drain hose
3
0
0
m
m
o
r
m
o
r
e
1
0
0
m
m
o
r
m
o
r
e
1
0
0
m
m
o
r
m
o
r
e
1
0
0
0
m
m
o
r
m
o
r
e
50mm
or more
65mm
or more
It is advisible to avoid more than 2 blockage directions.
About
960 mm
About
1660 mm
Length of power supply cord
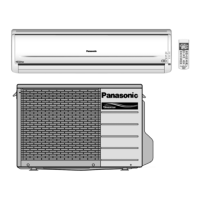
10. Installation Instruction
10.1 Select The Best Location
10.1.1 Indoor Unit
• Do not install the unit in excessive oil fume area such as kitchen, workshop and etc.
• There should not be any heat source or steam near the unit.
• There should not be any obstacles blocking the air circulation.
• A place where air circulation in the room is good.
• A place where drainage can be easily done.
• A place where noise prevention is taken into consideration.
• Do not install the unit near the door way.
• Ensure the spaces indicated by arrows from the wall, ceiling, fence or other obstacles.
• Recommended installation height for indoor unit shall be at least 2.5m.
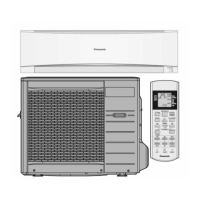
10.1.2 Outdoor Unit
• If an awning is built over the unit to prevent direct sunlight or rain, be careful that heat radiation from the
condenser is not obstructed.
• There should not be any animal or plant which could be affected by hot air discharged.
• Keep the spaces indicated by arrows from wall, ceiling, fence or other obstacles.
• Do not place any obstacles which may cause a short circuit of the discharged air.
• If piping length is over the rated length, additional refrigerant should be added as shown in the table below:
10.1.3 Indoor/Outdoor Unit Installation Diagram
Piping size Model Horse
Power
Gas Liquid
Rated Length
(m)
Max Elevation
(m)
Min Piping
Length (m)
Max Piping
Length (m)
Additional
Refrigerant
(g/m)
Piping length
for add. gas
(m)
S9*** 3/8” 1/4" 7.5 5 3 15 15 7.5
S10*** 3/8” 1/4” 7.5 5 3 15 15 7.5
S12*** 1/2" 1/4" 7.5 5 3 15 15 7.5
S13*** 1/2” 1/4" 7.5 5 3 15 15 7.5
S15***
1.0 ~
1.75HP
1/2" 1/4" 7.5 5 3 15 15 7.5
S18*** 1/2" 1/4" 5 15 3 20 15 10
S24***
2.0 ~
2.5HP
5/8” 1/4" 5 15 3 20 20 10
 Loading...