30
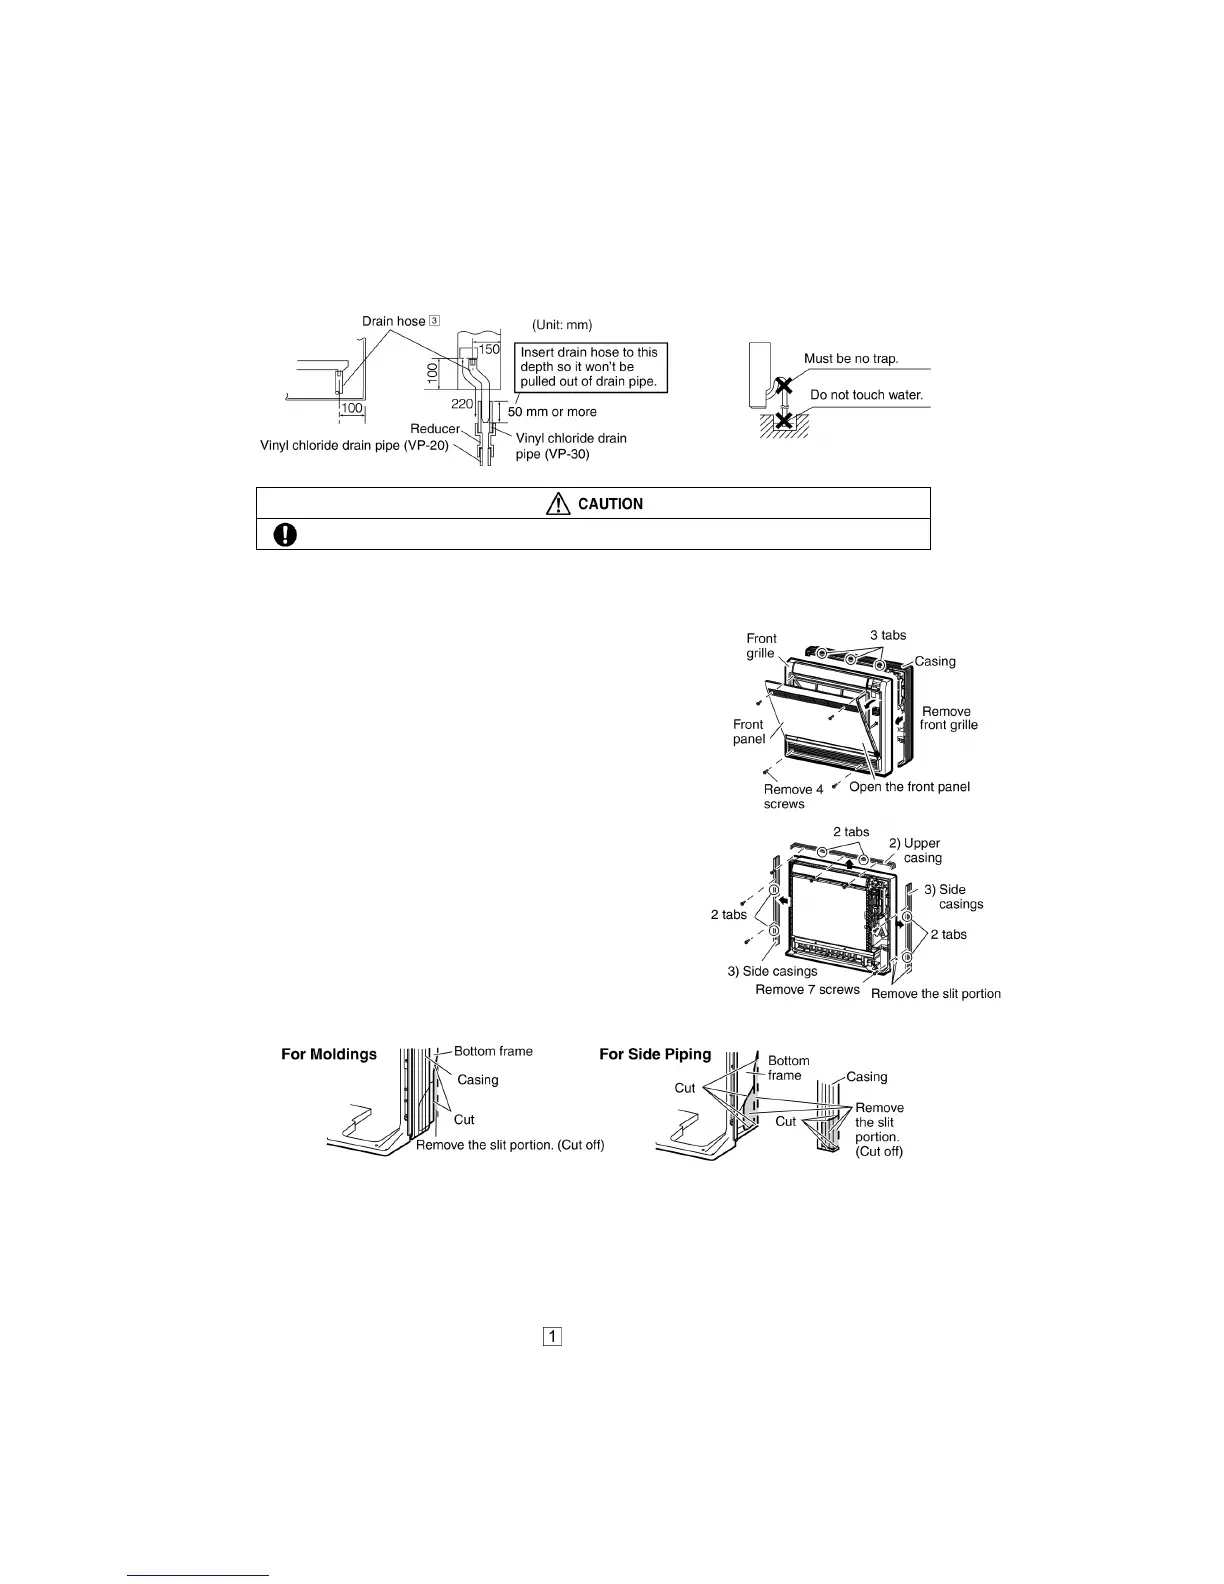
10.1.3.1.3 Drain piping
1 Use commercial rigid polyvinyl chloride pipe (general VP-20 pipe, outer diameter 26 mm, inner diameter
20 mm) for the drain pipe.
2 The drain hose (outer diameter 18 mm at connecting end, 220 mm long) is supplied with the indoor unit.
Prepare the drain pipe picture below position.
3 The drain pipe should be inclined downward so that water will flow smoothly without any accumulation.
(Should not be trap.)
4 Insert the drain hose to this depth so it won’t be pulled out of the drain pipe.
5 Insulate the indoor drain pipe with 10 mm or more of insulation material to prevent condensation.
6 Remove the air filters and pour some water into the drain pan to check the water flows smoothly.
Use polyvinyl chloride adhesive agent for gluing. Failure to do so may cause water leakage.
10.1.3.1.4 Indoor unit preparation
Open the front panel, remove the 4 screws and
dismount the front grille.
Follow the procedure below when removing the
slit portions.
For Moldings
o Remove the slit portions on the bottom frame
using nippers.
For Side Piping
1 Remove the 7 screws.
2 Remove the upper casing (2 tabs).
3 Remove the left and right casings (2 tabs on
each side).
4 Remove the slit portions on the bottom frame
and casings using nippers.
5 Return by following the steps in reverse order
(3 > 2 > 1).
Connect the Drain Hose
See 10.1.4 Connecting the Drain Hose
10.1.3.1.5 Indoor unit installation
Secure using 6 screws for floor installations. (Do not forget to secure to the rear wall.)
For wall installations, secure the mounting plate using 5 screws and the indoor unit using 4 screws.
The mounting plate should be installed on a wall which can support the weight of the indoor unit.
1 Temporarily secure the mounting plate to the wall, make sure that the panel is completely level, and mark the
boring points on the wall.
2 Secure the mounting plate to the wall with screws.