28
RQT8415
Timer recording
See also “Important notes for recording” (➡ 8).
[HDD] [RAM] [-R] [-RW‹V›] [+R] [+RW]
≥You can enter up to 32 programmes up to a month in advance.
(Each daily or weekly programme is counted as one programme.)
Preparation
≥Turn on the television and select the appropriate video input to suit
the connections to this unit.
≥If recording to DVD, insert a disc that you can use for recording
(➡ 24).
≥Make sure that the clock settings are correct (➡ 71).
You can perform timer recordings by simply selecting the desired
programme from the television programme list.
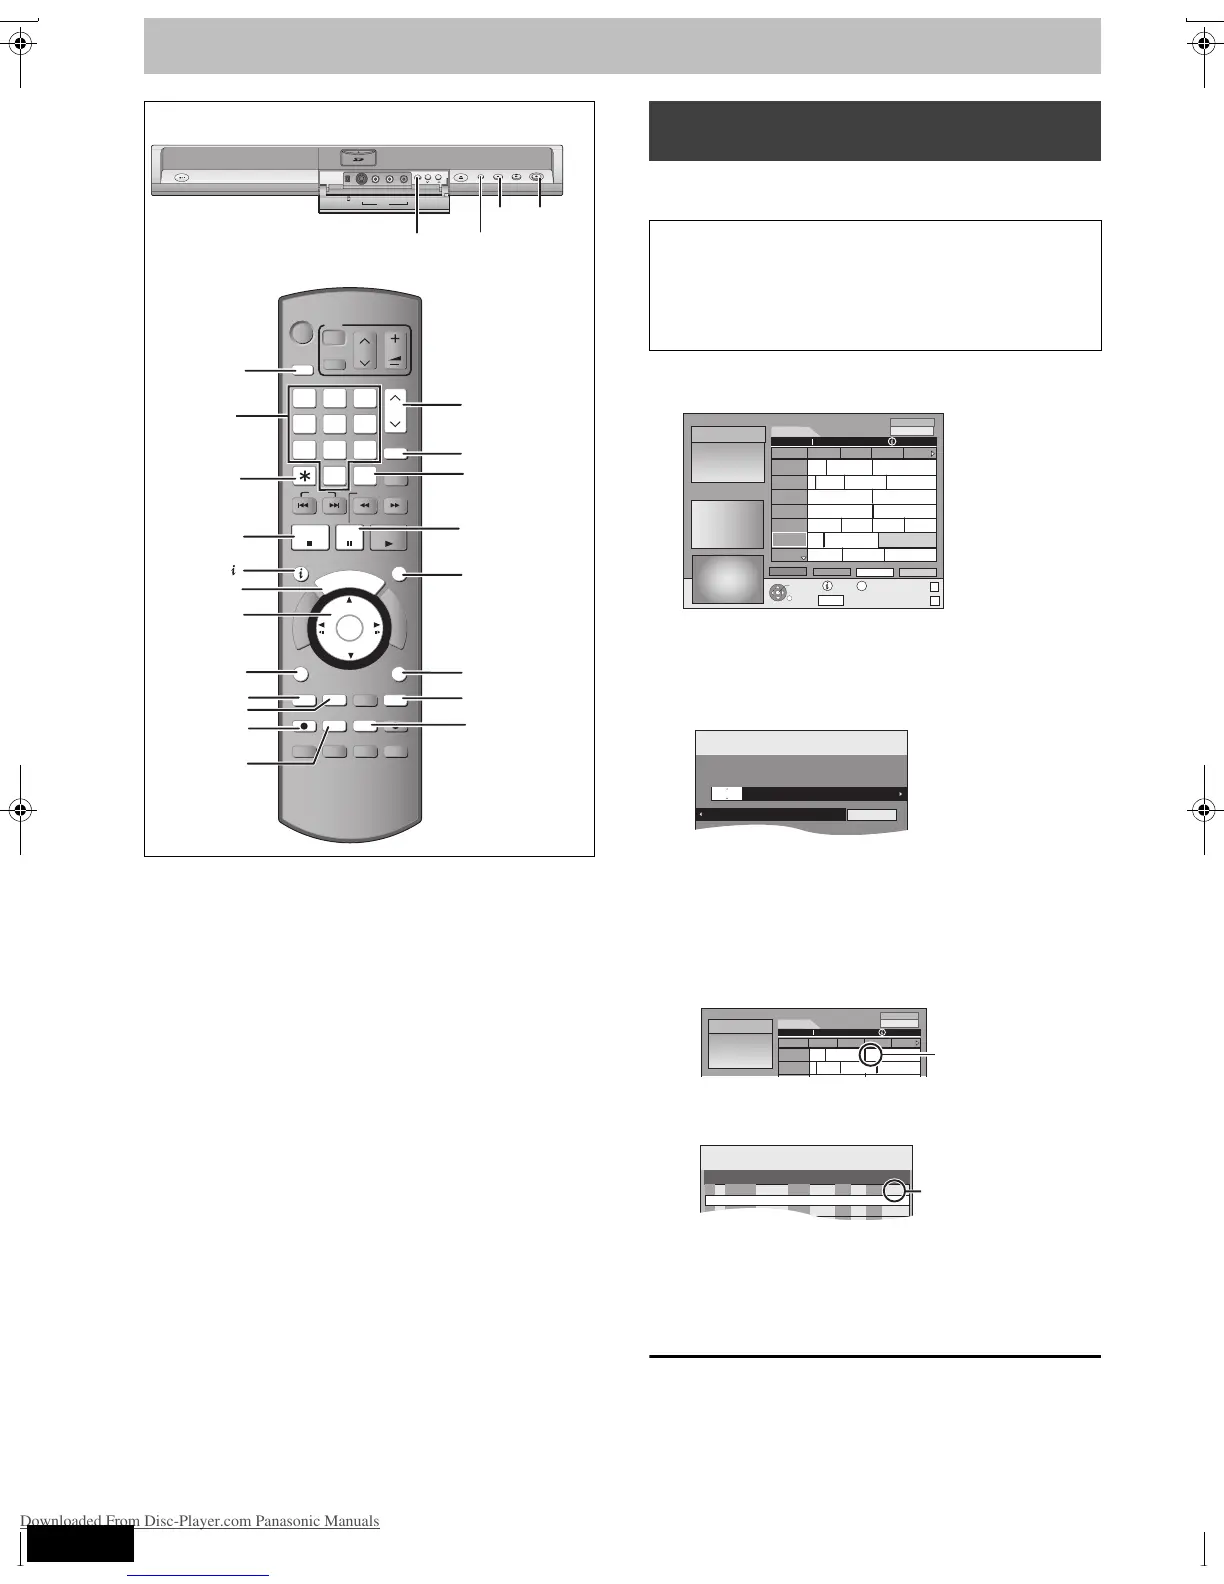
1 Press [GUIDE].
2 Press [3, 4, 2, 1] to select the
programme.
3 Press [ENTER].
≥Confirm the programme and make corrections if necessary
using [3, 4, 2, 1] (➡ 30, right column, step 3).
≥When “-- ---” appears in the “Name” column, you cannot set
timer recording. Press [3, 4] to select desired programme
position. After you have entered the information of a TV
station, it is kept in the unit’s memory.
4 Press [ENTER].
The settings are stored and the timer programme is on.
“F” lights on the unit’s display to indicate timer recording
standby has been activated.
Repeat steps 2–4 to programme other recordings.
[Note]
≥If “NTSC” has been selected for “TV System” (➡ 70), the GUIDE
Plus+ system cannot be used.
∫ To cancel recording when recording has already
begun (➡ 31)
∫ To release the unit from recording standby
(➡ 31)
∫ Notes on timer recording (➡ 31)
OPEN/CLOSE
DRIVE
SELECT
Í
DVD
3,4,2,1
ENTER
DRIVE
SELECT
REC MODE
SUB MENU
∫
PROG/CHECK
RETURN
EXT LINK
ShowView
INPUT SELECT
CH
GUIDE
¢
W X
;
¥ REC
Numbered
buttons
“Blue”
“Red”
“Green”
Using the GUIDE Plus+ system to make
timer recordings
Before using the GUIDE Plus+ system
≥The television programme list is not displayed immediately after
purchasing this unit.
≥You must complete initial setup for the GUIDE Plus+ system.
Refer to “GUIDE Plus+ system settings” (➡ 19) for more
information.
RETURN
TIMER REC
15.7. Tue 15:05
S
SUB MENU
GUIDE
Display Mode
PAG E-
PAG E+
 Loading...