61
RQT9079
Changing the unit’s settings
You can change the unit’s settings using Setup menu.
≥The settings remain intact even if you switch the unit to standby.
1 While stopped
Press [FUNCTION MENU].
2 Press [3, 4] to select “To Others”
and press [OK].
3 Press [3, 4] to select “Setup” and
press [OK].
4 Press [3, 4] to select the tab and
press [1].
5 Press [3, 4] to select the menu and
press [OK].
6 Press [3, 4] to select the option and
press [OK].
To return to the previous screen
Press [RETURN].
To exit the screen
Press [EXIT].
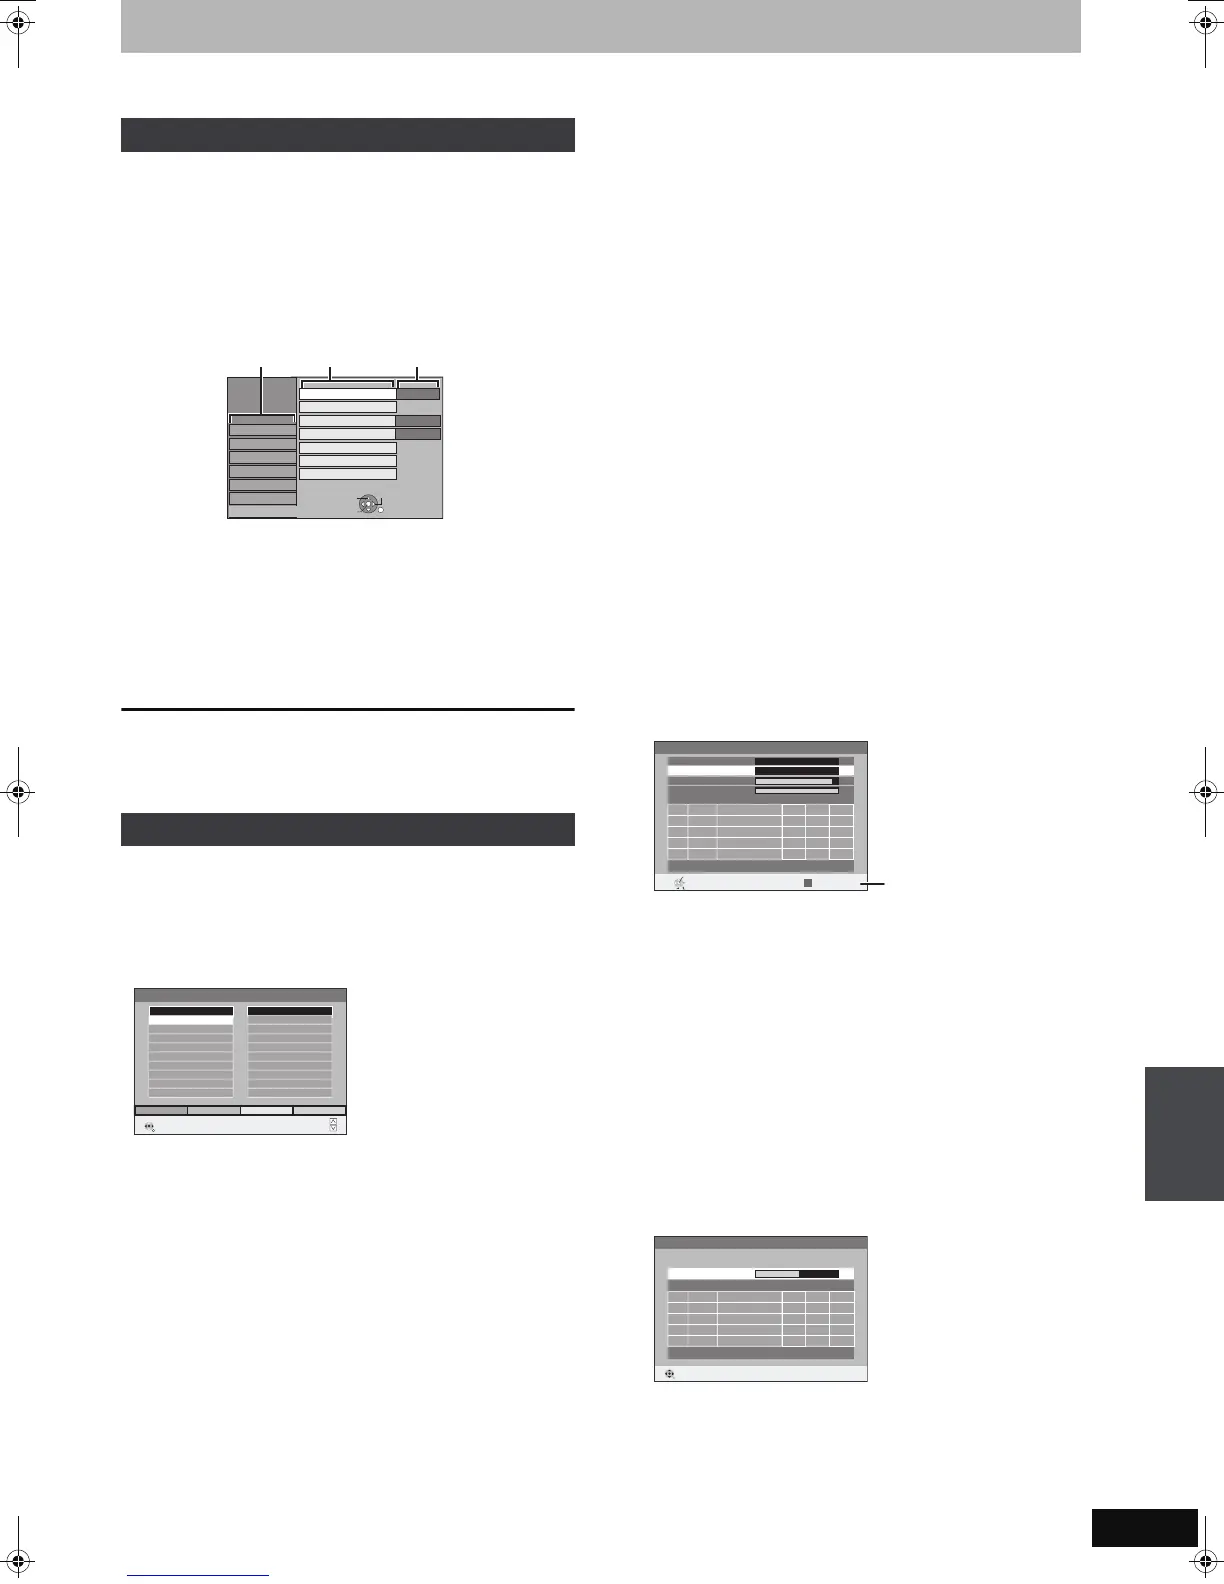
∫ Edit Profiles
You can create four profiles of channels for making viewing and
recording easier. Editing these profiles does not affect the channel
setting itself.
≥Timer recording may not work correctly if you edit the profiles
during timer recording standby.
Press the “Green” button to select the profile.
To add channels to a profile
1 Press [3, 4] to select the channel in the “All Services” column
and press the “Yellow” button.
≥Repeat this step to add other channels.
≥Press the “Blue” button to add all the available channels to the
profile. (This function is available only when no channels have
been added to the profile.)
2 Press [OK] to save the profile.
To change the order of channels of a profile
1 Press [1]
§
.
2 Press [3, 4] to select the channel in the “Profile” column to
move and press the “Green” button.
3 Press [3, 4] to select the new position of the channel and press
the “Green” button.
≥Repeat the steps 2 – 3 to move other channels.
4 Press [OK] to save the profile.
To delete channels on a profile
1 Press [1]
§
.
2 Press [3, 4] to select the channel in the “Profile” column and
press the “Yellow” button.
≥Repeat this step to delete other channels.
≥Press the “Blue” button to delete all the channels from the
profile.
3 Press [OK] to save the profile.
Deleting a channel from a profile does not affect the channel
itself. You can still select the channel from the “All Services”
profile.
To change the name of a profile in the “Profile” column
1 Press [1]
§
.
2 Press the “Red” button.
(➡ 46, Entering text)
§
When the station name of the “All Services” column is highlighted
∫ Auto-Setup Restart
Download from TV
You can restart auto channel setting if set up (➡ 10) fails for some
reason.
Select “Download from TV” when you connect the unit to a Q Link
compatible TV with a fully wired 21-pin Scart cable or a VIERA Link
(HDAVI Control 3) compatible TV with an HDMI cable.
When the confirmation screen appears
Press [2, 1] to select “Yes” and press [OK].
You can also use the following method to restart Auto-Setup.
When the unit is on and stopped
Press and hold [X CH] and [CH W] on the main unit until the
country setting screen or DVB Auto-Setup screen appears.
All the settings except for the ratings level, ratings password and
clock settings return to the factory preset. The timer recording
programmes are also cancelled.
∫ Settings for Digital Services
Press [OK] to show the following settings.
DVB Manual Tuning
You can set channels manually that the DVB Auto-Setup could not
complete successfully.
1 Press [3, 4] to select “DVB Manual Tuning” and press [OK].
2 Press [3, 4] to select the channel you want to set.
3 Press [2, 1] to adjust the frequency.
≥The frequency rises and falls in steps of 0.5 MHz.
≥Adjust the frequency by checking the signal strength and signal
quality displays.
[Refer to “Signal Condition” (➡ 62) for signal quality and signal
strength.]
4 Press [OK] to start scan.
The set channel is displayed in the table.
5 Press [EXIT] and press [WXCH] to check that applicable
channels have been selected.
Add New DVB Services
You can search for newly added terrestrial digital channels to
receive.
1 Press [3, 4] to select “Add New DVB Services” and press [OK].
The unit starts searching for newly available terrestrial digital
channels. This takes about 5 minutes.
A message is displayed when the search is finished.
“No new services found.” is displayed when no new services can
be found.
2 Press [OK] to save the newly found channels.
Common procedures
Tuning
Tabs
Menus Options
Setup
Remote Control
Clock
Quick Start
DivX Registration
System Update
DVD 1
On
Power Save
Off
Disc
Picture
Sound
Display
Tun ing
Connection
Others
OK
RETURN
TAB
SELECT
Initialize
Edit Profiles
RETURN
SELECT
Profile Select Add AllAdd
All Services
2 ABC
20 ABC HDTV
Profile 1
Page -
Page +
DVB Manual Tuning
Frequency
MHz
Prog. QualityChannel Service Name Net ID TS ID
RETURN
010
010
DVB CH24
498,0
Signal Quality
Signal Strength
Channel System
Western Europe (CCIR)
Change Channel System
OFFSET
STAR T SCAN
CHANNEL
If there is no picture, press
the “Red” button and select
the correct channel system.
Add New DVB Services
Please wait! Ch 5 69
Prog. QualityChannel Service Name Net ID TS ID
RETURN
RETURN: to cancel
HDD, disc and card management/Changing the unit’s settings
DMREX78&88EG&EC&EF-RQT9079-L_eng.book 61 ページ 2008年2月27日 水曜日 午後3時11分

 Loading...