50
*Note4:
X-VALUE & LINEARITY (P2 and P3 Posts) Adjustment Procedure
1. Set the Auto Tracking to off.
(1) Set Drive Select to VHS and press the [STOP] and [EJECT] keys simultaneously for more than 3 seconds to enter Service
Mode.
(2) Press [STOP] and [EJECT] keys simultaneously twice to activate Service Mode 2, and then Auto-Tracking is turned off.
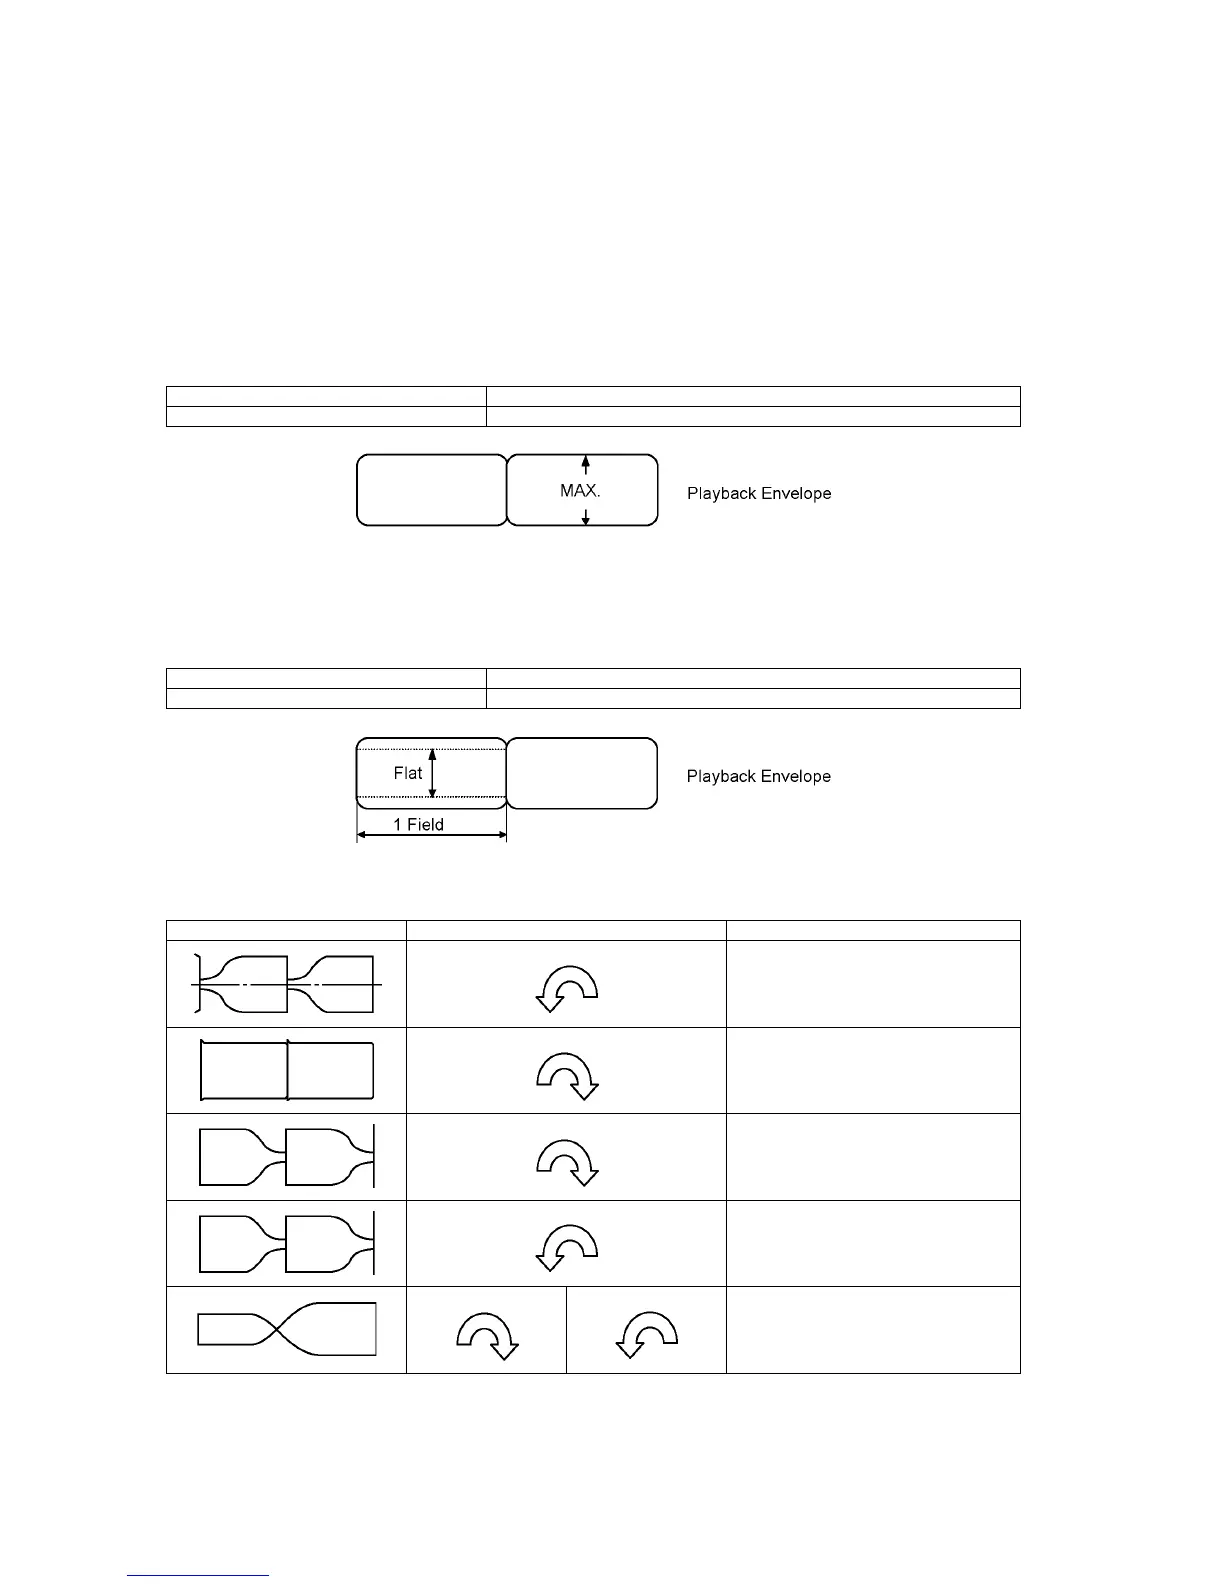
2. Perform the X-VALUE ADJUSTMENT
X-VALUE ADJUSTMENT
(1) After turning off the Auto tracking, playback the alignment Tape and press [CH UP] and [CH DOWN] keys simultaneously
to adjust the tracing to FIX value.
(2) Adjust A/C Head Base so that the envelope becomes maximum level.
(It is described on “5-2. Tape Interchangeability in “R4 Mechanism” that is separated volume.)
LINEARITY ADJUSTMENT
(1) After turning off the Auto tracking, playback the alignment Tape and press [CH UP] and [CH DOWN] keys simultaneously
to adjust the tracing to FIX value.
(2) Adjust the LINEARITY so that the envelope is flat when moving tracking to (+) and (-) directions.
l Main symptoms and Adjustment point
Alignment Tape VFM8125H3F
Test Point of Playback Envelope TW3001 (or TW4502)
Alignment Tape VFM8125H3F
Test Point of Playback Envelope TW3001 (or TW4502)
Envelope Post Name Adjustment Method
P2 Post Turn P2 Post counter-clockwise
(Approx. 1/2 revolution)
P2 Post Turn P2 Post clockwise
(Approx. 1/4 revolution)
P3 Post Turn P3 Post clockwise
(Approx. 1/2 revolution)
P3 Post Turn P3 Post counter-clockwise
(Approx. 1/4 revolution)
P2 Post P3 Post Turn P2 Post clockwise
(Less than 1 revolution)
Turn P3 Post counter-clockwise
(Less than 1 revolution)
 Loading...