•
•
•
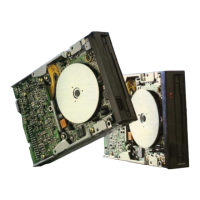
11.6 Write Protect Sensor/Index Detector Assembly
Removal
and
In
stallation (See
Fig.
11.6)
(1) Remove
the
front plate as described
in
11.2.
(2)
Remove
the
write
protect
sensor mounting g
screw
and
index
detector
mounting screw
respectively.
(3) Remove
the
wri
te
protect
sensor/index
detector
assembly.
(4) Reverse
the
above procedure
to
reinstal
l.
(5)
When
reinstalling
the
write
protect
sensor,
exercise
care so
that
the
leads and write
protect
sensor will
not
project from
the
bottom
and side of
the
base.
(6) After index
detector
installation, adjust
the
index timing as described
in
9.7.
@
Fig.11.6
Write
Protect
Sen
sor/Index
Detector
Assembly Removal
11.7 Cartridge Guide Assembly Removal and
Installation (See
Fig
.
11
.7)
-
15
-
(1) Remove
the
printed circuit board as described
in
11.1
.
(2) Remove
the
front plate as described
in
1 1.2.
(3) Remove
the
shield
plate
mounting screw and
ta
ke
the
shield plate off.
(4) Remove
the
write
protect sensor as described
in
11
.6.
It
is
not
necessa
ry
to
remove
the
index
detector.
(5) Remove
the
four cartridge guide mounting
screws and
take
out
the
cartridge gui
de
assembly.
(6)
After reinstallation, adjust
the
collet assembly
as
in
11
.4
step
(6)
and adjust
the
index timing
as
in
9.7.
(7)
When
removing
or
reinstalling, be careful
not
to
damage
the
carriage arm
with
the
lifter.
Insulating Paper
Shi,'dPlot,
~
~,t--
'
Cartridge
Gui
de
Assembly
~
<::i
\
I
I
Fig. 11
.7
Cartridge
Guide
Assembly Removal
 Loading...