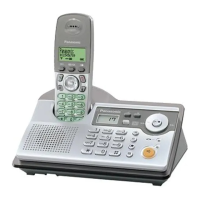
Answering System Features
52
Listening to new/all messages
When you have new messages:
– the answer on indicator on the base unit
flashes
– the total number of new messages is
shown on the handset display
– the base unit beeps about once a minute if
the message alert feature (page 57) has
been turned on
Note:
L The base unit display will show the total
number of recorded messages.
Using the base unit
Press {5}.
L If new messages have been recorded, the
base unit plays back new messages.
L If there are no new messages, the base
unit plays back all messages.
Note:
L To adjust the speaker volume during
playback, press {>} or {<} repeatedly. 9
volume levels are available.
L After playing back all of the new
messages, the answer on indicator will
stop flashing but will remain lit up when
the answering system is turned on.
Using the handset
1 Press {j/OK}.
2 Select “Answer System”, then press
{>}.
3 Select “Play New Msg.” or “Play
All Msg.”, then press {>}.
Note:
L To adjust the speaker volume during
playback, press {e} or {v} repeatedly.
L While listening to messages, you can
switch between the receiver and speaker
by pressing {C} or {s}.
Repeating, skipping, stopping,
erasing a message during
playback
L To repeat a message during playback:
– for the base unit, press {<}
– for the handset, press {<}
If pressed within the first 5 seconds of a
message, the previous message will be
played.
L To skip a message during playback:
– for the base unit, press {>}
– for the handset, press {>}
L To stop a message during playback:
– for the base unit, press {5}
– for the handset, press {9}
L To erase a message during playback:
– for the base unit, press {4}
– for the handset, press {*}, {4}
Erasing all messages
Using the base unit
Press {4} 2 times.
Note:
L The greeting message is not erased.
Using the handset
1 Press {j/OK}.
2 Select “Answer System”, then press
{>}.
3 Select “Erase Message”, then press
{>}.
4 Select “Erase All”, then press {>}.
5 Select “Yes”, then press {>}.
6 Press {ih}.
Note:
L The greeting message is not erased.
TG1840AL(e-e).book Page 52 Tuesday, April 11, 2006 11:02 AM

 Loading...