Advanced (Playback)
- 158 -
You can set protection for pictures you do not want to be deleted by mistake.
•
For details about the icon display during burst picture group playback, refer to “About display of
[FAVORITE], [PRINT SET] and [PROTECT] icons during playback of burst picture groups.
” on
P132.
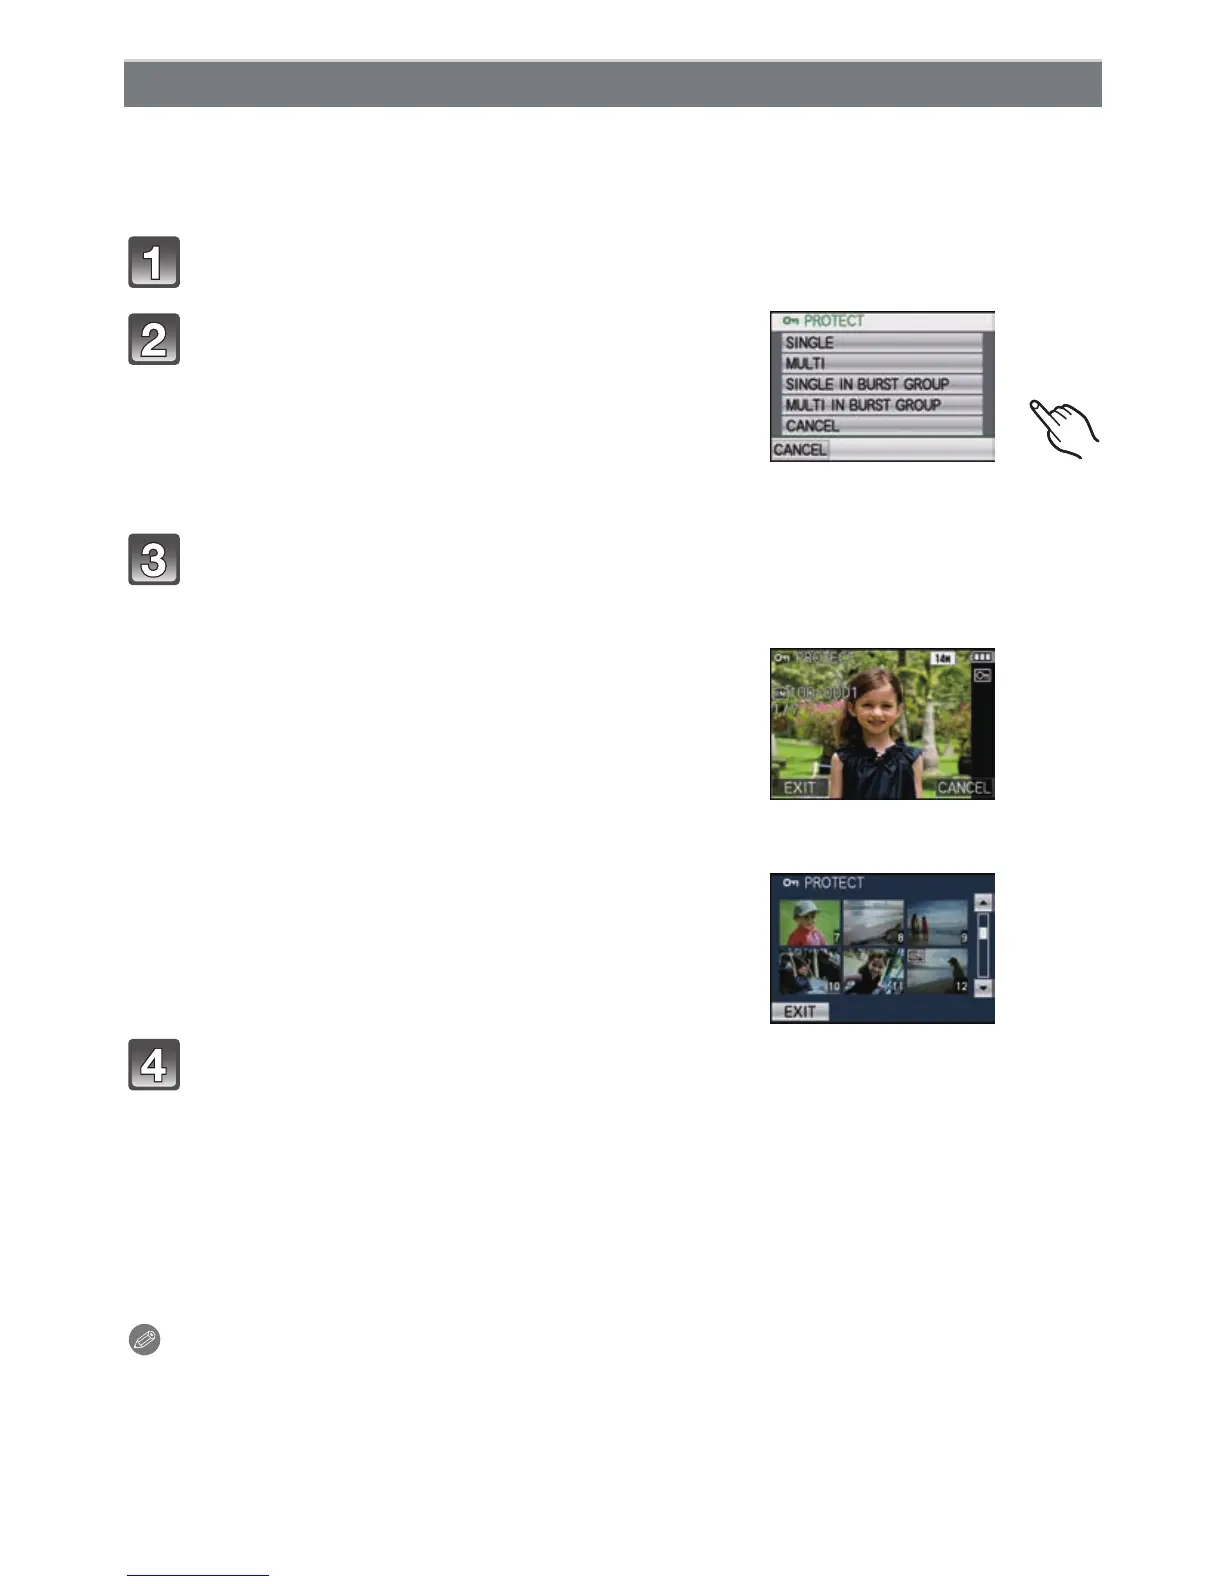
Select [PROTECT] on the [PLAYBACK] Mode menu. (P23)
Press [MENU] several times to return to the menu screen.
• Touch [EXIT] to close the menu.
∫ Canceling all the [PROTECT] settings
1 Touch [CANCEL] on the screen shown in step 2.
2 Touch [YES].
3 Touch [CANCEL] to return to the menu screen.
4 Touch [EXIT] to close the menu.
•
If you touch [CANCEL] while canceling protection, the canceling will stop halfway.
Note
•
The protect setting may not be effective on other equipment.
• Even if you protect pictures in the built-in memory or a card, they will be deleted if the built-in
memory or the card is formatted.
• Even if you do not protect pictures on a card, they cannot be deleted when the card’s
Write-Protect switch is set to [LOCK].
[PROTECT]
Touch the item.
• When you have selected
[SINGLE IN BURST GROUP] or
[MULTI IN BURST GROUP], select burst picture
group, and proceed to step
3.
• When [CANCEL] is selected, see “Canceling all the
[PROTECT] settings
” on P158.
Select the picture.
[SINGLE] setting
Drag the screen horizontally to select an image,
and then touch [SET].
•
You can forward or rewind pictures continuously by
keeping your finger on the left or right sides of the
screen after forwarding/rewinding a picture.
(Pictures are displayed reduced in size)
• Setting is canceled by touching [CANCEL].
[SINGLE]
[MULTI] setting
Touch the picture you wish to protect.
•
Switch the screen by touching [3]/[4] if these are
displayed on the slide bar.
• Setting is canceled by touching the same picture
again.
[MULTI]

 Loading...