20
OPTICAL IMAGE
STABILIZER
1
1,3
PHOTO
SHOT
2
2
MEGA
1 2
1,3
2
FADE
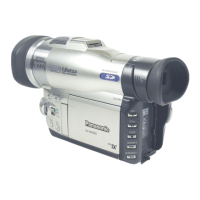
Digital Zoom Function
This function is useful when you want to record close-up shots of subjects
located beyond a normal zoom range of 1k to 10k magnification. With the
Digital Zoom Function, you can select a magnification of 20k or even to
100k.
1
Set [CAMERA FUNCTIONS] >> [CAMERA SETUP] >>
[D.ZOOM] >> [20
t
] or [100
t
].
≥20k: Digital zooming to 20k
≥100k: Digital zooming to 100k
2
Push the [W/T] Zoom Lever towards [W] or towards [T] to
zoom in or out.
To cancel the Digital Zoom Function
Set [D.ZOOM] on the [CAMERA SETUP] Sub-Menu to [OFF].
≥As the magnification of digital zoom increases, the quality of image may
deteriorate.
≥By pressing the [W/T] zoom lever to [W] or to [T] in Recording Pause Mode,
you can zoom 1-10k at the maximum speed of 0.3 seconds.
≥During recording, you can zoom 1-10k in as short a time as approximately
0.8 seconds.
~~~~~~~~~~~~~~~~~~~~~~~~
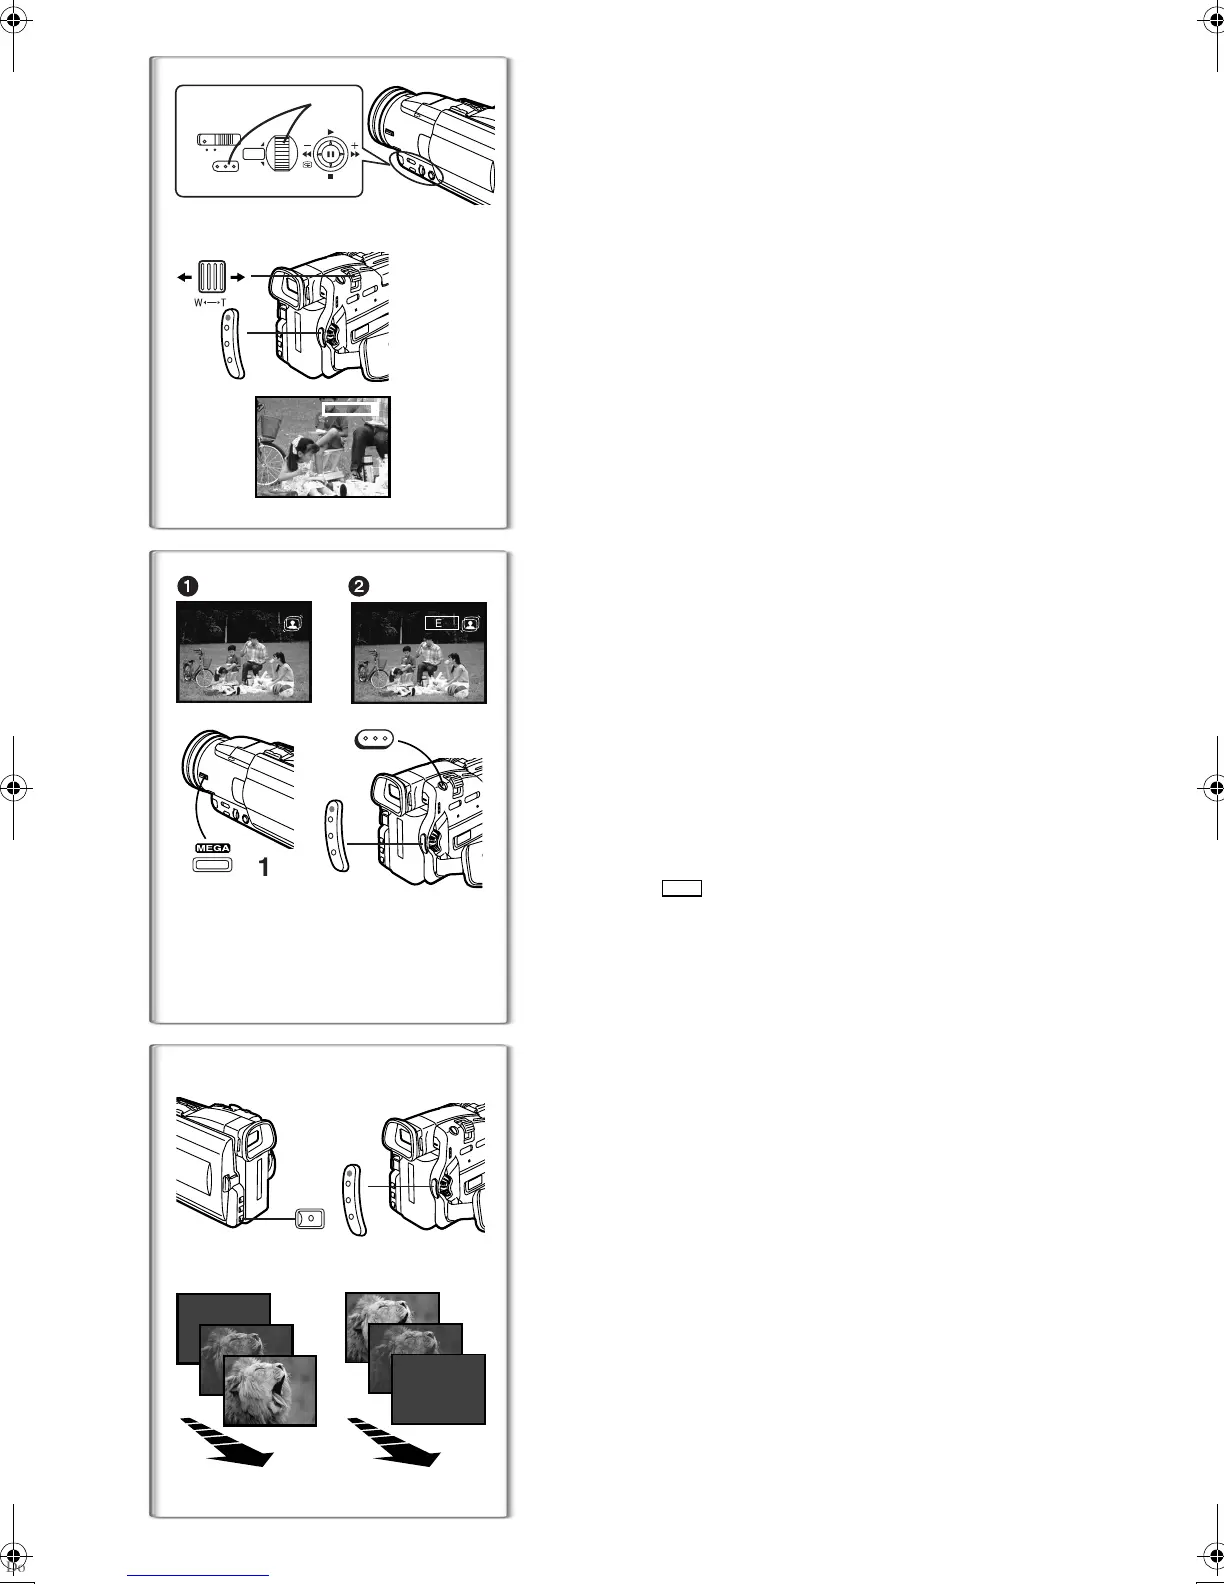
Optical Image Stabilizer Function
If you are recording in unstable situations and the Movie Camera is shaky,
you can use this function to correct the distortion in these images.
≥If the Movie Camera shakes too much, this function may not be able to
stabilize images.
1
Press the [OPTICAL IMAGE STABILIZER] Button repeatedly
until the
[
[
[[
[
] indication
1
appears.
2
Press the Recording Start/Stop Button or [PHOTO SHOT]
Button to start recording.
MEGA OIS (Optical Image Stabilizer) Function
This function increases the effect. We recommend using MEGA
OIS (Optical Image Stabilizer) Function when performing Card
Photo Shot Function.
3
Press the [OPTICAL IMAGE STABILIZER] Button repeatedly
until the [
[
[[
[
] Indication
2
appears.
≥For other notes concerning this item, see page 47.
~~~~~~~~~~~~~~~~~~~~~~~~
Fade In/Out Functions
Fade In
1
Fade In brings out images and sounds gradually from a black screen at the
beginning of a scene.
1
Keep pressing the [FADE] Button during the Recording
Pause Mode.
≥The image fades out gradually.
2
When the image is completely gone, press the Recording
Start/Stop Button to start recording.
3
Release the [FADE] Button about 3 seconds after starting
recording.
≥The image reappears gradually.
Fade Out
2
Fade Out causes images and sounds to disappear gradually, leaving a black
screen at the end of a scene.
1
Keep pressing the [FADE] Button while recording.
≥The image fades out gradually.
2
When the image is completely gone, press the Recording
Start/Stop Button to stop recording.
3
Release the [FADE] Button.
≥The still picture cannot fade in or fade out.
MEGA
30
t
W
T
D.ZOOM
AUTO
MNL
PUSH
MENU
1
2
W.B/SHUTTER/IRIS/
VOL/JOG
B.book20ページ2001年8月27日 月曜日 午前10時14分