Chapter 5 Operations — Content Manager
ENGLISH - 197
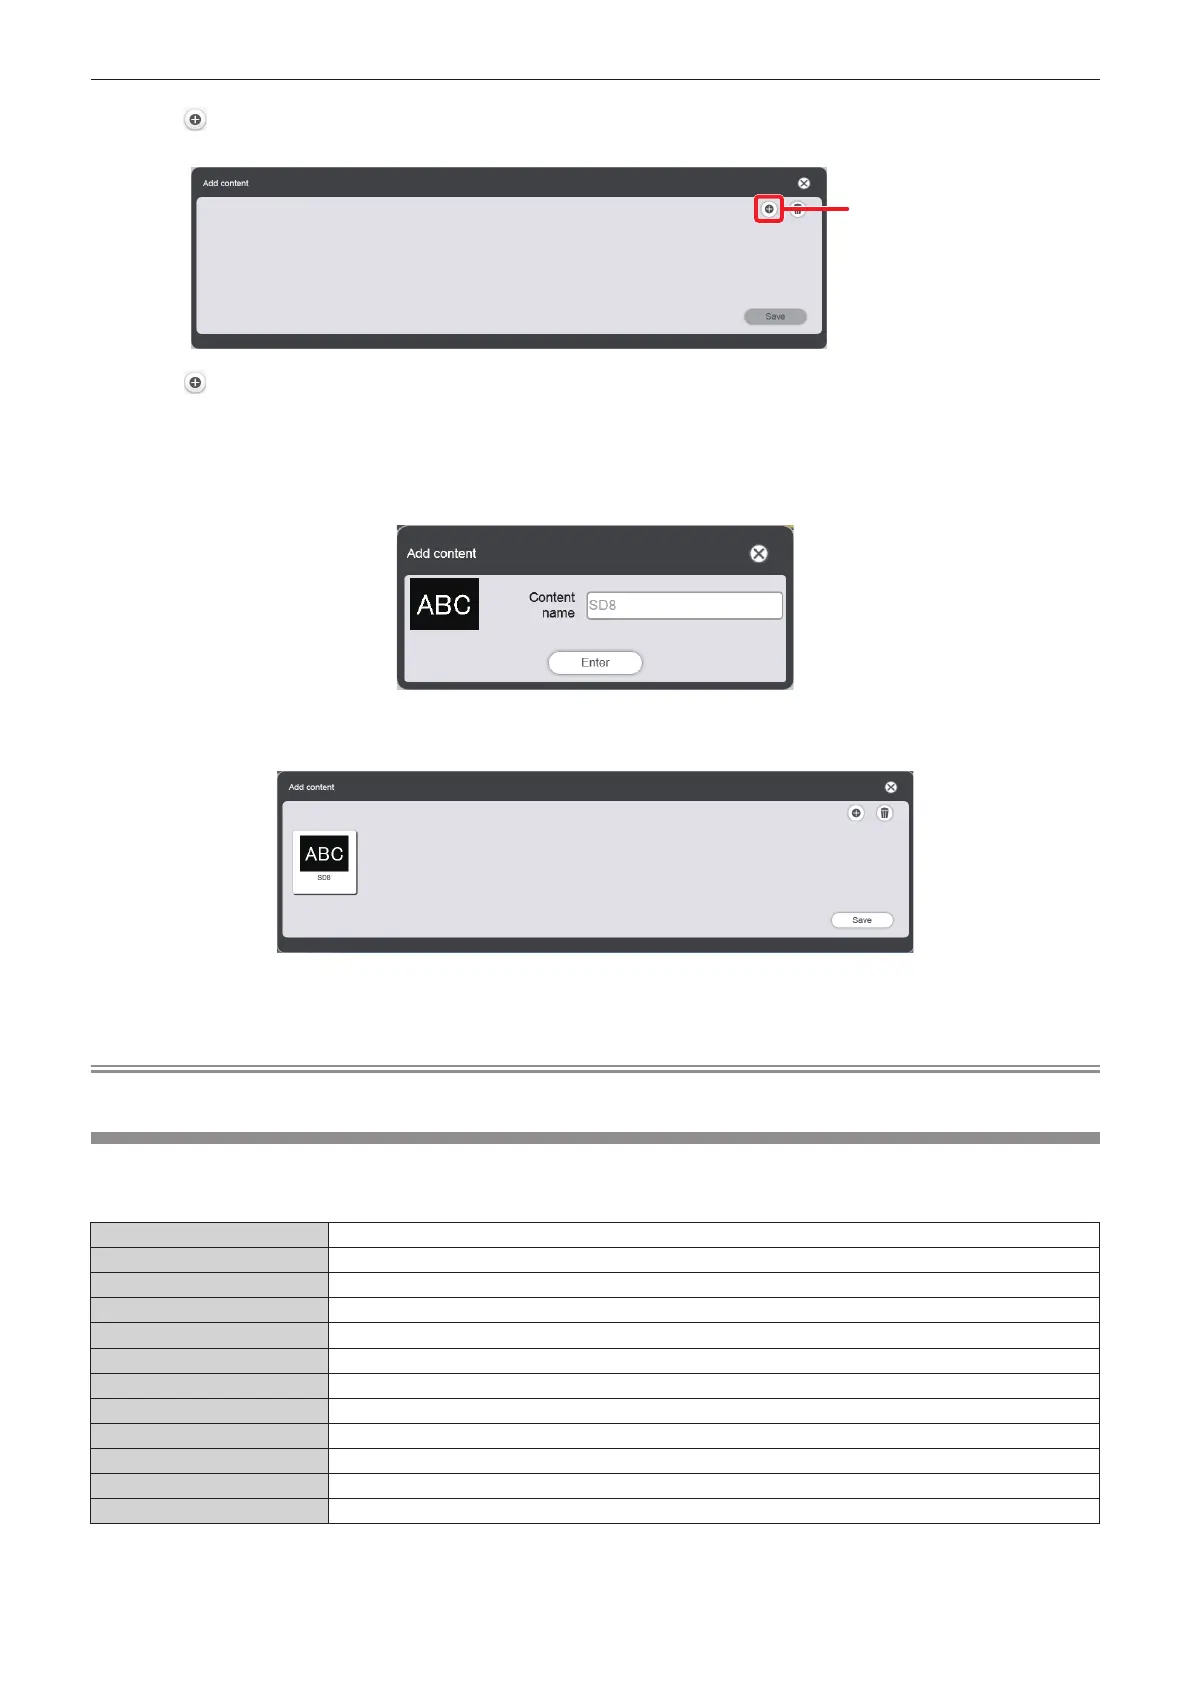
5) Click .
f The [Add content] screen is displayed.
Content addition
6) Click on the [Add content] screen.
f The le selection screen is displayed.
7) Select the still image file of the pattern to be newly registered, and click the [Open] button.
f To replace it with another pattern, prepare a still image le having the same le name as the one deleted.
f The content name entry screen is displayed.
8) Enter any [Content name], and click the [Enter] button.
f The content is registered in the [Add content] screen.
9) When addition of contents to register is complete, click the [Save] button.
f Added contents are registered in the SD card.
Note
f When the content to be deleted or replaced is registered in a schedule or slideshow, the content cannot be deleted.
[Effect]
The following table shows the special effects ([Effect]) which can be set to still image contents and used when
changing the playback screen.
[Off] Does not apply image effects.
[Random] Applies image effects randomly.
[Wipe left] Displays the image gradually from the left like wiping.
[Wipe right] Displays the image gradually from the right like wiping.
[Wipe down] Displays the image gradually from the top like wiping.
[Split] Displays the image gradually from the center toward the left and right like wiping.
[Zoom out] Displays the image gradually from the center towards the entire image.
[Fade] Displays the entire image gradually.
[Blind] Displays the image gradually like opening vertical blind.
[Checker wipe] Displays the image gradually from the left to right in checkerboard patterns.
[Slide in] Displays the next screen as if it slides in from the right to left.
[Slide out] Displays the next screen by removing the current screen as if it slides out from the right to left.

 Loading...