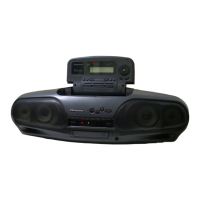
RX-DT30
n
Disassembly Instructions
Warning
:
This
product uses a laser
diode.
Refer to
caution
statements on page 2.
ACHTUNG :
Die
laserernheit
nicht
zerlegen.
Die
lasereinheit darf nur gegen eine vom hersteller
spezrfizierte
einheit ausgetauscht werden.
“ATTENTION SERVICER”
Some chassis components may have sharp edges. Be careful when
disassembling
and servicing.
Ref. No.
1
Removal of the Handle
Ref. No.
2
Procedure
1.
Release 2 ribs.
Procedure
1
2.
Pull out the handle.
_
-m--_--
Handle
-__
Ref. No.
3
Procedure
2*3
Removal of the Top Cabinet Unit
~
1.
Press the CD eject button.
2. Remove 5 screw
(0
-
Q).
3. Remove the Top Cabinet
Unit.
\
CD Eject Button
Ref. No.
4
Procedure
2+31,4
1
Removal of the Control P.C.B.
I
:
Removal of the Front Cabinet
1
1.
Remove the battery cover.
2. Remove 8 screws
(
@
-
0
).
_,
Front Cabinet
3.
Press the 2 eject buttons.
4.
Release 1 claw.
5. Remove the front cabinet
in
the
direction
of arrow
6.
Remove 1 connector
(CP307).
1. Remove 2 connectors (CN303, CN801).
2. Remove FFC cable from the connector CN702 (Control P.C.B.).
3. Release 4 claws.
FFC Cable
Control P.C.B.
CN702
I
CN303
Claws
-5-
 Loading...