49
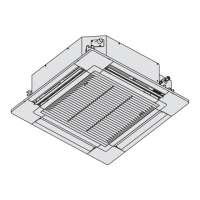
■ 4-Way Cassette 60x60 Type (Y1 Type)
Checking the unit position
(1) Check that the ceiling hole is within this range:
600 × 600 mm
(2) Confirm that the positions of the indoor unit and the ceiling
are as shown in the diagram. If the positions of the ceiling
surface and unit do not match, air leakage, water leakage,
flap operation failure, or other problems may occur.
CAUTION
●
Never place the panel face-down. Either hang it
vertically or place it on top of a projecting object.
Placing it face-down will damage the surface. (Fig. 7-12)
must be within the range of 13 – 18 mm. (Fig. 7-12)
If not within this range, malfunction or other trouble may
occur.
A
Main unit
Ceiling side
Ceiling opening
dimension
Fig. 7-12
●
Do not touch the flap or apply force to it. (Fig. 7-13)
(This may cause flap malfunction.)
Flap
Fig. 7-13
7-4. Before Installing the Ceiling Panel
(1) Remove the air-intake grille and air filter from the ceiling
panel.
a) Remove the 2 screws on the latch of the air-intake
grille. (Fig. 7-14) (Reattach the air-intake grille after
installation of the ceiling panel.)
Fig. 7-14
b) Slide the air-intake grille catches in the direction shown
by the arrows 1 to open the grille. (Fig. 7-15)
1
1
Fig. 7-15
c) With the air-intake grille opened, remove the grille hinge
from the ceiling panel by sliding it in the direction shown
by the arrow 2. (Fig. 7-16)
2
Fig. 7-16
(2) Removing the corner cover.
a) Remove the screws on the corner and slide the latches
in the direction of the arrow 1 to disconnect the hinges
(3 locations). Then, remove the air-intake grille in the
direction of the arrow 2. (Fig. 7-17)
1
2
1
Fig. 7-17
7-5. Installing the Ceiling Panel
The power must be turned ON in order to change the flap
angle. (Do not attempt to move the flap by hand. Doing so may
damage the flap.)
(1) Hang the temporary latches on the inside of the ceiling
panel to the receptacle on the unit to temporarily attach the
ceiling panel in place. (Fig. 7-18)
● The ceiling panel must be installed in the correct direction
relative to the unit. Align the REF. PIPE and DRAIN marks
on the ceiling panel corner with the correct positions on the
unit.
● To remove the ceiling panel, support the ceiling panel while
pressing the temporary latches toward the outside.
(Fig. 7-18)
Fig. 7-18
(2) Align the panel installation holes and the unit screw holes.
Air-intake grille
Air-intake grille hinge
Ceiling panel
Corner cover
Ceiling panel
Corner cover
Push
Temporary
latch
Temporary latches
Screw
Latch
Panaindoor336013Eng.indb49Panaindoor336013Eng.indb49 2012/03/2121:07:252012/03/2121:07:25
 Loading...