4.4. Clearing Self-Diagnostic Memory
Errors are stored in the unit memory. To clear memory, press and hold down [STOP ] button
for 5 seconds or more during self-diagnostic mode. The message, “CLEAR” appears on the
display when memory is erased, and the unit displays the message, “TEST”.
Memory is not affected by turning off the power or unplugging the socket.
Be sure to clear memory after repair is completed.
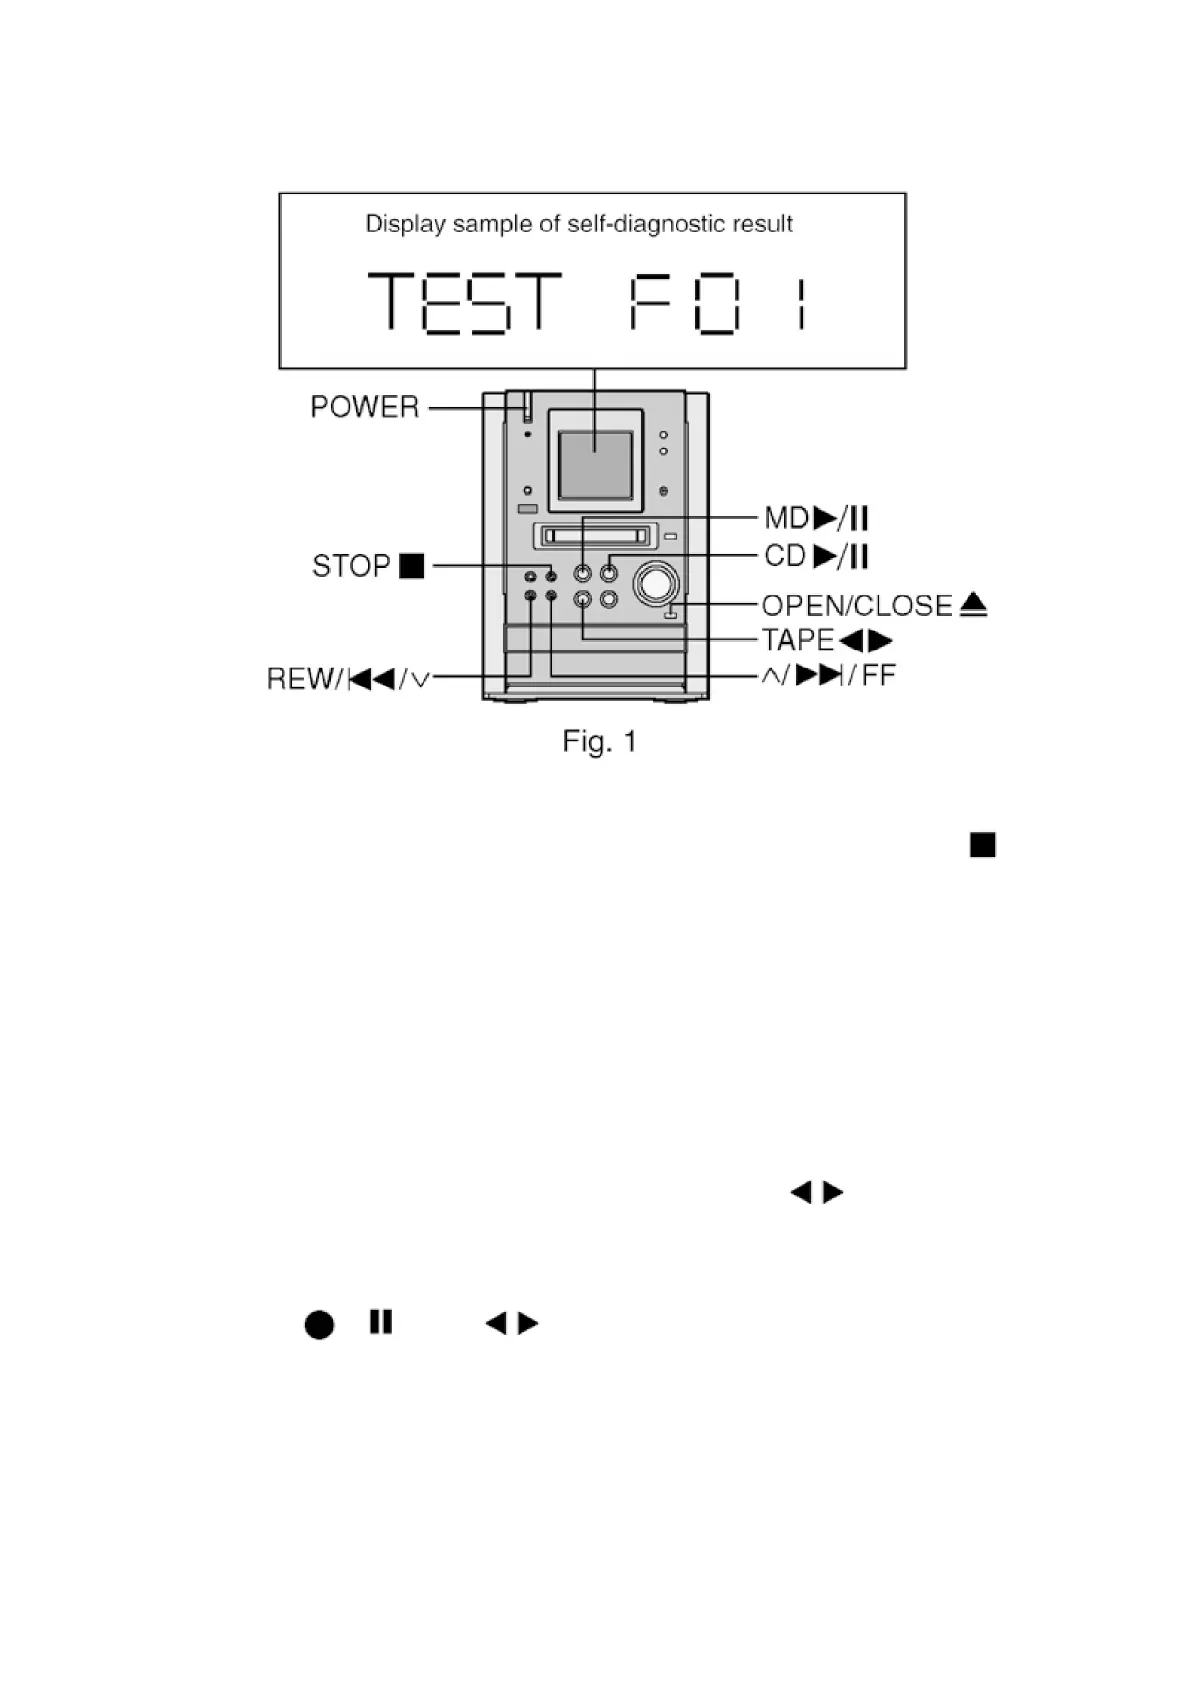
4.5. Displaying Self-Diagnostic Results
<Cassette Deck Section> (H01, H02, H03, H06, F01, F02)
1. Enter the self-diagnostic mode, following the instructions
described in [4.2. Entering Self-Diagnostic Mode].
2. Insert a normal-positioned music tape with erase prevention
niches on both Sides A and B. Press [TAPE ] button to
activate the TPS operation so that the tape automatically stops at
an interval between music selections.
3. Press [ / ] and [ ] buttons together on the remote
controller. (Recording does not start.)
4. Then, insert a Cr02-positioned blank cassette tape with an erase
prevention niche of Side A or B set to the left side.
6