Do you have a question about the Panasonic SA-PM38DBEB and is the answer not in the manual?
General guidelines for servicing safety, including lead dress and protective device installation.
Procedure for checking leakage current with AC plug unplugged and a jumper connection.
Procedure for checking leakage current with AC plug connected, using a resistor and capacitor.
Important safety notes regarding the AC cord, plug, and fuse replacement.
Cautions before performing repairs and adjustments, avoiding short-circuits and overcurrent.
Explanation of the protection circuitry and how to reset it if it operates.
List of safety-critical parts marked with 'A' that require manufacturer-specified replacements.
Techniques to prevent component damage from static electricity, focusing on ESD-sensitive devices.
Cautions regarding hazardous radiation exposure from the laser diode and safe handling procedures.
Service cautions related to legal restrictions, particularly concerning lead-free solder (PbF).
Special care required when handling the traverse unit and optical pickup to prevent damage.
Details on the service manual's content and scope, noting information not covered.
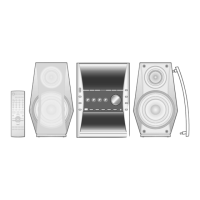
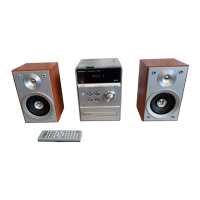
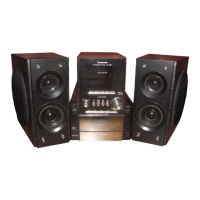
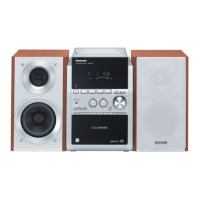
Description of button operations on the main unit, including controls and their functions.
Explanation of buttons and their functions on the remote control unit.
Information on compatible disc formats (CD, CD-R/RW, MP3) and playback guidelines.
Summary table of service modes, activation methods, and applications for checking functions.
Detailed tables for service modes, including FL display and key operation.
Table listing error codes, diagnosis contents, automatic FL display, and remarks for troubleshooting.
Flow chart illustrating the sequence for disassembling casing and internal parts for servicing.
Diagram showing the location of major internal components and PCBs within the unit.
Step-by-step instructions for removing the top cabinet assembly, including screw removal and catch release.
Procedure for removing the headphone printed circuit board.
Instructions for removing the iPod printed circuit board.
Procedure for removing the DAB unit printed circuit board.
Steps to remove the front panel assembly, involving cable detachment and catch release.
Instructions for detaching and removing the USB printed circuit board.
Procedure for removing the panel printed circuit board, including volume knob removal.
Steps to release catches and remove the FL window from the front panel assembly.
Instructions for releasing catches and removing the centre ornament.
Procedure for removing the CD lid by manipulating shafts and releasing a hook.
Steps to detach FFC cables and remove the CD mechanism unit.
Procedure for removing the power printed circuit board.
Steps for replacing the Power Amp IC (IC5101), including desoldering and handling heatsinks.
Instructions for detaching cables and removing the main printed circuit board.
Procedure for removing the fan unit, involving screw and catch release, and cable detachment.
Steps to detach cables and remove the transformer printed circuit board.
Procedure for replacing transistor Q5901, including desoldering and handling heatsinks.
Instructions for removing the CD servo printed circuit board, involving screw removal and desoldering.
Step-by-step procedures for disassembling the traverse unit, including guide and slide plate release.
Procedure for assembling the traverse unit, ensuring proper seating and short pin removal.
Instructions for checking and repairing the DAB Module PCB, including disassembly and reassembly steps.
Procedure for checking and repairing the USB PCB, detailing disassembly, cable connection, and testing.
Steps for checking and repairing the Panel PCB, including disassembly, cable connections, and insulating material placement.
Procedure for checking and repairing the CD Servo PCB, including disassembly, cable connections, and CD insertion.
Instructions for checking and repairing the Power PCB, involving disassembly, cable connections, and insulating material.
Steps for checking and repairing the Transformer PCB, including disassembly, cable connections, and support block usage.
Procedure for checking and repairing the Main PCB, involving fan unit flipping and cable connections.
Table of voltage measurements for various pins on the USB PCB in CD PLAY and STANDBY modes.
Table of voltage measurements for IC7001 and IC7002 pins on the CD Servo PCB.
Table of voltage measurements for IC200, IC600, IC601, and IC700 pins on the Main PCB.
Table of voltage measurements for IC800, Q760, Q761, Q100, Q350, Q375, Q382, Q600, Q602, Q603, Q604, Q761, Q762, QR375, QR376, QR384, QR600 pins on the DAB Module PCB.
Table of voltage measurements for IC900 pins on the Panel PCB.
Table of voltage measurements for IC5101 pins on the Power PCB.
Table of voltage measurements for IC5901, Q5901, Q5902, Q5903, Q5904, Q5905, Q5907 pins on the Transformer PCB.
Table of voltage measurements for IC1, IC3, IC4, IC201, Q1, Q2, Q100, Q201, Q202, Q350, Q375, Q382, Q600, Q602, Q603, Q604, Q761, Q762, QR375, QR376, QR384, QR600 pins on the DAB Module PCB.
Visual representations of waveforms at various points in the circuit for diagnostic purposes.
Diagram illustrating the CD servo circuit's signal flow and component connections.
Block diagram for main, panel, transformer, and DAB extent circuits, showing signal paths.
Block diagram detailing the main (2/2), headphone, iPod, and USB circuits and their interconnections.
Diagram showing the functional blocks and signal flow within the DAB module circuit.
Detailed schematic diagram of the CD servo circuit, showing components and connections.
Part 1 of the main circuit schematic, illustrating signal paths and component interconnections.
Part 2 of the main circuit schematic, detailing signal paths and component interconnections.
Part 3 of the main circuit schematic, showing signal paths and component interconnections.
Part 4 of the main circuit schematic, illustrating signal paths and component interconnections.
Schematic diagrams for the panel and headphone circuits, showing component layouts.
Schematic diagram of the USB circuit, detailing connections and components.
Schematic diagrams for the iPod, Power, and DAB Extent circuits.
Schematic diagram of the transformer circuit, showing AC input and voltage distribution.
Schematic diagram of the DAB module circuit, illustrating tuner and baseband processor functions.
Layout diagrams for the CD Servo PCB and Transformer PCB, showing component placement.
Layout diagrams for the Main, DAB Module, and DAB Extent PCBs, showing component placement.
Layout diagrams for the Panel, Headphone, and Power PCBs, showing component placement.
Layout diagrams for the iPod PCB and USB PCB, showing component placement.
Detailed terminal functions for IC7001 (Servo Processor), listing pin numbers, I/O, and functions.
Terminal functions for IC7002 (4CH Drive), detailing pin numbers, I/O, and functionality.
Terminal functions for IC800 (Micro-Processor), listing pin numbers, I/O, and functions.
Exploded view showing mechanical parts and their corresponding replacement part numbers.
Diagram illustrating the packaging components and their placement for the product.
List of mechanical replacement parts, including safety references, part numbers, and descriptions.
List of electrical replacement parts, including PCBs, ICs, transistors, diodes, capacitors, and resistors.
| Brand | Panasonic |
|---|---|
| Model | SA-PM38DBEB |
| Category | Stereo System |
| Language | English |