EasyManua.ls Logo

Panasonic SA-PMX152EG User Manual

Panasonic SA-PMX152EG
79 pages
To Next Page IconTo Next Page
Page #1 background imageLoading...
Page #1 background image
© Panasonic Corporation 2017. All rights reserved.
Unauthorized copying and distribution is a violation of
law.
PSG1703007CE
A6
CD Stereo System
Model No. SA-PMX150EG
SA-PMX150PC
SA-PMX152EG
Product Color: (S)...Silver Type
TABLE OF CONTENTS
PAGE PAGE
1 Safety Precautions----------------------------------------------- 3
1.1. General Guidelines---------------------------------------- 3
1.2. Before Repair and Adjustment ------------------------- 3
1.3. Protection Circuitry ---------------------------------------- 4
1.4. Caution For Fuse Replacement------------------------ 4
1.5. Safety Part Information----------------------------------- 4
2 Warning-------------------------------------------------------------- 5
2.1. Prevention of Electrostatic Discharge (ESD)
to Electrostatically Sensitive (ES) Devices---------- 5
2.2. Precaution of Laser Diode------------------------------- 6
2.3. Service caution based on Legal restrictions -------- 7
2.4. Handling Precaution for Traverse Unit --------------- 8
3 Service Navigation----------------------------------------------- 9
3.1. Service Information --------------------------------------- 9
3.2. Software / Firmware Update ---------------------------- 9
4 Specifications ----------------------------------------------------10
5 Location of Controls and Components------------------ 12
5.1. Main Unit & Remote Control Key Button
Operations ------------------------------------------------- 12
6 Service Mode----------------------------------------------------- 13
6.1. Service Mode Table ------------------------------------- 13
6.2. Service Mode Error Code ------------------------------ 14
6.3. Doctor Mode----------------------------------------------- 15
6.4. Sales Demonstration Lock Function Mode -------- 18
7 Troubleshooting Guide --------------------------------------- 19
8 Disassembly and Assembly Instructions--------------- 25
8.1. Disassembly flow chart --------------------------------- 26
8.2. Type of screws-------------------------------------------- 26
8.3. Main Parts Location Diagram ------------------------- 27
8.4. Disassembly of Top Cabinet--------------------------- 28
8.5. Disassembly of ALLPLAY Module Block ----------- 29
8.6. Disassembly of Front Panel Unit --------------------- 30
Notes: Please refer to the Original Service Manual for :
O CD Mechanism Unit, Order No. PSG1303059AE
O Speaker system SB-PMX100EGK, Order No. PSG1505005CE

Table of Contents

Question and Answer IconNeed help?

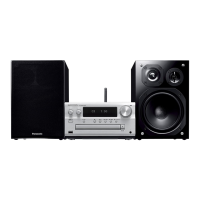
Do you have a question about the Panasonic SA-PMX152EG and is the answer not in the manual?

Panasonic SA-PMX152EG Specifications

General IconGeneral
TypeStereo System
Speaker Type2-way
Speaker Configuration2.0
Impedance6 Ω
Tweeter diameter2.5 cm
Woofer diameter10 cm
Input Sensitivity500 mV
Signal-to-Noise Ratio75 dB
CD PlayerYes
Optical disc playerYes
Disc types supportedCD, CD-R, CD-RW
Number of optical discs1
FM RadioYes
RadioYes
Radio bands supportedFM
Preset stations quantity30
USB PortYes
USB 2.0 ports quantity1
BluetoothYes
Bluetooth version4.2
Supported Bluetooth profilesA2DP, AVRCP
3.5 mm (1/8-inch) inYes
Headphone outputs1
Ethernet LANNo
Wi-FiNo
Apple AirPlay 2 supportNo
Playback MP3Yes
Playback AACYes
Playback FLACNo
Playback WAVYes
Playback AIFFNo
EqualizerYes
Bass reflexYes
Product colourBlack

Summary

Safety Precautions

General Guidelines

General safety guidelines for servicing the audio system.

Before Repair and Adjustment

Precautions before starting repair or adjustment procedures.

Safety Precautions

Protection Circuitry

Information on the unit's protection circuitry and its function.

Caution For Fuse Replacement

Guidance on replacing fuses with correct types to maintain safety.

Safety Part Information

Lists critical safety components requiring specific replacement parts.

Warning

Prevention of Electrostatic Discharge (ESD) to Electrostatically Sensitive (ES) Devices

Techniques to prevent damage from static electricity to sensitive components.

Warning

Precaution of Laser Diode

Safety precautions when handling the laser diode in the optical pickup unit.

Warning

Service caution based on Legal restrictions

Guidance on legal restrictions related to service, particularly lead-free solder.

Warning

Handling Precaution for Traverse Unit

Specific handling precautions for the traverse unit and optical pickup.

Service Navigation

Service Information

Overview of technical information provided for service personnel.

P.C.B. repair method

Methods for repairing different printed circuit boards (PCBs).

Individual Part repair method (For Main P.C.B.)

Specifics on individual part replacement for the Main PCB.

Software / Firmware Update

Information on updating system firmware via software.

Specifications

Location of Controls and Components

Main Unit & Remote Control Key Button Operations

Identification and function of buttons on the main unit and remote control.

Service Mode

Service Mode Table

Table detailing various service modes and their key operations.

Service Mode

Service Mode Error Code

Lists error codes for different system modules and diagnostic contents.

Service Mode

Doctor Mode

Information on entering and using Doctor Mode for diagnostics.

Doctor Mode Table 1

Details for specific Doctor Mode tests and their displays.

Service Mode

Doctor Mode Table 2

Further details on Doctor Mode tests including traverse and combination tests.

Service Mode

Doctor Mode Table 3

Additional Doctor Mode tests for Bluetooth and ALLPLAY firmware.

Service Mode

Doctor Mode Table 4

Final Doctor Mode table for DAB firmware version checking.

Sales Demonstration Lock Function Mode

How to activate or cancel the sales demonstration lock function.

Troubleshooting Guide

No Power or No Display

Step-by-step guide for diagnosing and fixing no power or no display issues.

Cannot Power ON due to Error code F76

Troubleshooting steps for power-on issues related to error code F76.

Troubleshooting Guide

Cannot Power ON due to Error code F61

Troubleshooting steps for power-on issues related to error code F61.

Bluetooth® Pairing Failure

Diagnosis and resolution for Bluetooth pairing failures.

Main Set any buttons "NO function"

Steps to troubleshoot when main unit buttons do not function.

No Remote Control Function

Guide to diagnose and fix issues with the remote control.

Troubleshooting Guide

USB Device Cannot Detect "NO DEVICE"

Steps to resolve issues where USB devices are not detected.

PC not detected "PC UNLOCK"

Troubleshooting guide for when the PC is not detected for connection.

Troubleshooting Guide

No Output Sound

Guide to troubleshoot and resolve issues with no sound output from various sources.

Check Point

Power PCB (SMPS PCB)

Specific check points for the Power Supply (SMPS) PCB.

Check Point

Main PCB

Specific check points located on the Main PCB.

Disassembly and Assembly Instructions

Disassembly and Assembly Instructions

Disassembly flow chart

Visual flowchart illustrating the disassembly sequence of unit parts.

Type of screws

Identifies different types of screws used in the unit assembly.

Disassembly and Assembly Instructions

Main Parts Location Diagram

Diagram showing the location of major components and PCBs within the unit.

Disassembly and Assembly Instructions

Disassembly of Top Cabinet

Step-by-step instructions for removing the top cabinet of the unit.

Disassembly and Assembly Instructions

Disassembly of ALLPLAY Module Block

Procedure for disassembling the ALLPLAY module block.

Disassembly and Assembly Instructions

Disassembly of Dipole Antenna

Steps to remove the dipole antenna from the unit.

Disassembly of ALLPLAY Module with Data

Procedure for removing the ALLPLAY module with data.

Disassembly and Assembly Instructions

Disassembly of Front Panel Unit

Instructions for disassembling the front panel unit.

Disassembly of Panel Block

Steps to remove the panel block assembly.

Disassembly and Assembly Instructions

Disassembly of Headphone P.C.B.

Procedure for removing the headphone PCB.

Disassembly of IR Sensor P.C.B.

Steps to remove the IR sensor PCB.

Disassembly of USB P.C.B.

Procedure for removing the USB PCB.

Disassembly and Assembly Instructions

Disassembly of ALLPLAY Antenna P.C.B.

Steps to remove the ALLPLAY antenna PCB.

Disassembly of SMPS P.C.B.

Procedure for removing the SMPS PCB.

Disassembly and Assembly Instructions

Disassembly of Main P.C.B.

Steps for removing the main PCB.

Disassembly of Inner Chassis

Procedure for removing the inner chassis components.

Disassembly and Assembly Instructions

Disassembly of Tuner P.C.B.

Steps for removing the tuner PCB.

Disassembly and Assembly Instructions

Disassembly of DAB P.C.B. (For PMX152 only)

Procedure for removing the DAB PCB (specific to PMX152 model).

Disassembly of CD Mechanism Unit

Steps for removing the CD mechanism unit.

Disassembly and Assembly Instructions

Replacement of Traverse Unit

Instructions for replacing the traverse unit.

Disassembly of Traverse Unit

Detailed steps for disassembling the traverse unit.

Disassembly and Assembly Instructions

Assembly of Traverse Unit

Instructions for assembling the traverse unit.

Disassembly and Assembly Instructions

Disassembly of CD Interface P.C.B.

Steps for disassembling the CD interface PCB.

Disassembly and Assembly Instructions

Disassembly of Bluetooth P.C.B.

Procedure for removing the Bluetooth PCB.

Disassembly of Rear Cabinet

Steps for removing the rear cabinet.

Service Position

Checking of Panel, Main, SMPS, ALLPLAY Module with Data and CD Interface P.C.B.

Guide for checking specific PCBs and modules after assembly.

Block Diagram

SERVO & SYSTEM CONTROL BLOCK DIAGRAM

Block diagram illustrating the servo and system control signal flow.

Block Diagram

AUDIO BLOCK DIAGRAM

Block diagram showing the audio signal paths and processing.

Block Diagram

POWER SUPPLY (1/2) BLOCK DIAGRAM

Block diagram of the power supply circuit (part 1 of 2).

Block Diagram

POWER SUPPLY (2/2) BLOCK DIAGRAM

Block diagram of the power supply circuit (part 2 of 2).

Wiring Connection Diagram

Schematic Diagram

Schematic Diagram Notes

Explanations of symbols, notations, and safety notices used in schematics.

Schematic Diagram

MAIN (MICON) CIRCUIT

Schematic of the Main PCB's microcontroller (MICON) circuit.

Schematic Diagram

MAIN (MPORT/ADC) CIRCUIT

Schematic for the Main PCB's input/output and analog-to-digital converter circuits.

Schematic Diagram

MAIN (CD MOTOR DRIVER) CIRCUIT

Schematic detailing the CD motor driver circuit on the Main PCB.

Schematic Diagram

MAIN (SUPPLY) CIRCUIT

Schematic of the power supply distribution circuits on the Main PCB.

Schematic Diagram

MAIN (DSP/DAMP/HEADPHONE) CIRCUIT

Schematic for the DSP, damping, and headphone amplifier circuits on the Main PCB.

Schematic Diagram

MAIN (ALLPLAY/LAN) CIRCUIT

Schematic of the ALLPLAY and LAN interface circuits on the Main PCB.

Schematic Diagram

CD INTERFACE, TUNER & USB CIRCUIT

Schematics for CD Interface, Tuner, and USB circuits.

Schematic Diagram

PANEL, IR SENSOR & HEADPHONE CIRCUIT

Schematics for Panel, IR Sensor, and Headphone circuits.

Schematic Diagram

SMPS CIRCUIT (1/2)

Schematic diagram of the SMPS (Switching Mode Power Supply) circuit (Part 1).

Schematic Diagram

SMPS CIRCUIT (2/2)

Schematic diagram of the SMPS (Switching Mode Power Supply) circuit (Part 2).

Schematic Diagram

DAB CIRCUIT

Schematic diagram for the DAB (Digital Audio Broadcasting) circuit.

Printed Circuit Board

MAIN P.C.B. (Side A)

Layout diagram of the Main PCB (Side A).

Printed Circuit Board

MAIN P.C.B. (Side B)

Layout diagram of the Main PCB (Side B).

Printed Circuit Board

CD INTERFACE, TUNER, USB & HEADPHONE P.C.B.

Layout diagrams for CD Interface, Tuner, USB, and Headphone PCBs.

Printed Circuit Board

PANEL & IR SENSOR P.C.B.

Layout diagrams for the Panel and IR Sensor PCBs.

Printed Circuit Board

SMPS & DAB P.C.B.

Layout diagrams for the SMPS and DAB PCBs.

Voltage Measurement

MAIN P.C.B. (1/2)

Table of standard voltage measurements for the Main PCB (Part 1).

Voltage Measurement

MAIN P.C.B. (2/2)

Table of standard voltage measurements for the Main PCB (Part 2).

SMPS & PANEL P.C.B.

Table of standard voltage measurements for SMPS and Panel PCBs.

Exploded View and Replacement Parts List

Cabinet Parts Location

Exploded view showing cabinet parts and their locations.

Exploded View and Replacement Parts List

Packaging

Diagram illustrating the product's packaging and included accessories.

Exploded View and Replacement Parts List

Mechanical Replacement Parts List

List of mechanical parts available for replacement.

Exploded View and Replacement Parts List

Electrical Replacement Parts List

List of electrical components available for replacement.
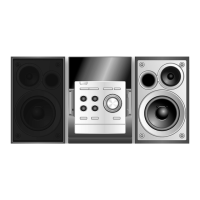
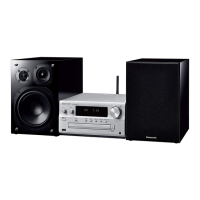
Related product manuals