25
8.2.8. VESA Metals
1. Remove the 4 screws.
2. Remove the 4 VESA Metals.
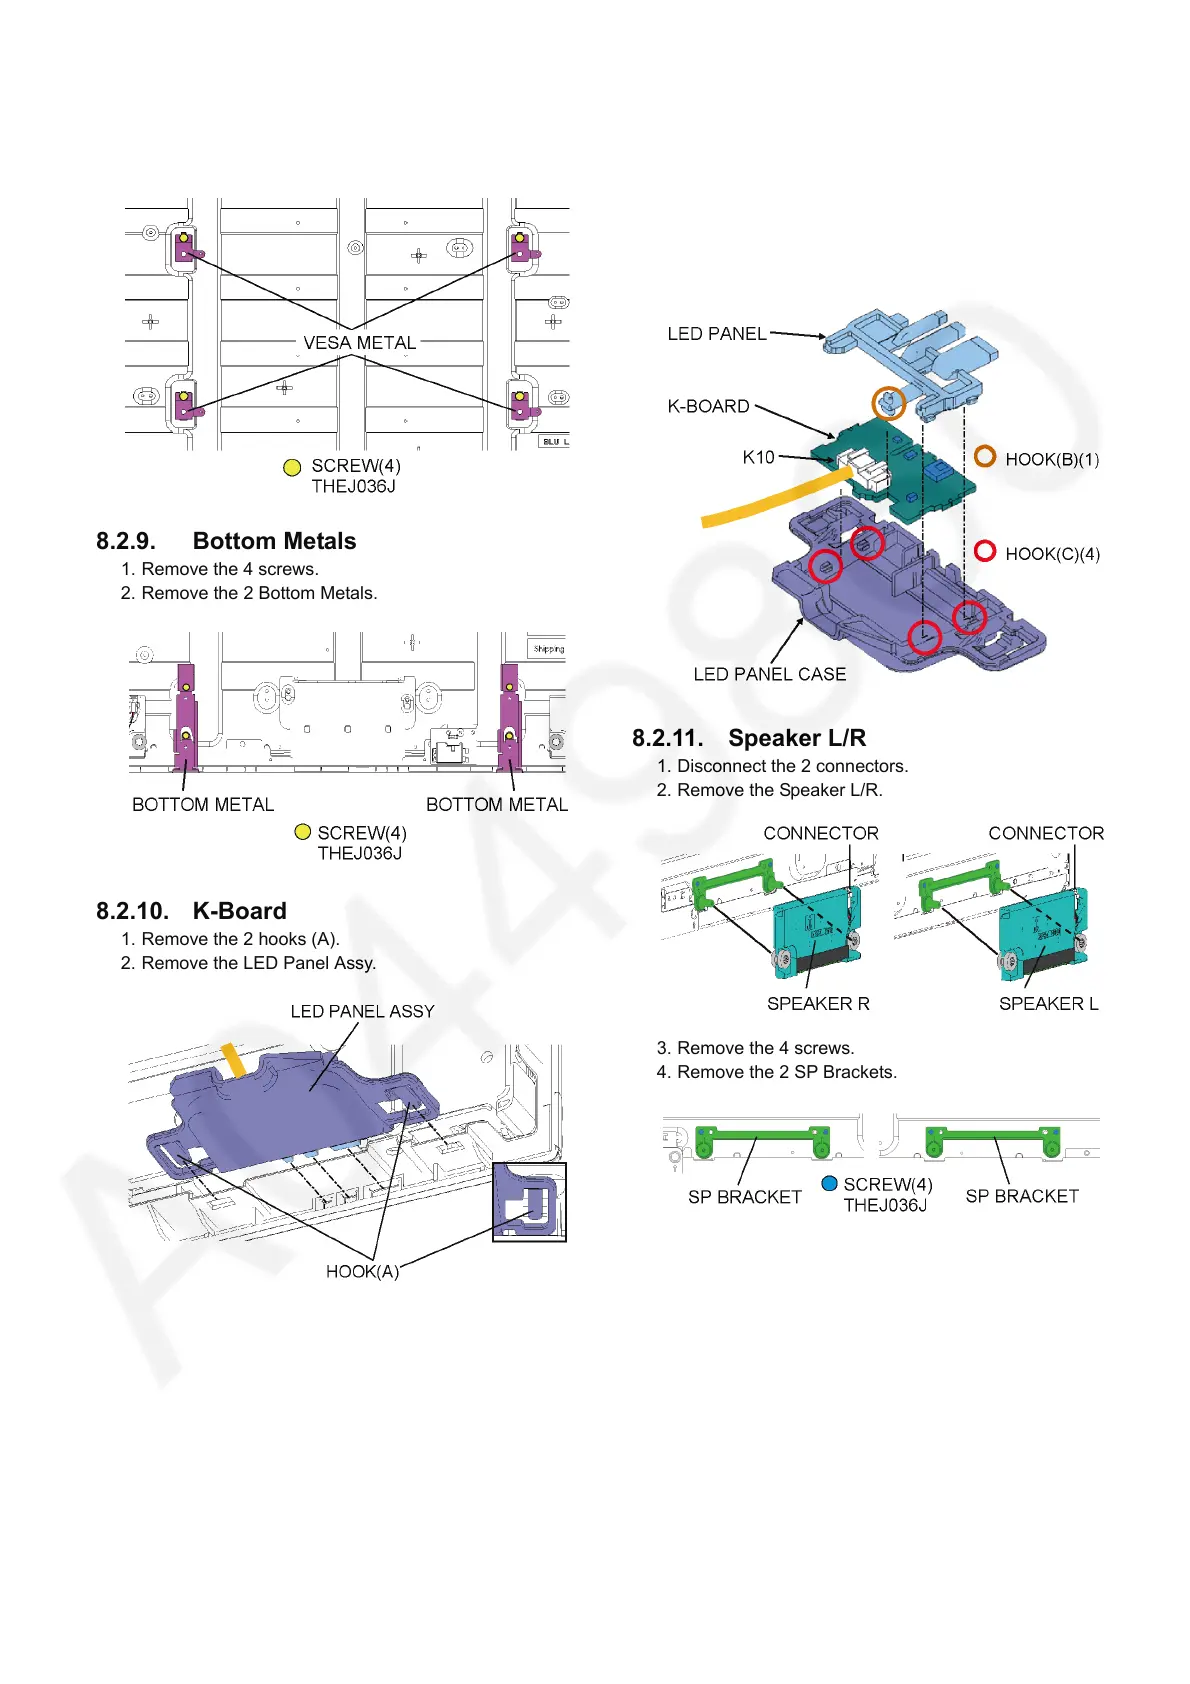
8.2.9. Bottom Metals
1. Remove the 4 screws.
2. Remove the 2 Bottom Metals.
8.2.10. K-Board
1. Remove the 2 hooks (A).
2. Remove the LED Panel Assy.
3. Remove the 1 hook (B).
4. Remove the 4 hooks (C).
5. Remove the K-Board and the LED Panel from the LED
Panel Case.
6. Disconnect the connector (K10).
7. Remove the K-Board from the LED Panel.
8.2.11. Speaker L/R
1. Disconnect the 2 connectors.
2. Remove the Speaker L/R.
3. Remove the 4 screws.
4. Remove the 2 SP Brackets.