23
8 Disassembly and Assembly Instructions
8.1. Remove the Rear cover
1. See PCB Layout (Section 3)
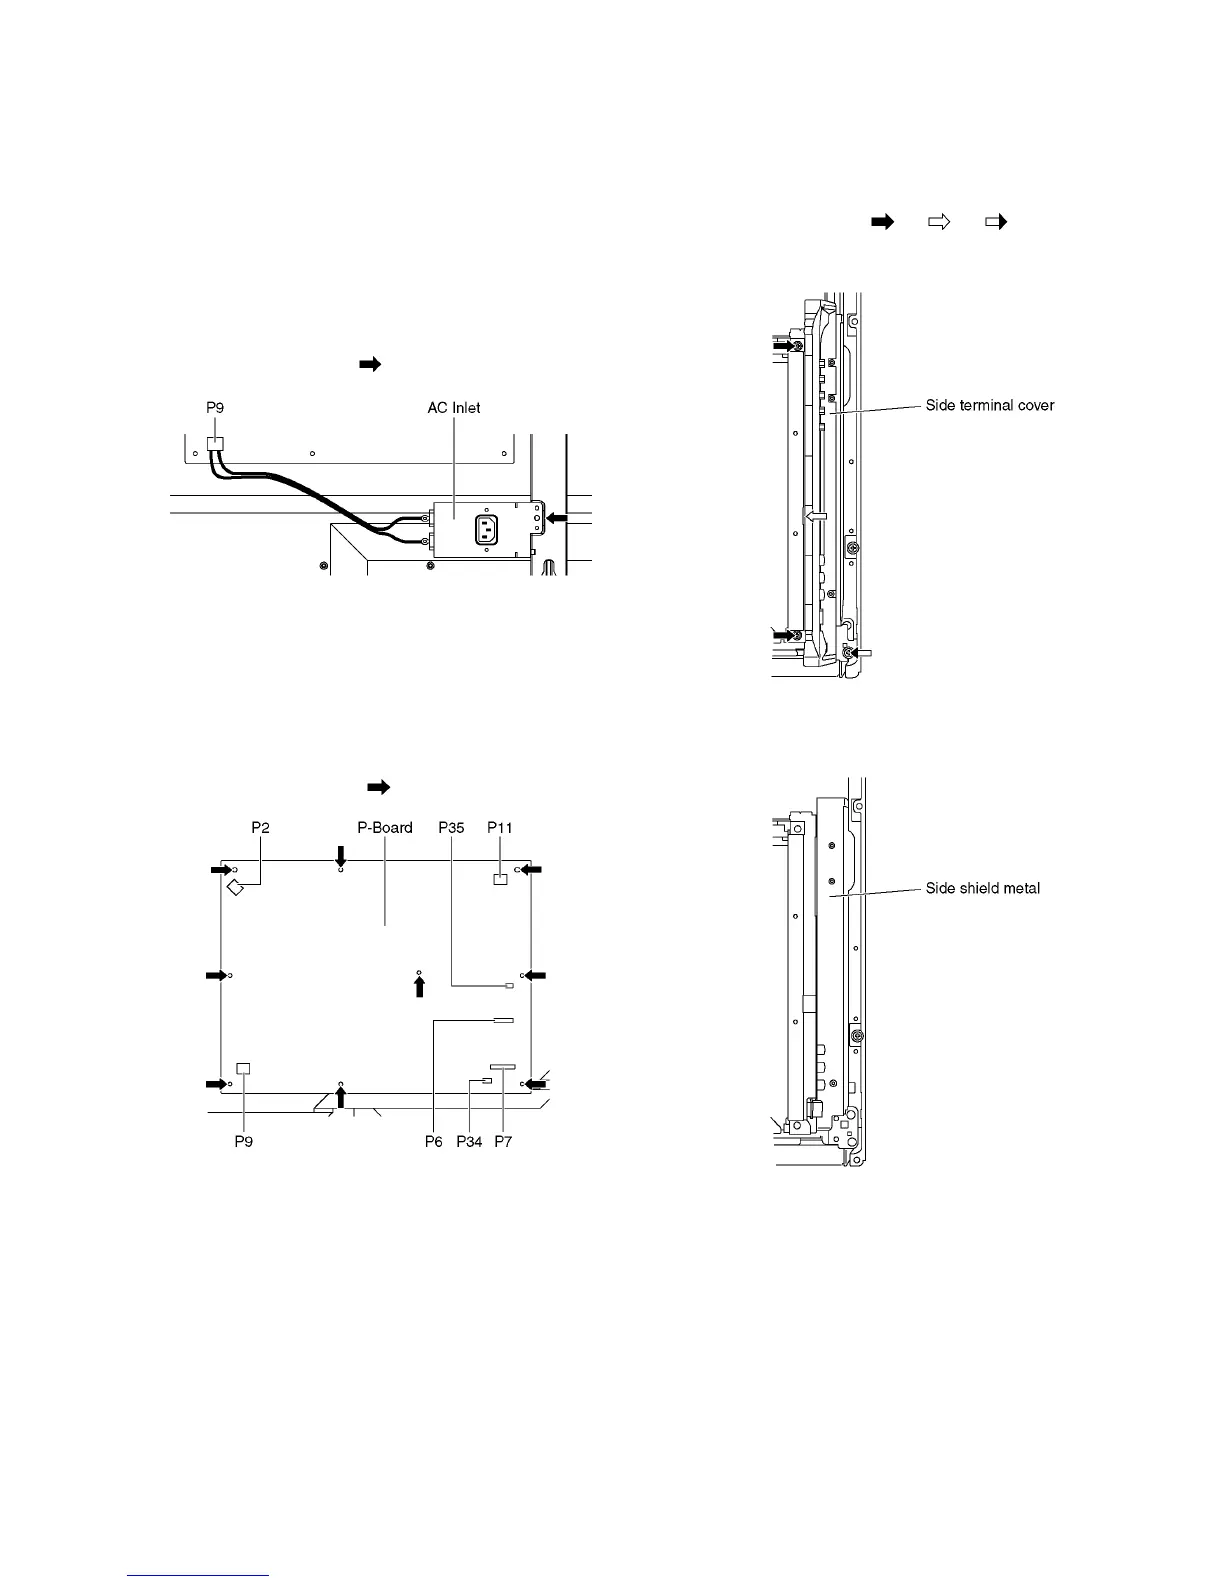
8.2. Remove the AC inlet
Caution:
To remove P.C.B. wait 1 minute after power was off for dis-
charge from electrolysis capacitors.
1. Unlock the cable clampers to free the cable.
2. Disconnect the connector (P9).
3. Remove the screw (×1 ) and remove the AC inlet.
8.3. Remove the P-Board
Caution:
To remove P.C.B. wait 1 minute after power was off for dis-
charge from electrolysis capacitors.
1. Unlock the cable clampers to free the cable
2. Disconnect the connectors (P2, P6, P7, P9, P11, P34 and
P35).
3. Remove the screws (×9 ) and remove the P-Board.
8.4. Remove the Side terminal
cover and the Side shield metal
1. Remove the screws (×2 , ×1 , ×1 ).
2. Remove the Side terminal cover.
3. Remove the Side shield metal.