24
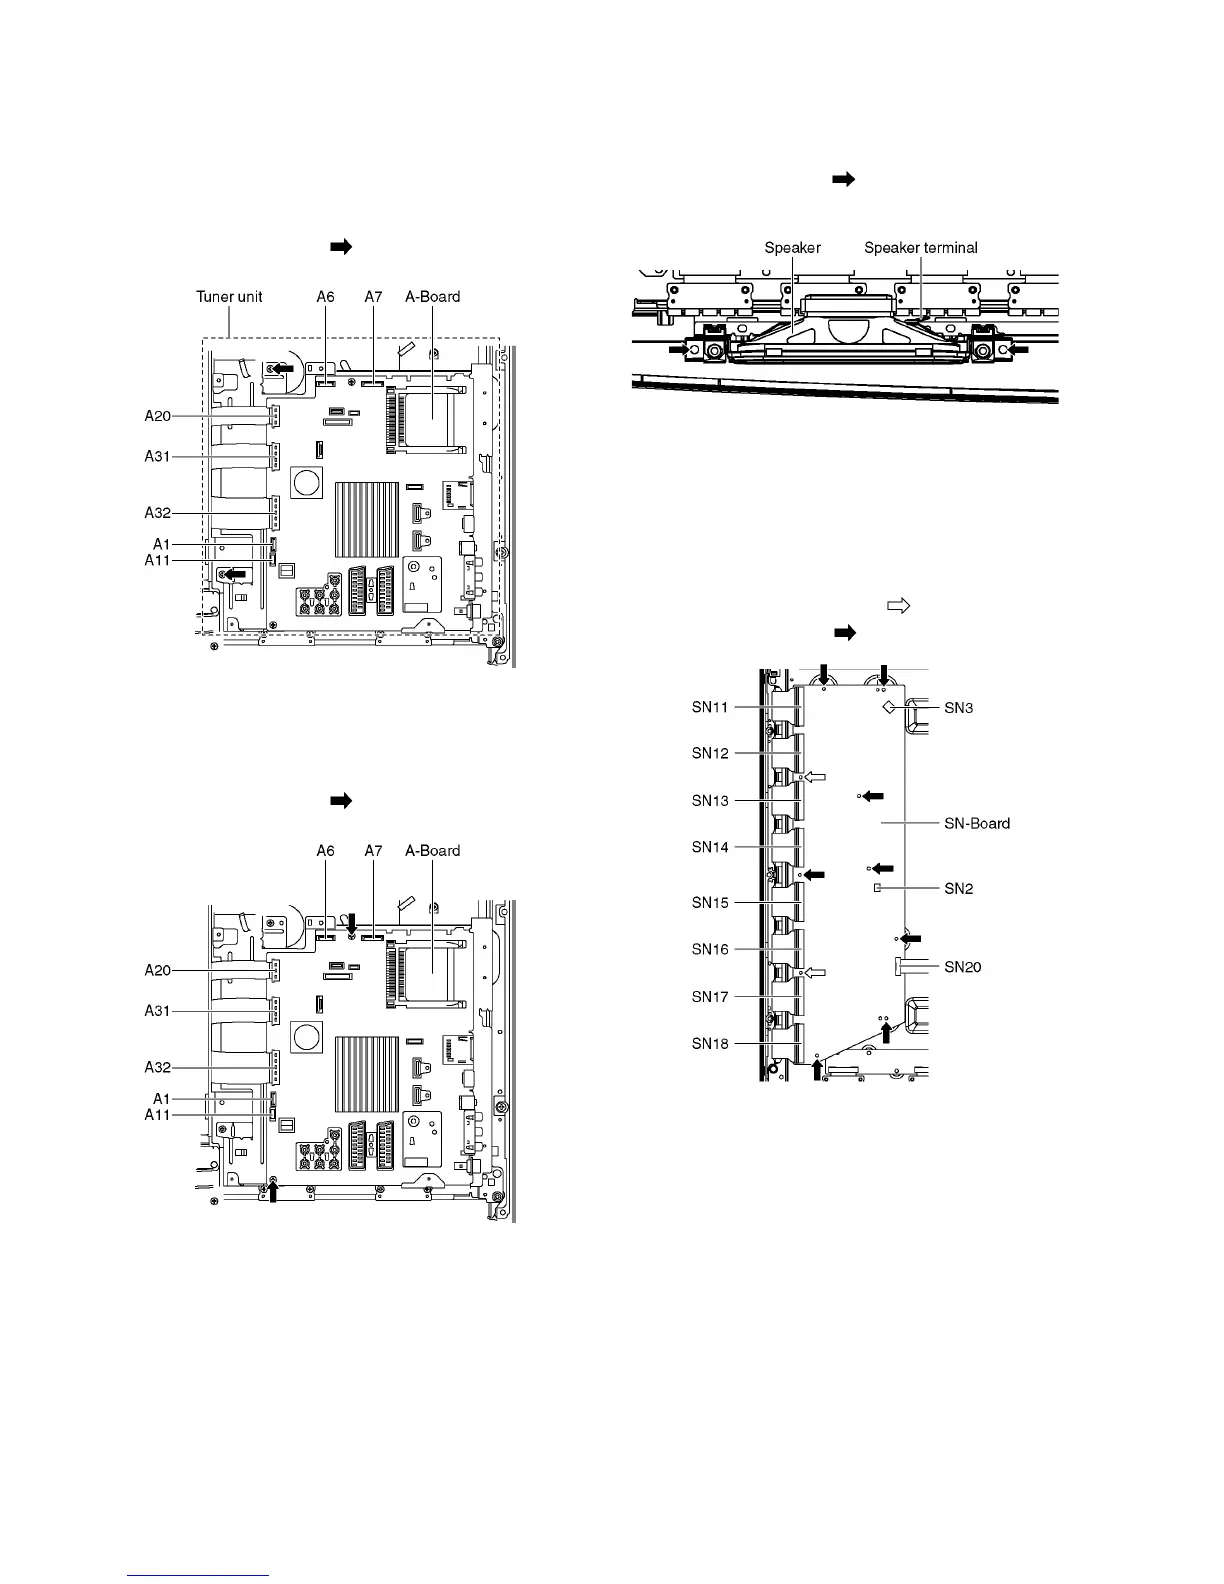
8.5. Remove the Tuner unit
1. Remove the Side terminal cover and the Side shield
metal. (See section 8.4.)
2. Unlock the cable clampers to free the cable.
3. Disconnect the connectors (A1, A6, A7 and A11).
4. Disconnect the flexible cables (A20, A31 and A32).
5. Remove the screws (×2 ) and remove the Tuner unit.
8.6. Remove the A-Board
1. Remove the Tuner unit. (See section 8.5.)
2. Remove the screws (×2 ) and remove the A-Board.
8.7. Remove the Speakers
1. Unlock the cable clampers to free the cable.
2. Disconnect the Speaker terminal.
3. Remove the screws (×2 each) and remove the Speak-
ers (L, R).
8.8. Remove the SN-Board
1. Remove the flexible cables (SN11, SN12, SN13, SN14,
SN15, SN16, SN17 and SN18) connected to the SN-
Board.
2. Disconnect the connectors (SN2 and SN3).
3. Disconnect the flexible cable (SN20).
4. Remove the molding props (×2 ).
5. Remove the screws (×8 ) and remove the SN-Board.