Indicates that "Press-to-talk" mode is on
(page 16).
Indicates that the doorphone's LED lights
are on (page 23
).
3.3 Battery installation
– USE
ONLY rechargeable Ni-MH batteries AAA (R03)
size.
– Do NOT use Alkaline/Manganese/Ni-Cd batteries.
– Confirm correct polarities (
, ).
Note:
R Use the supplied rechargeable batteries
(Ni-MH
ONLY). When replacing batteries, we recommend
using batteries that match the specifications of the
batteries listed on page 33.
R Wipe the ends of batteries (
, ) with a dry cloth.
R Avoid touching the ends of batteries
(
, ) or the
unit contacts.
3.4 Charging the sub monitor
Only connect the charger with the supplied Panasonic
AC adaptor (page 3
).
AC adaptor connections
*1 Press plug firmly.
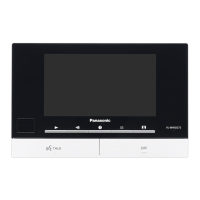
R Connect the charger to the power outlet, and then
place the sub monitor in the charger to charge it.
Charging usually takes about 8 hours.
A Charge indicator
– when charging: lights
–
when charging is completed: off
B Hook
R Charging may take longer in the following situations.
– When the operating temperature is low
(page 33).
– When the sub monitor is picked up off the charger
or used during charging.
– When the sub monitor’s signal is out of range
(
) (page 12).
R The sub monitor does not overcharge even if it is
continuously placed in the charger.
Battery level
Icon Battery level
High
Medium
Low
Needs charging
R See page 33 for a guide on operating times for the
sub monitor.
Note:
R When the sub monitor is off the charger or the AC
adaptor
is disconnected for 1 week or more, remove
the batteries in order to maintain battery performance
and prevent the batteries from discharging.
– Recharge the batteries before using the sub
monitor again.
3.5 Wall mounting
Note:
R Make sure that the wall and the fixing method are
strong enough to support the weight of the unit.
R Drive the screws (locally procured) into the wall.
13
3. Preparation

 Loading...


