7
3. The first time you power on the DPF, a calibration will be performed to set the Touch Screen
sensors. Wait until the calibration is completed before touching the screen or pressing a key on
the remote control.
4. Select the desired language for the user interface display.
5. After the initial start up screen is displayed, a slideshow will automatically begin displaying the
photos that are stored in the internal memory.
6. To view your own photos, insert a memory card or USB flash drive containing your photos into the
appropriate slot/port on the DPF, and then select
Start Slideshow on the memory source option
screen.
CAUTION: The cards and USB flash drive will only fit in one direction; do not force them as this
will damage the card reader or USB port.
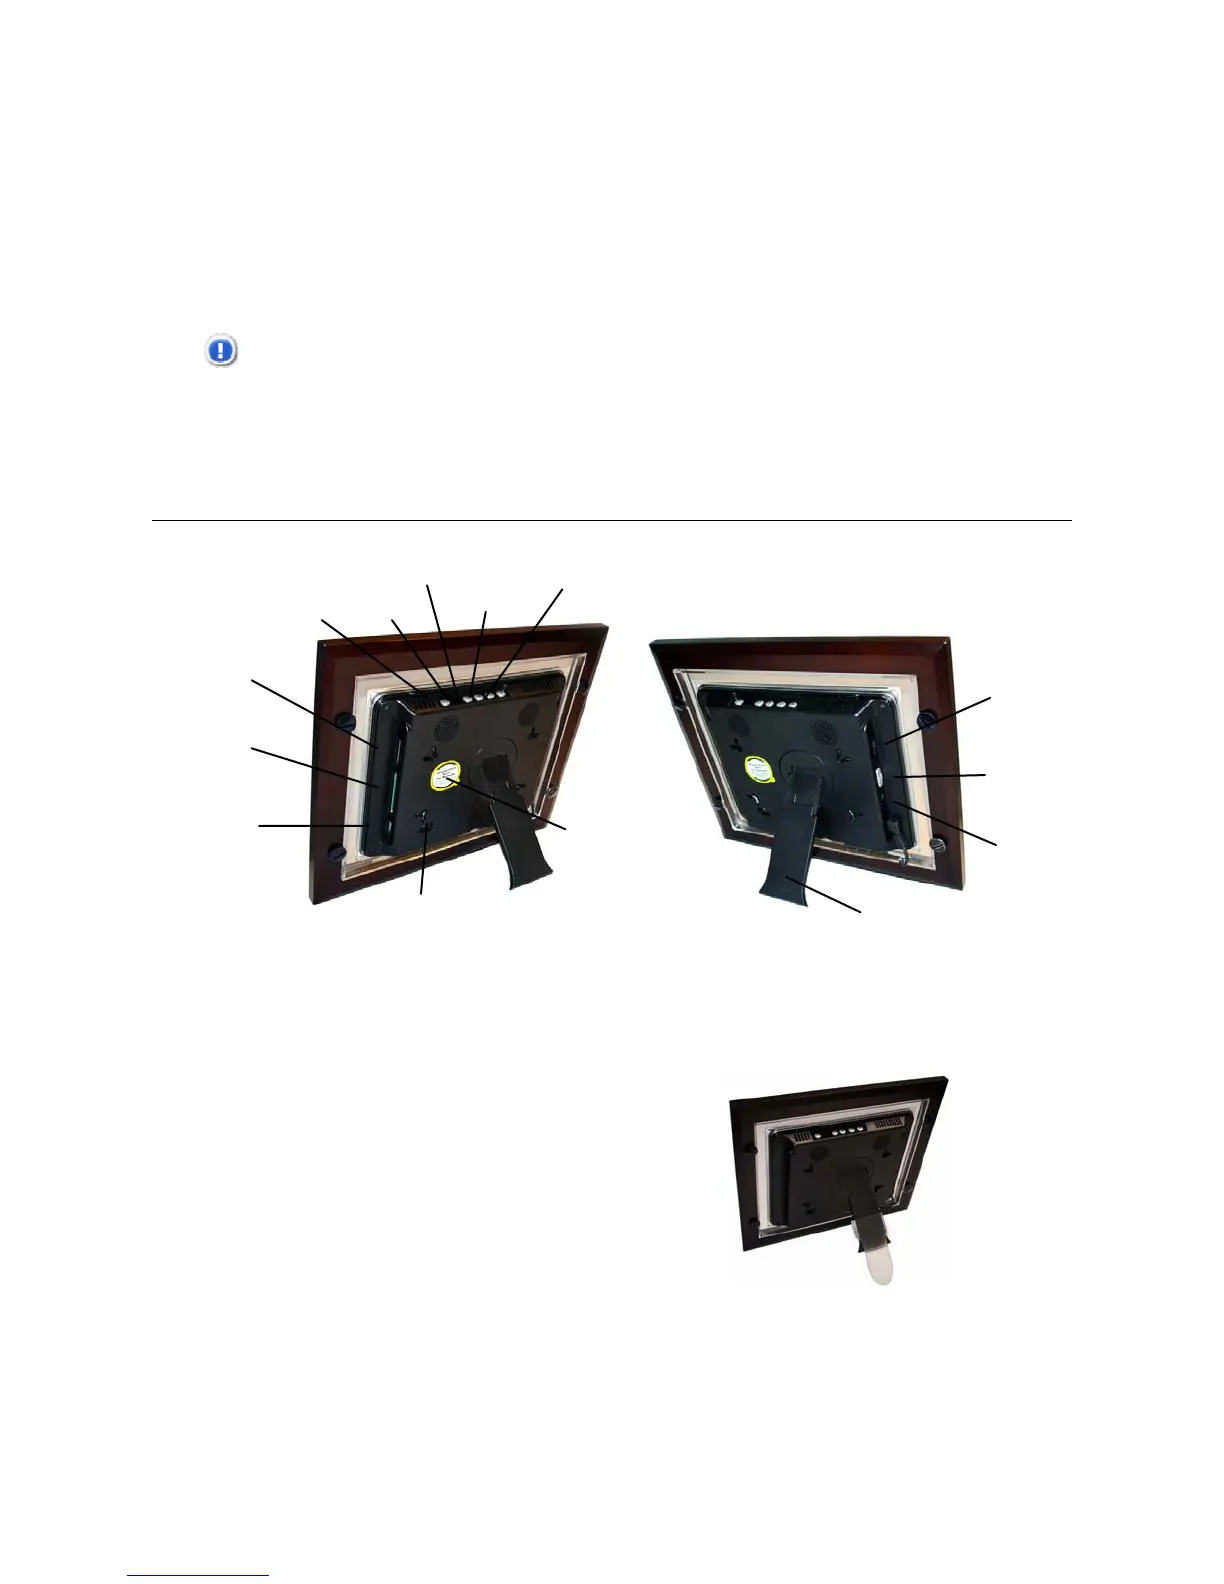
Overview of the DPF
(The memory card slots, ports, and jacks in your DPF may be different than those pictured here.)
Adjustable Stand Extension
A plastic stand extension has been included with this
DPF allowing you to achieve more viewing angles as
desired.
Attach the Extension
1. Lay the frame face-down on a solid flat surface.
2. Hold the extension at a sideways angle and place one side over the side of the stand, and
then press the other side down until the extension snaps into place.
Adjustable stand
Magnetized area
for storing
Remote Control
USB Host
Memory card slot
MENU
EXIT
ENTER
►Right arrow
◄Left arrow
Mini USB Device
Compact
Flash slot
Brightness control
Power ON/OFF
DC power jack
 Loading...