16
Use the plastic sheath when scanning originals that are sized
or shaped other than the standard 3.5”x5” or 4”x6”. Depending
on the shape, you may want to perform additional manual
cropping on the scanned image, using your own photo editing
software, to achieve your desired final image.
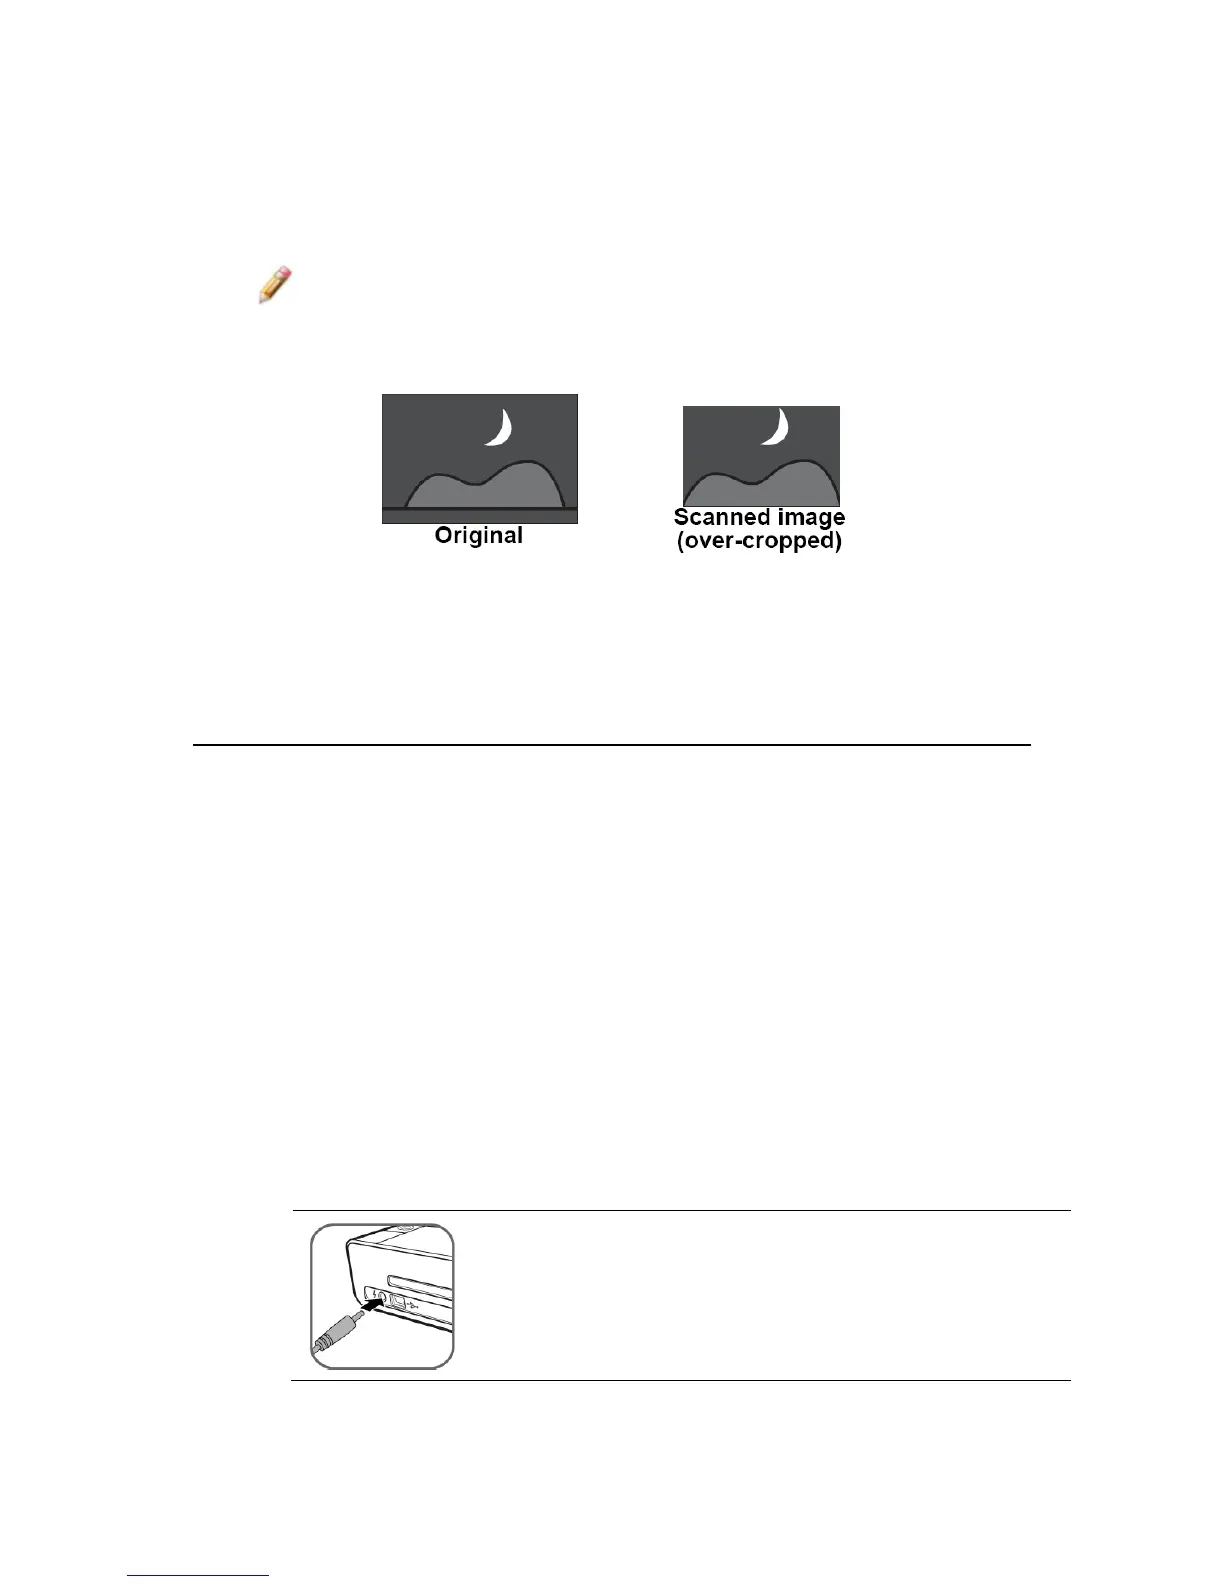
Note: When scanning darker originals (for example, a photo of
the night sky), over-cropping may occur. Please insert the
original in a different direction (orientation) and try again.
ConnectPhotoLinkScannertoaPC
By connecting the scanner to a computer, you can access the
scanned images on the memory card directly, or use the scanner
as a memory card reader, so that you can freely copy, paste or
delete files to and from the memory card using the computer.
PCSystemRequirements
Operating system:
Windows 2000 Pro, XP, Vista or later version
USB Port Supported:
USB 1.1 or 2.0 port
1. Connect the plug on the power adapter cord
to the power connector on the scanner.
 Loading...


