20
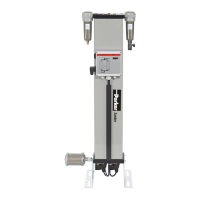
Medium Flow Compressed Air Dryers - IOMI.
SIDE MOUNTING THE REAR PANEL
For installations where space is limited (for example if the dryer is placed against a wall), it maybe benecial to install the rear panel assembly to the
side of the dryer to provide easier access to the electrical control box, dewpoint sensor & control valves.
Important Notes:
• Piping between the 5/2 valves and cylinders requires exchanging with longer piping (not supplied). e length of piping required is tabled below.
• e values quoted are for the longest hose needed and for certain models may be trimmed shorter for neatness.
• PTFE hygrometer piping, must be a single length of piping - no joins. Deviation may result in an incorrectly displayed dewpoint.
Dryers manufactured prior to 05/10/2021 Dryers manufactured after to 05/10/2021
Nylon
Ø 6mm
Nylon
Ø 8mm
PTFE
Outer Ø 4mm
Inner Ø 2mm
(1mm wall section)
Nylon
Ø 6mm
Nylon
Ø 8mm
PTFE
Outer Ø 4mm
Inner Ø 2mm
(1mm wall section)
CDAS / OFAS / FBP
HL 050 - HL 070
720mm
(6 x)
825mm
(1 x)
1000mm
(1 x)
720mm
(6 x)
350mm
(1 x)
1200mm
(1 x)
CDAS / OFAS / FBP
HL 075 - HL 085
850mm
(6 x)
970mm
(1 x)
1000mm
(1 x)
850mm
(6 x)
570mm
(1 x)
1200mm
(1 x)
Procedure - Dryers Manufactured Prior to 05/10/2021
• Cut new 6mm & mm piping based upon lengths shown in table above
• Make note of the piping identication number on each length of 6mm piping and where
each pipe is connected
• Ensure each length of new piping has a corresponding identication number
• At the 5/2 control valves - Disconnect the 6 x 6mm pipes feeding the 2 x inlet cylinders
and 1 x exhaust cylinder
• At the 5/2 control valve manifold block - Disconnect the 8mm control air feed pipe
• Remove the 4 retaining screws attaching the backplate to the dryer
• Carefully rotate the backplate 180 degrees and re-attach the backplate to dryer using 2 of
the existing retaining screws
• Connect new length of 8mm pipe between the 5/2 manifold & dryer control air feed point
on inlet casting
• Connect the new lengths of 6mm piping to 5/2 control valves, ensuring the identication
labels and piping conguration matches those used originally (see image).
• Replace 4mm PTFE hygrometer piping with a longer, single length of 4mm PTFE.
Procedure - Dryers Manufactured After 05/10/2021
• Cut new 6mm & mm piping based upon lengths shown in table above
• Make note of the piping identication number on each length of 6mm piping and where
each pipe is connected
• Ensure each length of new piping has a corresponding identication number
• At the 5/2 control valves - Disconnect the 6 x 6mm pipes feeding the 2 x inlet cylinders
and 1 x exhaust cylinder
• At the control air lter inlet - Disconnect the 8mm control air feed pipe
• Remove the 4 retaining screws attaching the backplate to the dryer
• Carefully rotate the backplate 180 degrees and re-attach the backplate to dryer using 2 of
the existing retaining screws
• Connect new length of 8mm pipe between the control air lter inlet & dryer control air
feed point on inlet casting
• Connect the new lengths of 6mm piping to 5/2 control valves, ensuring the identication
labels and piping conguration matches those used originally (see image).
• Replace 4mm PTFE hygrometer piping with a longer, single length of 4mm PTFE.
Standard Rear Panel
(Rear View)
Side Mounted Rear Panel
(Front View)
Side Mounted Rear Panel
(Side View)
Side Mounted Rear Panel
(Rear View)
Inlet
Cylinder 2
Exhaust
Cylinder 3
Inlet
Cylinder 1
2
1
6
5
4
3
2
1
3
4
6
5
 Loading...