Parker Hannifin Corporation
Hose Products Division
Wickliffe, OH
10
Technical Manual
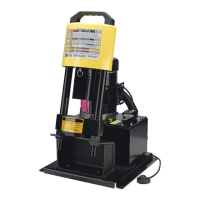
Karrykrimp
Bulletin 4480-T30-US
Mark the hose insertion depth
and push hose into fitting
until the mark on the hose is
even with the end of the shell.
Lubricate hose if necessary,
however, DO NOT lubricate if
using spiral hose. See Hose
Insertion Depth table below.
Place shell onto end of
hose and make sure
the end of the shell
lines up with the Inser-
tion Depth mark.
Push hose onto the
88 Series fitting until
the shell bottoms
against the fitting’s
stop ring or hex.
Lubricate hose if
necessary.
Position the hose and fitting in dies from below.
Rest bottom of coupling
on die step using the
PARKALIGN
®
feature.
Crimping instructions for 26, 43, 81 and HY Series Fittings
Pull pin at the top
of pusher to swing
it back. Place
unitized die-train
into base plate.
See decal on
crimper for proper
die set.
Important:
Lubricate the
crimper’s die bowl
using a MOLY-
GRADE lithium-
base grease.
Place correct die ring
on top of the dies. See
decal on crimper for
proper die ring.
Position pusher by
replacing the pin and
operate pump until the die
ring bottoms out. Release
pressure within the pump
— remove finished
assembly.
Note: Minikrimp,
Karrykrimp & Karrykrimp
2 have several types of
power sources, all of which
are separate units from the
crimping machine.
For 81 Series Shells with 88 Series Fittings
2
Insert unitized die train
4
Place die ring and crimp
5
Measure crimp diameter
Standard
Parkrimp Series
26 Series
Crimp
Diameter
Measure crimp diameter on the flat surfaces of the
crimped shell, referenced in the illustration
to the left. Reference decal on crimper for crimp
diameters. Never use hose assemblies with
incorrect crimp diameters.
Important: Hose assemblies must be inspected for
cleanliness and free of all foreign particles.
Hose Insertion Depths in Inches
Hose by
Dash Size
Fitting Series
26 43 81 HY
inch inch inch inch
-4 0.8125 0.8125 1.4375
-5 0.8125 0.9375
-6 0.8125 1.1250 1.4375
-8 0.8125 1.3125 1.5000
-10 0.8750 1.5625 1.5000
-12 0.8750 1.5000 1.1250 1.6250
-16 1.0000 1.7500 1.2500
-20 1.8750 1.3125
1
Mark insertion depth and push on tting
3
Position the tting
Crimping Instructions
Note: See Hose Insertion Depth table at the left.
Important: Hose assemblies must be inspected for
cleanliness and free of all foreign particles.
Note: Parker Hannifin will not accept responsibility
for the operations of, or provide warranty coverage
for, a crimper that is operated by a power unit other
than equipment supplied by Parker Hannifin for the
expressed purpose of operating the designated
crimper.
www.comoso.com
 Loading...