33
4.3
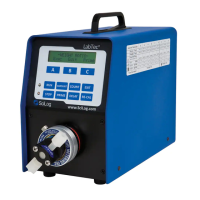
Pump Tube Installation
1.
Open the pump head by moving the black loading lever 180° to the left. If you are going to use
the upper pump channel, slip the tubing into the upper channel; this is over the pump roller
cage. If the lower pump channel is used, feed the tubing through the lower
channel; this is under the pump roller cage.
2.
Lock the tubing in place by pushing the loading lever 180° to the right. The tube retainer spring
will automatically place the correct tension on the pump tubing to prevent tube “walking”.
3.
With the pump head closed, lightly pull the two ends of the tubing in opposite
directions and away from the pump head. This pulling action insures that the pump tubing is
taut and within the pump channel.
4.4
Pump Tube Replacement
1.
The pump tubing section located in the pump head should be advanced at regular time inter-
vals, i.e.: daily, if the LabTec™ is heavily used.
2.
When advancing pump tubing, the used pump tube section must be moved to the pump
discharge side, i.e. dispensing side. The used pump tube section is weakened and tends to
collapse when placed on the suction side of pump head.
3.
When you advance or replace the pump tubing, break-in the new pump tube section by letting
the pump run for a few minutes before attempting RE-CAL. The pump output will have
stabilized during the break-in period, thus your calibration will be more accurate.
Note: Do NOT mount or dismount the pump head while the LabTec™ is powered. Do NOT
change pump tubing while the LabTec™ is powered. When using both upper
and lower pump channels simultaneously, the same type of tubing should be used in
each channel.

 Loading...