GB 25
the next
watering day setting (e.g. MO, TU) until the setting is completed (see
Fig. E5). Press the button
5
to confirm.
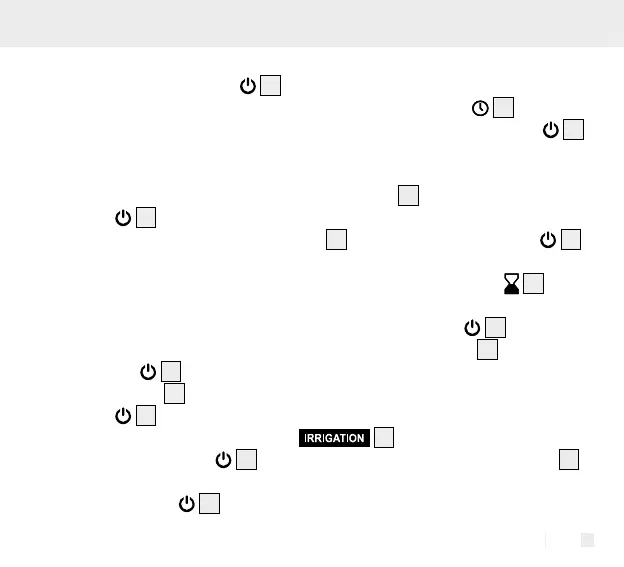
5. Enter the watering start time setting. The program start time
14
will be
flashing. If you need to set the watering start time, just press the button
5
to enter.
6. The hour for starting the watering time will flash on screen. Set the hours for
starting the watering time with the rotary control
6
and confirm with the
button
5
. The minute for starting the watering time will flash on screen.
Set the minutes with the rotary control
6
and confirm with the button
5
(for example 6:20) (see Fig. E6).
7. Enter the watering duration setting. Run time - watering duration
15
will
be flashing.
8. If you need the watering duration setting, press the button
5
to enter.
9. The watering duration hours flashing, turn the rotary control
6
to set. Press
the button
5
to confirm. The watering duration minutes flashing, turn the
rotary control
6
to set (for example 1 hrs 5 mins) (see Fig. E7). Press the
button
5
to confirm.
10. Enter watering interval time setting
20
will be flashing at the same
time. Press the button
5
to set irrigation time. Turn the rotary control
6
to set minutes (max. 19 minutes) (for example 18 minutes) (see Fig. E8).
Press the button
5
to confirm.