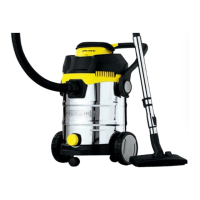
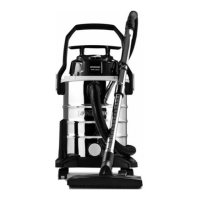
Never vacuum without a lter!
To store the suction set during
breaks, push together the telescopic
suction hose (17) and plug the suc-
tion pipe holder (18) into the socket
on the motor housing (see picture
below).
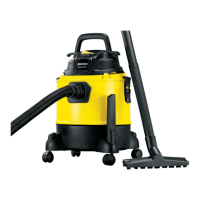
Operation
Fully unwind the suction hose (
19) before commencing work.
Switching on/off
Connect the mains plug.
Do not vacuum without a lter!
(How to insert the lter is described
in the chapters “dry vacuuming“
and “wet vacuuming“).
Switching On:
On/Off Switch (see
6) In position “I“.
Switching Off:
On/Off Switch (see
6) In position “0”.
Dry vacuuming
The appliance is supplied with the
folded lter (
23) tted.
Vacuuming with a uted lter:
1. For dry vacuuming, t the uted lter
(23) onto the lter basket (27) on the
motor head (3). The sealing lip that
curves upward must point away from
the motor head.
2. Fit the lter cover (22) and lock it with
a light turn:
Lock the lter cover
Unlock the lter cover
Vacuuming with the paper lter
bag:
To avoid the uted lter becoming
clogged, we recommend the addi-
tional use of the brown paper lter
bag.
1. Fit the uted lter (23).
2. Fold the side aps on the paper lter
bag (24) down on the perforation.
3. Completely unfold the paper lter bag
(24) and pull it over the internal suc-
tion nozzle (8) in the stainless steel
container (9). The connector on the
suction nozzle must be completely en-
closed by the sealing ring on the lter
bag opening.
A ne dirt lter bag made of micro
lter eece is also optionally avail-
able, which can be used in place
of the included paper lter bag (see
“Spare parts/Accessories”).
Vacuuming with the dry lter
(fabric lter bag, optionally
available):
The anti-tear fabric lter bag, which is
optionally available (see “Spare parts/Ac-
cessories”), is suitable for vacuuming large
dirt particles.
1. Place the foam lter (
21) on the lter
basket (
27) (see “Wet Vacuuming”).
2. Pull the fabric lter bag over the lter
basket.