471-958-240709
7
IE CYGB
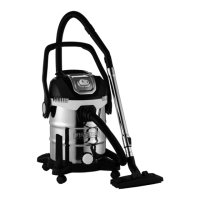
Overview
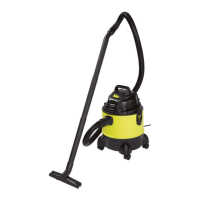
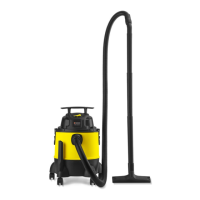
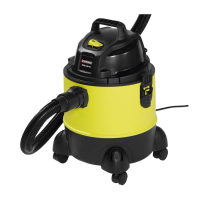
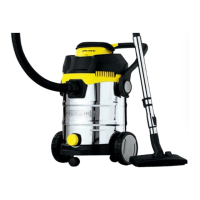
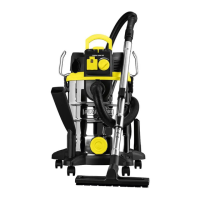
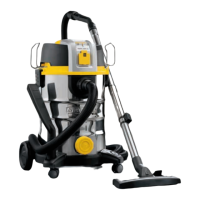
Housing
1 Motor housing
2 Carrying handle
3 On/off switch
4 4 Pin ports for accessories
5 Suction connection
6 Stainless steel container
7 Drainage outlet
8a 2 feet with castors and accessory
fi ttings
8b 2 feet with wheels and accessory
fi ttings
9 Cable holder
10 Sealing clip
11 Blow connection
12 Mains power cable
13 Telescopic suction pipe
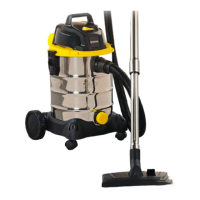
Accessories
14 Vacuum tube holder
15 Vacuum hose
16 Handle with air regulation
17 Air diffuser
Filter
18 Foam fi lter for wet vacuuming
19 F
ilter cover
20 Fluted fi lter for dry vacuuming
21 Paper fi lter bag for fi ne dust
Nozzles
22 Switchable household nozzle
for vacuuming carpets
for vacuuming smooth surfaces
23 Crevice nozzle
Delivery Contents
Unpack the equipment and check that it is
complete.
The equipment is supplied with the motor
head on (see
no. 1).
To take off the motor head and remove the ac-
cessories, open the fi xing clips (see
no. 10).
-
Motor housing
-
Carrying handle
-
Stainless steel container
-
2 feet with castors and accessory fi ttings
- 2 feet with wheels and accessory fi ttings
-
Telescopic suction pipe
- Vacuum hose
- Handle with air regulation
-
Air diffuser
- Foam fi lter
- Fluted fi lter + fi lter cover (already mounted)
- Paper fi lter bag
- Switchable household nozzle
- Crevice nozzle
- 6 cross-head screws
Dispose of the packaging material in a
proper manner.
Assembly
Pull out the mains plug.
Danger of electric shock.
1. Screw on the carrying handle (2)
with the enclosed cross-head
screws.
2. Place the feet (8a+b) on the casing:
-
The feet with the swivel castors
(8a) in the sockets on the front of
the container (6)
- The feet with the wheels (8b) with
the imprinted numbers
+
into the corresponding holes on the
back of the container (see small pic-
ture above).
3. Attach the feet using the enclosed
cross-head screws.
4. Fit the motor head (1) onto the
stainless steel container (6) (see
picture
) and fi x it with the fi xing
clips (10).
5. Plug the air diffuser (17) into the
blow connection (11) (bayonet fi x-
ing).
6. Fit the accessories: