6
EN
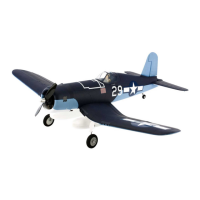
Installing Wings
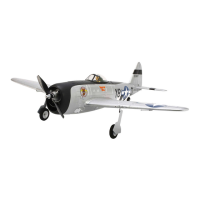
Installing Horizontal Tail
1. Install tube in hole in fuselage.
2. Install left horizontal tail on tube.
3.Installlefthorizontaltailinfuselagemount.
4. Install right horizontal tail on tube, in mount and on connector with left tail
panel.
5. Apply 4 pieces of tape on fuselage mounts and top and bottom
of horizontal tail.
6. Attach clevis to elevator control horn
(seemanualinstructionsforclevisconnection).
7.Whenneeded,disassembleinreverseorder.
1.Whereinstalled,removecanopyhatchfromfuselage.
2. Turn aircraft over so bottom of fuselage faces up.
3.Putwing’sguidepinsinfuselageplateholes.
4.Whereused,putaileron,apandlandinggearconnectorsinholeinfuselage.
Note:Makesureconnectorsdonotfalloutoffuselageafterwingisinstalled.
5.Alignandattachwingtofuselageusing3screws.
CAUTION: Do NOT crush or otherwise damage wiring when attaching
wing to fuselage.
6. Turn assembled fuselage and wing so the bottom of the wing is down.
7.Whereused,connectaileron,apandlandinggearconnectorstothereceiver
or Y-harnesses.
Note: There is no difference between 2 connections on a Y-harness. Left and
right servo connectors do not have to be connected to a particular side of a
Y-harness.
8.Whereneeded,disassembleinreverseorder.
Note: Not to scale. Not all wiring
is shown. Tape is not shown.
 Loading...