8
EN
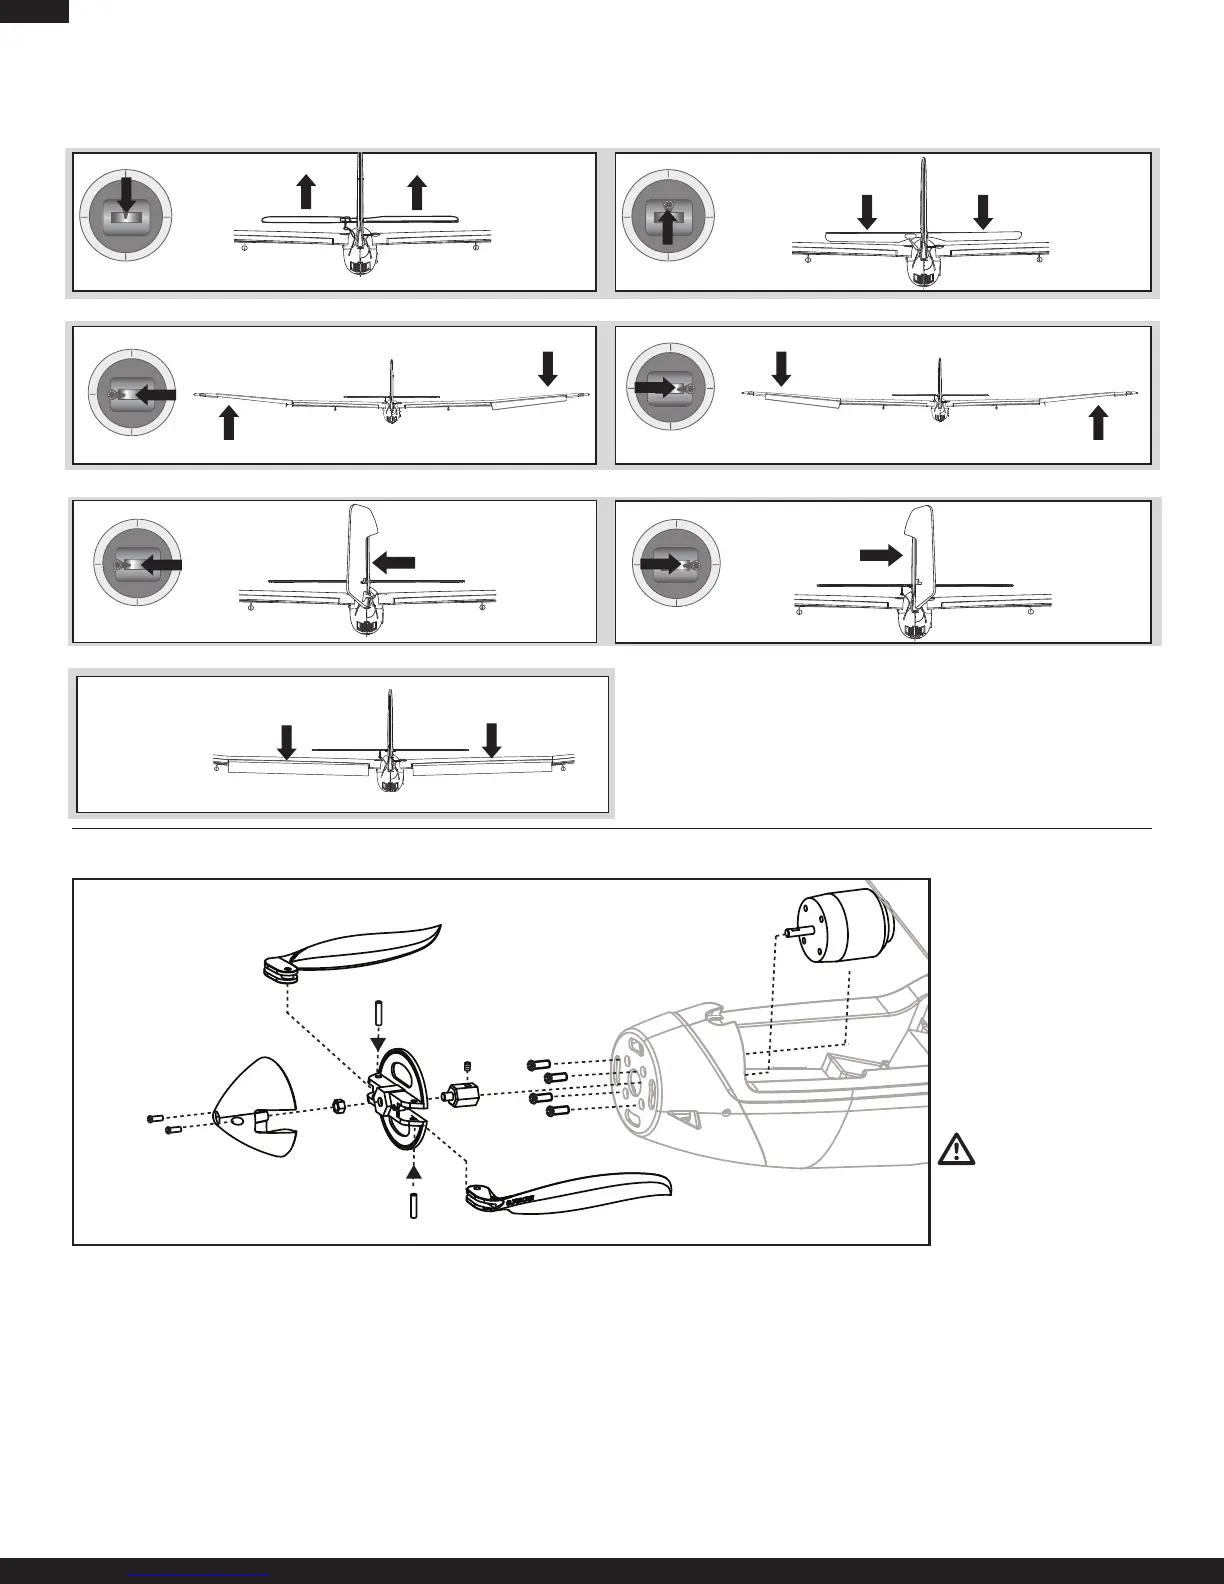
Elevator down
Rudder left
Rudder right
Disassembly
1. Remove and keep 2 screws from the spinner (using a #0 screwdriver).
2. Remove spinner from the backplate.
Note: Removing the spinner may let blade pins fall out of the backplate.
3. Removeandkeep2pinsfromthepropellerbladesandthebackplate.
4. Remove 2 propeller blades from the backplate.
5. Remove hex nut from the backplate and spinner nut.
6. Loosensetscrewasmallamountinspinnernut.
7. Remove spinner nut from motor shaft.
8. Remove and keep 4 screws from cowling and motor.
9. DisconnectmotorwireconnectorsfromESCconnectors.
10. Remove motor from inside fuselage.
Assembly
1. ConnectmotorandESCwireconnectorssowirecolorsalign.
2. Install motor in cowling using 4 screws.
3. Putspinnernutonmotorshaft.
4. Align setscrew in spinner nut with flat on motor shaft and fully tighten
setscrew.
5. Attach backplate to spinner nut using hex nut.
6. Attachpropellerbladestobackplateusingpinssothatpropellerslieat
against the fuselage.
Note: Fully install pins in the backplate. Pin ends should not show above
the edge of the backplate holes.
7. Fully install the spinner on the backplate using 2 screws.
Service of Power Components
CAUTION: DO NOT handle the
motororESCwhiletheightbat-
teryisconnectedtotheESC.Personal
injury could result.
Bind your aircraft and transmitter before doing these tests. Move the controls on the transmitter to make sure aircraft control surfaces move correctly.
Control Direction Test
Rudder
Elevator
Aileron
Elevator up
Aileron left Aileron right
Flap switch
Flaps
 Loading...