PaymentCloud LLC. • 800-988-2215 • support@paymentcloudinc.com
Table of Contents
Additional Information
3V.022025
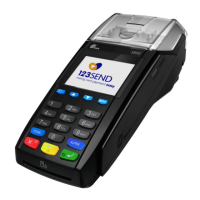
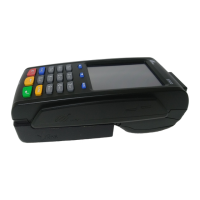
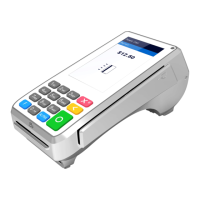
PAX SP30
User Manual & Setup Guide
Spec Sheet
Shop PAX SP30
Connect to Ethernet
How to Load Paper Roll
The PAX SP30 lacks a built-in thermal receipt printer. As such, it
is not necessary or possible to load paper rolls into this device.
How to Turn On/Off
1. Power On: Your PAX SP30 will automatically power on when
connected to a working power source.
2. Power Off: Disconnect your PAX SP30 from its power source.
How to set up an Ethernet
1. Plug your Ethernet cord into the red port on your payment
terminal hub and the power cord into the power port.
2. Ensure the other end of your power cord is plugged into your
power source.
3. Plug the other end of your Ethernet cord into a WiFi router.
4. Your device should power on.
5. To proceed, press the FUNC button on the left side of your
SP30.
6. Enter your password, then press the green ENTER button to
proceed.
7. Scroll down to the COMMUNICATIONS option and select.
8. If prompted, enter the password one more time and conrm.
9. Select LAN PARAMETERS.
10. Select IP ADDRESS.
11. Your IP address will be displayed on your PAX SP30 screen.
To return to the home screen, press the red CANCEL button.
12. Once back on the home screen, select SETTINGS.
13. Select PAX PIN PAD SETTINGS and enter your IP address.
14. Conrm when ready.
PAX SP30 - Default Password
The PAX SP30 default password is the day’s date entered in the
MM/DD format. If this does not work, try entering the day’s date
in the MM/DD/YYYY format.
Setup
Setup
3
Accept Payments
4
Rights Reserved
9
Settings
7
Troubleshooting
& Tips
8
Overview
2