Do you have a question about the PAX A910 and is the answer not in the manual?
Initiates the application process by pressing the 'Get started' button on the initial screen.
Automatically redirects to the purchase screen after initiating the application.
Input the transaction amount and confirm by clicking 'Charge'.
Optionally add a tip amount if requested by the customer.
Enter the number of installments if supported and requested by the customer.
Insert, swipe, or tap the customer's card or device to pay.
Hand the POS to the customer for PIN entry if prompted, then press the green button.
Indicates that the payment transaction has been approved.
Select how to receive the receipt: email, preview on POS, or print.
Navigate to and select 'Transactions List' from the main menu.
Search for and select the specific transaction to be cancelled.
Click '>' on a transaction to view its detailed information.
Click 'Cancel Transaction' on the transaction details screen.
Provide the customer's PIN if required for the cancellation process.
Choose receipt options: email, preview on POS, or print.
Access 'Other Transactions' from the main menu.
Choose the 'Refund' option from the available transaction types.
Input the specific amount to be refunded to the customer.
Insert, swipe, or tap the customer's card or device for the refund.
Enter the customer's PIN if prompted by the system.
Confirms that the refund transaction has been successfully approved.
Select receipt delivery method: email, preview, or print.
Navigate to 'Other Transactions' via the main menu.
Choose the 'Pre-Auth' option to initiate a pre-authorization.
Input the amount for the pre-authorization.
Insert, swipe, or tap the customer's card or device.
Provide the customer's PIN if requested by the system.
Confirms that the pre-authorization transaction is approved.
Select receipt options: email, preview, or print.
Navigate to 'Other Transactions' from the main menu.
Choose 'Pre-Auth Completion' to finalize a pre-authorized transaction.
Choose the specific transaction to complete from the list.
Insert, swipe, or tap the customer's card or device.
Enter the customer's PIN if prompted by the system.
Select receipt method: email, preview on POS, or print.
Choose 'Close Batch' from the main menu to finalize daily transactions.
Select 'Summary Receipt' or 'Detailed Receipt' and confirm with 'OK'.
Click 'OK' when the 'Success' message appears, indicating batch closure.
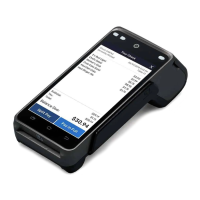
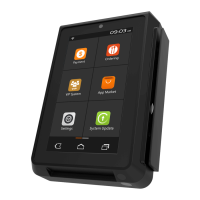
| Operating System | Android 6.0 |
|---|---|
| Display | 5.5-inch HD (1280 x 720) capacitive touchscreen |
| Memory | 1GB RAM, 8GB Flash |
| Connectivity | 4G, WiFi, Bluetooth |
| Card Readers | Magstripe, EMV Chip, Contactless |
| Camera | 5MP rear camera |
| Certifications | PCI PTS 5.x, EMV L1 & L2 |
| Payment Methods | Credit/Debit, Contactless |
| Dimensions | 57mm |