NMS044 Reference Manual Connecting the Solar Panel 25
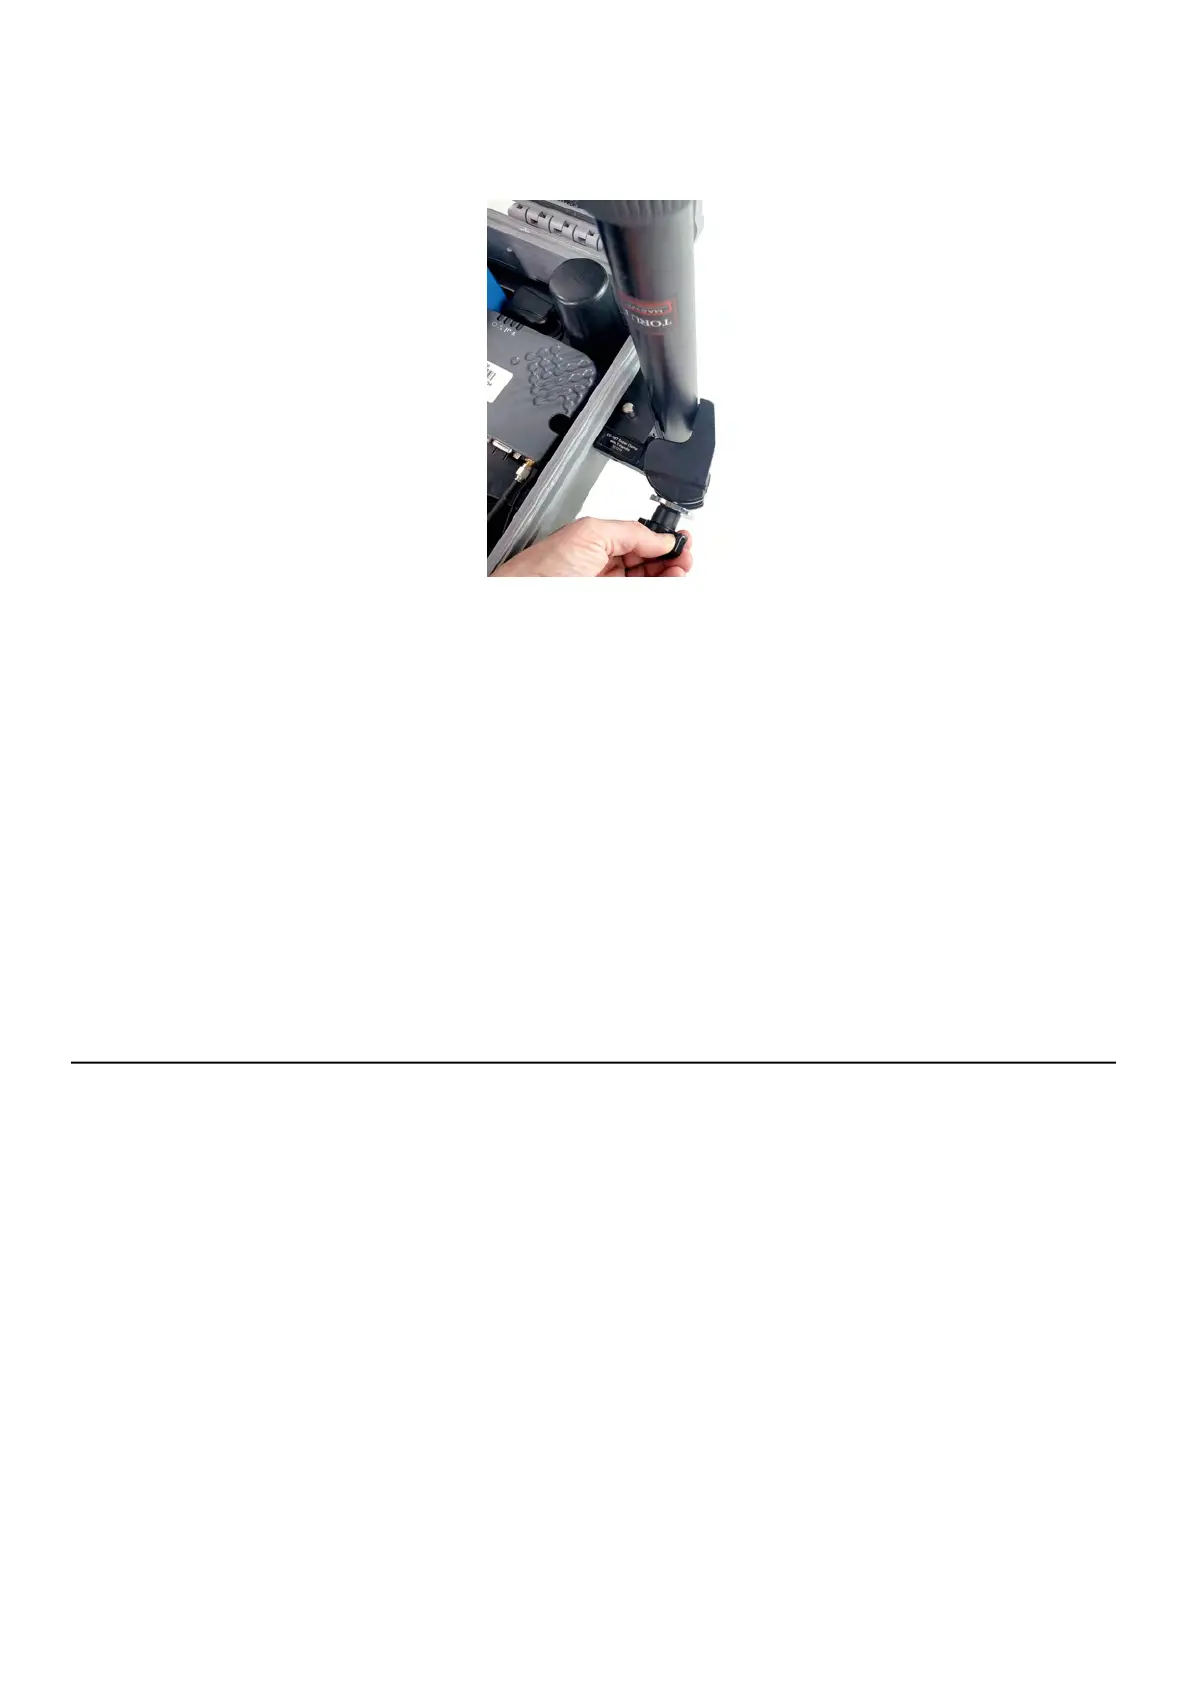
Step 5. Place the pole in the clamp on the system case, and twist clamp screw
clockwise to secure the pole.
Figure 3-8 Telescoping Pole With Super Clamp
Step 6.
To extend sections of the pole, loosen the telescoping pole binders, extend the
pole, and tighten the binders.
Step 7. Use the hook and loop cable straps (already on the cable) to secure the signal
cable to the pole.
Step 8. Place the guy wire ring over the screw, which is on the top of the pole.
Step 9. Steady the pole by tying the 3 guy wires to the guy wire ring on one end and the
ground stakes on the other.
Step 10. Press the stakes into the ground, so that the guy wires are taught.
3.4 Connecting the Solar Panel
Step 1. Unlatch the solar panel to open.
Step 2. Loosen the thumb screws to extend legs. Match the angle of the legs on both
sides.
Step 3. Connect the CBL228 solar connectors to the solar panel connectors.