EasyManua.ls Logo

PDC CERTIS B2 User Manual

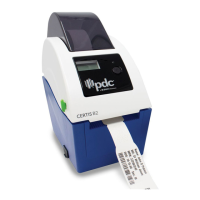
PDC CERTIS B2
30 pages
To Next Page IconTo Next Page
Page #1 background imageLoading...
Page #1 background image
DI
R
C
E
R
ECT
E
RTI
S
THE
R
S
B2:
P
R
MAL
B
P
D
T
-
B
i
B
AR
C
B
2 S
E
C
ODE
E
RIE
S
PRIN
T
S
T
ER
US
E
MAN
E
R’S
UAL

Questions and Answers:

PDC CERTIS B2 Specifications

General IconGeneral
Resolution203 dpi
Ribbon Length300 m
Print TechnologyThermal Transfer
Memory8MB Flash
InterfaceUSB2.0, Serial
Media Typefan-fold
Media Width25.4 mm
Media Thickness0.06 mm
Media Roll Diameter127 mm (5") OD
Ribbon Width110 mm
Power100-240 VAC, 50/60 Hz
Operating Temperature5°C
Storage Temperature60°C
Humidity85% (non-condensing)

Summary

Introduction

Product Introduction

Overview of the PDC bar code printer, highlighting its features like direct thermal printing, selectable speed, and print direction capabilities.

Compliances

Details the various safety and electromagnetic compliance standards met by the printer, including CE, FCC, UL, CUL, and C-Tick certifications.

Operations Overview

Unpacking and Inspection

Instructions for carefully inspecting the printer and its included accessories after unpacking to ensure all parts are present and undamaged.

Printer Overview

Provides a visual guide to the printer's external components, labeling key parts like the top cover lever, card socket, media window, LED indicator, and feed button.

Setup

Setting Up the Printer

Step-by-step guide for initial printer setup, including placement, power connection, and connection to a computer via USB cable.

Loading the Wristband Roll Media

Detailed instructions on how to properly load wristband rolls into the printer, including adjusting media holders and closing the cover.

Diagnostic Tool

Introduction to the Diagnostic Utility software for printer configuration, settings adjustment, firmware updates, and troubleshooting.

Setting Ethernet by Diagnostic Utility

Guides on configuring the printer's Ethernet interface using the Diagnostic Utility, via both USB and Ethernet connections.

Install MicroSD Memory Card

Instructions for inserting a MicroSD card into the printer's designated socket for storage or firmware updates.

Mount the Printer on the Wall

Information and diagram for securely mounting the printer onto a wall using specific screw sizes.

LED and Button Functions

LED Indicator

Explains the meaning of different LED colors and patterns (solid/flashing) indicating the printer's status, such as ready, paused, or error.

Regular Button Function

Describes the basic functions of the printer's button, including feeding wristbands and pausing/resuming print jobs.

Power on Utilities

Details how to access and use various power-on utilities for tasks like sensor calibration, initialization, and self-tests.

Troubleshooting

LED Status

Lists common printer issues based on LED status and provides corresponding recovery procedures for each problem.

Print Problem

Covers common printing issues such as 'Not Printing', 'No print on the wristband', 'Paper Jam', and 'Poor Print Quality' with solutions.

LCD display

Provides a guide to interpreting LCD messages like 'Head Open', 'No Paper', 'Paper Jam', 'Out of Mem', and 'Cutter Error' with recovery steps.

Maintenance