EasyManua.ls Logo

Peak Performance PKC0CV - User Manual

Peak Performance PKC0CV
12 pages
Print Icon
To Next Page IconTo Next Page
Loading...
Cargador de Baterías
Inteligente de
4/10/20/40 Amp
No. de Modelo: PKC0CV
Manual del Propietario
e Información de Garantía
Lea completamente estas instrucciones antes de usar este producto.
Conserve este Manual del Propietario para referencia futura.
P/N XXXXX, 1/10
1
4/10/20/40 Amp
Intelligent Battery
Charger
Model No.: PKC0CV
Owners Manual
and Warranty Information
Read these instructions completely before using this product.
Retain this Owners Manual for future reference.
P/N XXXXX, 1/10
1
Question and Answer IconNeed help?

Do you have a question about the Peak Performance PKC0CV and is the answer not in the manual?

Overview

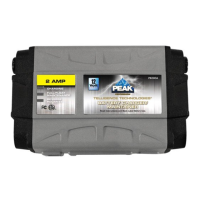
The device is a PEAK Performance 4/10/20/40 Amp Intelligent Battery Charger, Model No.: PK0CV. This manual provides detailed instructions for its safe and effective use, maintenance, and troubleshooting.

Function Description

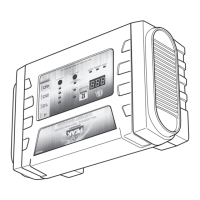
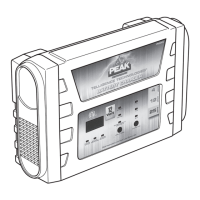
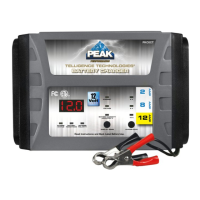
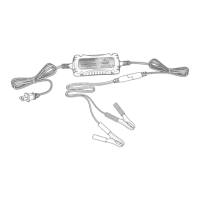
The PEAK Performance Intelligent Battery Charger is a sophisticated device designed to charge 12-volt automotive batteries. It offers four charging modes: 4-amp, 10-amp, 20-amp, and 40-amp, making it suitable for a wide range of vehicles and battery types. The charger incorporates an automatic battery recondition mode, which helps to extend battery life. It features an LED display that shows voltage, current, and battery capacity, along with an LED display for fault codes. The device automatically checks for correct polarity, requiring a minimum of 4-5 volts DC at the battery terminals to operate. It also includes heavy-duty cables and clamps for corrosion resistance, ensuring better connections. The charger is designed for both top-mount and side-mount battery terminals. It is ideal for charging or boosting during winter when the starting performance of vehicle batteries is lowered by cold or extreme weather conditions. The charger can be used for a variety of applications, including cars, trucks, farm equipment, boats, RVs, ATVs, lawn mowers, and garden tractors. It is also suitable for personal watercraft, motorcycles, and snowmobiles.

Important Technical Specifications

  • Rated Input Voltage: 120V AC/60Hz
  • Maximum Current Output: 40A/2A
  • Maximum Output Voltage: 14.8V DC/2V DC
  • Float Charge Voltage: 13.6-14.0V DC
  • Minimum Battery Voltage (for Battery Charger to operate): 4-5V DC
  • Ambient Operating Temperature: 32°-104°F (0°-40°C)
  • Weight: 7.4 lbs (3.3 kg)
  • Dimensions (L x H x W): 13-3/4 x 9-1/4 x 5-7/8 in. (349 x 235 x 149 mm)

The charging rates and corresponding battery capacities are as follows:

  • 4A: 12AH-28AH
  • 10A: 20AH-70AH
  • 20A: 60AH-140AH
  • 40A: 112AH

Usage Features

Safety Precautions: Before using the charger, it is crucial to read and understand all safety warnings. The device is designed for indoor use only and should not be exposed to rain or snow. It is important to wear eye protection and gloves when working with batteries. Batteries can produce explosive gases, so ensure adequate ventilation. Avoid smoking or creating sparks near the battery. Never charge a frozen battery. Always connect the charger to a 110/120-volt grounded AC outlet. Ensure the charger cables and clamps are in good condition.

Pre-Charge Activation: Before charging, verify the battery voltage. The charger will not activate if the battery voltage is below 4-5V DC. If the battery is deeply discharged, it may need to be reconditioned or replaced.

Connecting the Charger:

  1. Positive-grounded vehicle: Connect the negative (BLACK) charger clamp to the negative (NEG, N, –) ungrounded battery terminal. Connect the positive (RED) charger clamp to the carburetor, fuel lines, or sheet metal body parts; connect only to a heavy gauge, stable metal part of the frame or engine block.
  2. Negative-grounded vehicle: Connect the positive (RED) charger clamp to the positive (POS, P, +) ungrounded battery terminal. Connect the negative (BLACK) charger clamp to the vehicle chassis or engine block away from the battery.
  3. For side-mounted battery terminals: Use a larger diameter than the negative battery terminal (marked NEG, N, –). For top-mounted battery terminals, the positive terminal is red, the negative terminal is black.
  4. After connecting the clamps, plug the charger into a 110/120-volt AC power outlet.

Charging Process: The charger automatically detects the battery type and begins charging. The LED display will show the current voltage, battery capacity, and charging status. The charger will automatically adjust the charge rate as the battery becomes fully charged. The charger will enter float mode once the battery is fully charged.

Charging Rate Selection: The charger offers four charging rates: 4-amp, 10-amp, 20-amp, and 40-amp. Select the appropriate rate based on the battery's capacity and desired charging time. The 4-amp rate is for smaller batteries, while the 40-amp rate is for larger batteries or for quick boosting.

Troubleshooting: The manual provides a comprehensive troubleshooting guide for common issues such as:

  • No current reading or will not charge: Check the AC outlet, battery connections, and ensure the battery voltage is above 4-5V.
  • Battery slow to charge or very low voltage reading: Check the charge rate, battery health, and consider reconditioning.
  • Fault codes: The LED display will show specific fault codes (F01-F06) for various issues like short circuits, low battery voltage, high battery voltage, high temperature, no float charge, and reverse polarity. Each fault code has a corresponding cause and solution provided in the manual.

Maintenance Features

Cleaning:

  • After each use, clean the charger clamps to remove any battery fluid that will cause corrosion of the clamps.
  • Clean the outside case of the battery charger with a soft cloth and a mild, soapy solution.

Adding Water to the Battery:

  • WARNING: Battery acid is corrosive. Always wear eye protection and gloves when adding water to the battery.
  • NOTICE: Do not add water to a maintenance-free battery.
  • Once the battery is fully charged, check the electrolyte level of the battery. If the level is below the specified level, add clean distilled water only. Never add acid or tap water.

Storage:

  • Store the battery charger at room temperature. Make sure the charger clamps are stored in the storage area on the back of the unit after use.
  • Keep the battery charger cords loosely coiled during storage to prevent damage to the cords.
  • Do not store the battery charger or its cords if the clamps have been damaged.

Disposal: The battery charger is designed to provide years of service. However, when the battery charger reaches the end of its service life, it should be disposed of properly. Dispose of the charger in accordance with local, state, and federal regulations for electronic waste. Do not dispose of the charger in household trash.

Peak Performance PKC0CV Specifications

General IconGeneral
BrandPeak Performance
ModelPKC0CV
CategoryBattery Charger
LanguageEnglish

Related product manuals