45
- THEN assemble the PRESSURE SENSOR
- connect the wire communication with the power board
- connect the ribbon cable of the display and close the front cover
ATTENTION:
1. MAKE THE FACTORY PARAMETERS RESET BEFORE STARTING THE INVERTER (parameter
SET.F at page 11 of the Manual)
2. RESTORE MANUALLY THE SPECIFIC PARAMETERS OF THE SYSTEM
3. DO NOT RE-CALIBRATE THE PRESSURE SENSOR, IT IS FACTORY-CALIBRATED
CALIBRATION OF THE PRESSURE SENSOR
- You need an
auxiliary gauge
near STEADYPRES
-
bring the system (and STEADYPRES) pressure to zero (0 bar)
-
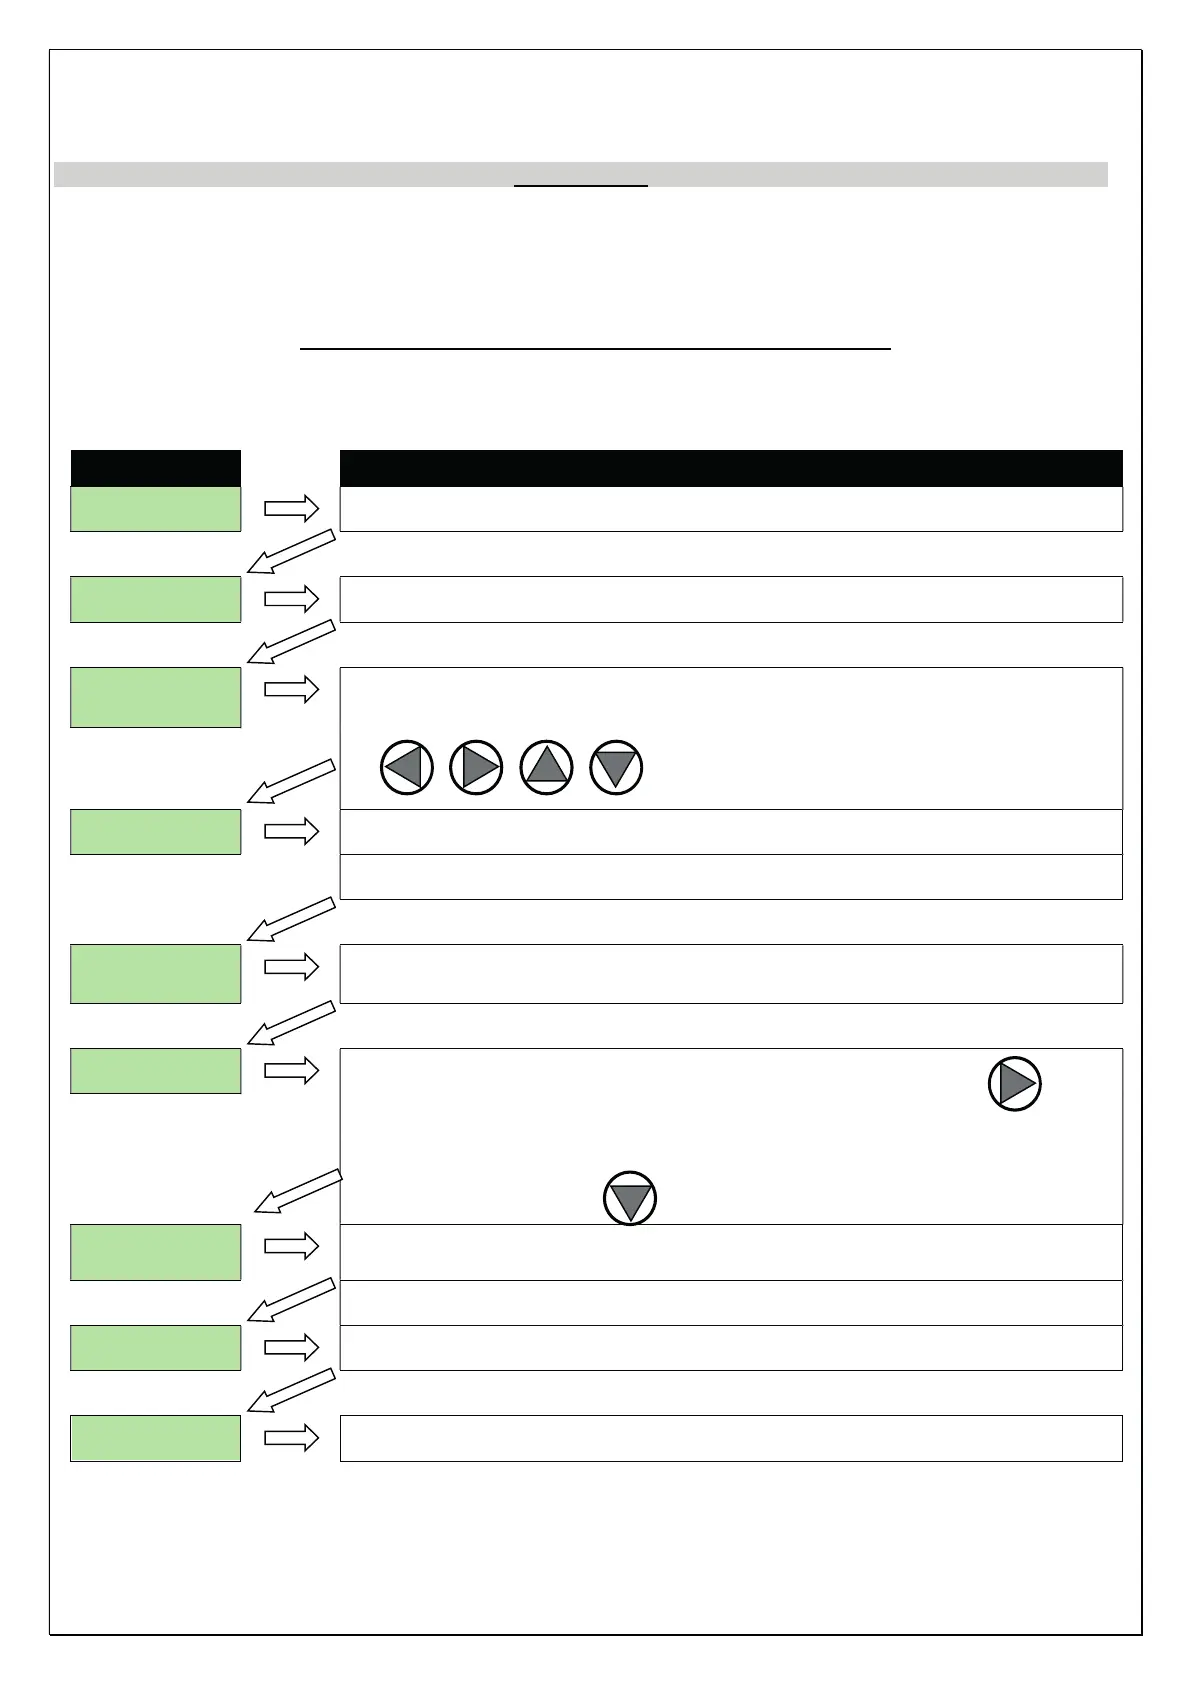
Start the calibration
of the pressure sensor according to the diagram below.
display action
P x.x
Switch the inverter off
display off
Switch the inverter on
STARTING
(for 10 sec.)
Press simultaneously the 4 buttons, within the 10 seconds of
STARTING.
ZERO
Check on the gauge that the pressure of the system is ZERO
Press the button SET/TEST to confirm the zero pressure
SP 5.0
Start the pump by pressing START button; the pump starts at
SP 5.0
Increase the frequency of the pump by pressing the button
until you reach the required pressure of 5 bar
If the pump is not able to reach 5,0 bar, reduce the required pressure
by pressing the button
(e.g. to 4 bar)
SP 4.0
Check on the gauge that the pressure of the system is that required by
Press the button ENTER to confirm
F hi
Press again the button ENTER
P_3.5
The inverter re-starts in automatic mode, the sensors calibrated.