2
When to Clean Your Filter
A lter's operating pressure increases as dirt is ltered from your pool. This buildup of pressure will vary due to dierent
bathing loads, temperature, environmental conditions, etc.
Clean your lter when the lter's pressure gauge reads approximately 10 psi higher than the Original Starting Pressure
or when signicant reduction in ow is noticed. When using a variable speed pump the Original Starting Pressure will
be dependent on the pump speed (RPM) when recording the original operating pressure.
Opening the Filter
Follow these instructions exactly to prevent the lid from separating during system start-up, operation or servicing.
This lter operates under high pressure. Air can also enter the system and become pressurized.
If there is air in the system, there will be positive pressure that could cause the lid to separate from the lter when you
release the clamp or during system start-up or operation.
If there is no air in the system, there may be negative pressure, which would make the system hard to open.
Follow these instructions exactly. Opening the relief valve equalizes the pressure and releases any trapped air within
the system, making it safe and easy to open.
RECOMMENDED EQUIPMENT:
• Socket Wrench
• 7/8-inch Socket
• Socket Extender (if needed)
PROCEDURE:
1. Shut o pump and relieve all pressure from the
ltration system.
a. Turn the pump OFF, shut OFF any automatic
controls (e.g., timers), and disconnect power at
the circuit breaker to ensure that the system is
not inadvertently started during maintenance.
b. Open the Manual Air Relief Valve by turning the
top of the valve 1/4 turn counterclockwise until it
snaps into the full open position.
c. Stand clear of the lter and wait until all pressure
is relieved. Pressure gauge must read zero (0)
psi.
2. Open the drain plug at the bottom of the lter and
allow all water to drain from the lter.
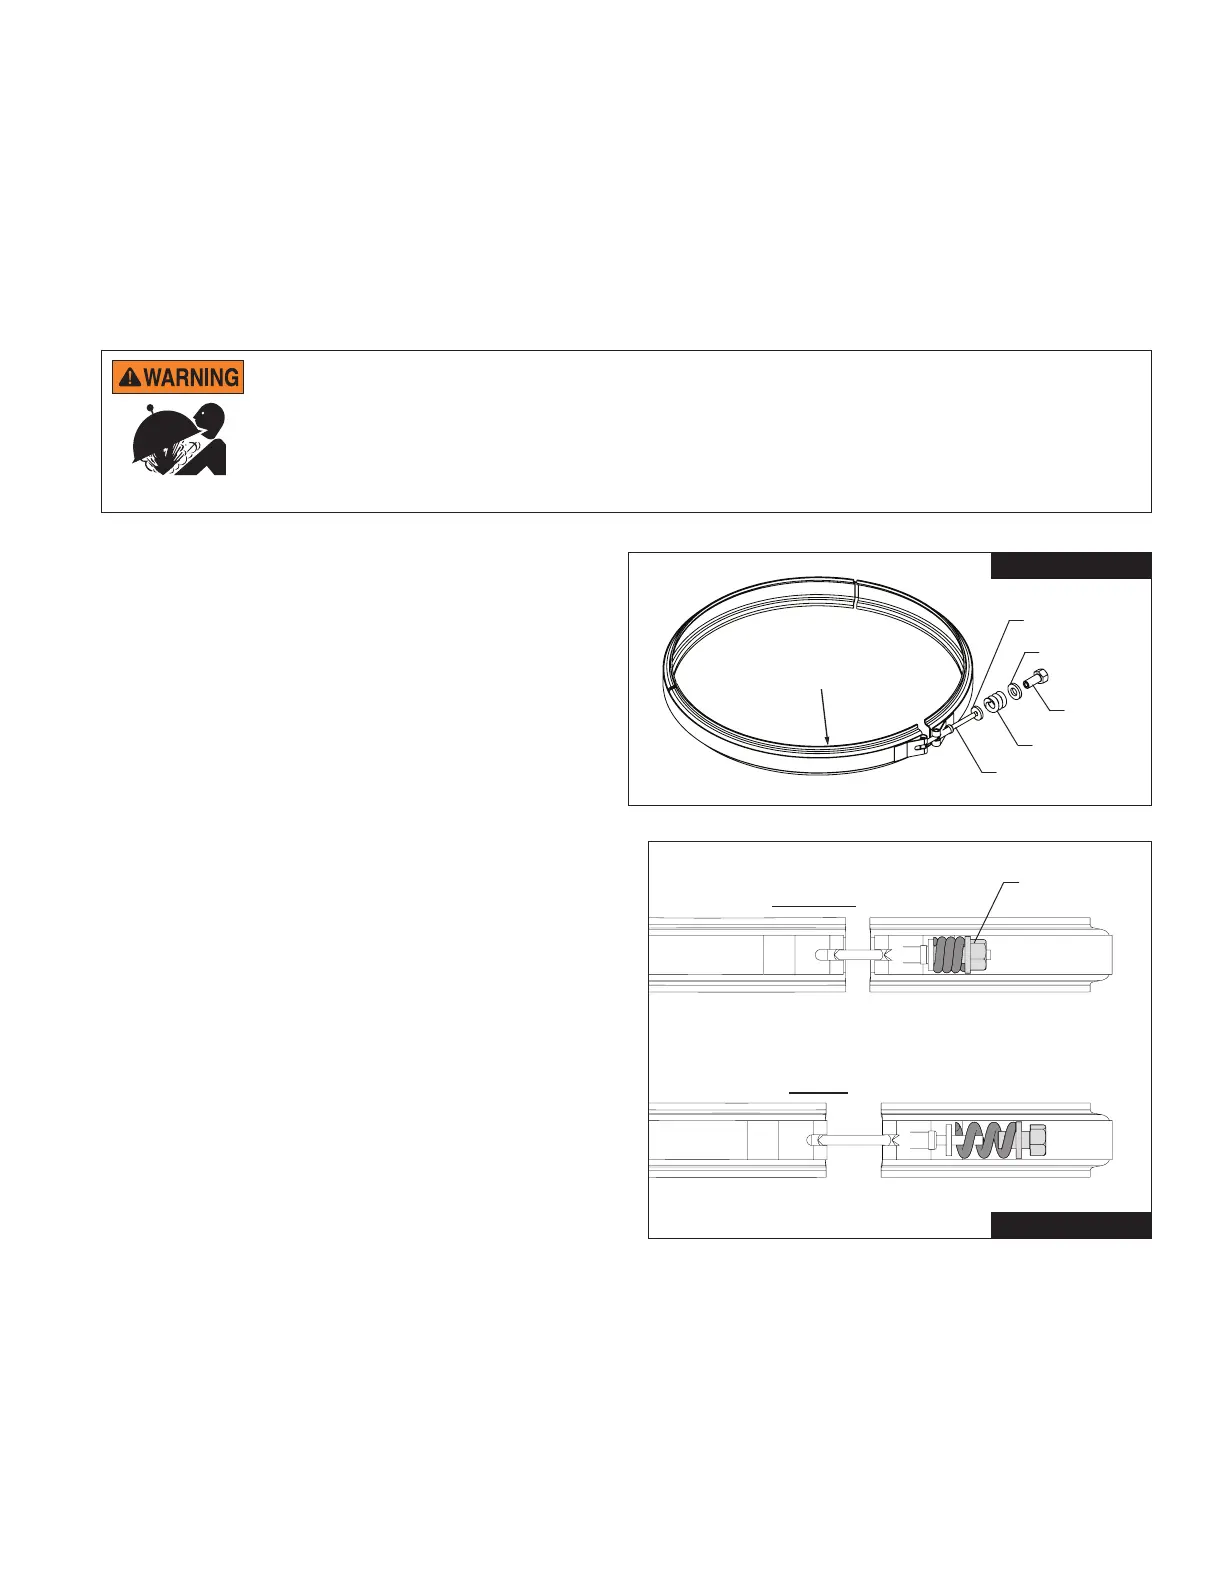
3. Using a 7/8-inch wrench, loosen the clamp barrel nut,
allowing the spring coils to decompress. See FIGURE
2.
4. Remove the barrel nut, spring and two washers from
the T-bolt and place them aside.
5. Remove the clamp ring from the lter and place it
aside.
6. Carefully lift the lter lid away from the tank bottom.
DO NOT lift the lter lid by the air relief valve. This can damage the valve.
Note: If the lid is tightly sealed to the tank bottom you may have to gently wiggle the lter lid side to side to
separate the tank halves. DO NOT use a screwdriver or pry-bar to lift the lid. This can damage the O-ring.
7. Place the tank lid and O-ring in a safe place where it will not be damaged while performing maintenance.
Note: Minimize the amount of debris that comes in contact with the tank O-ring while it is exposed.
SPRING
BARREL
NUT
SM. WASHER
T-BOLT
CLAMP RING
LRG. WASHER
FIGURE 1
CLAMP RING,
OPEN POSITION
CLAMP RING,
CLOSED POSITION
LOOSEN WITH
7/8" WRENCH
FIGURE 2
 Loading...