5
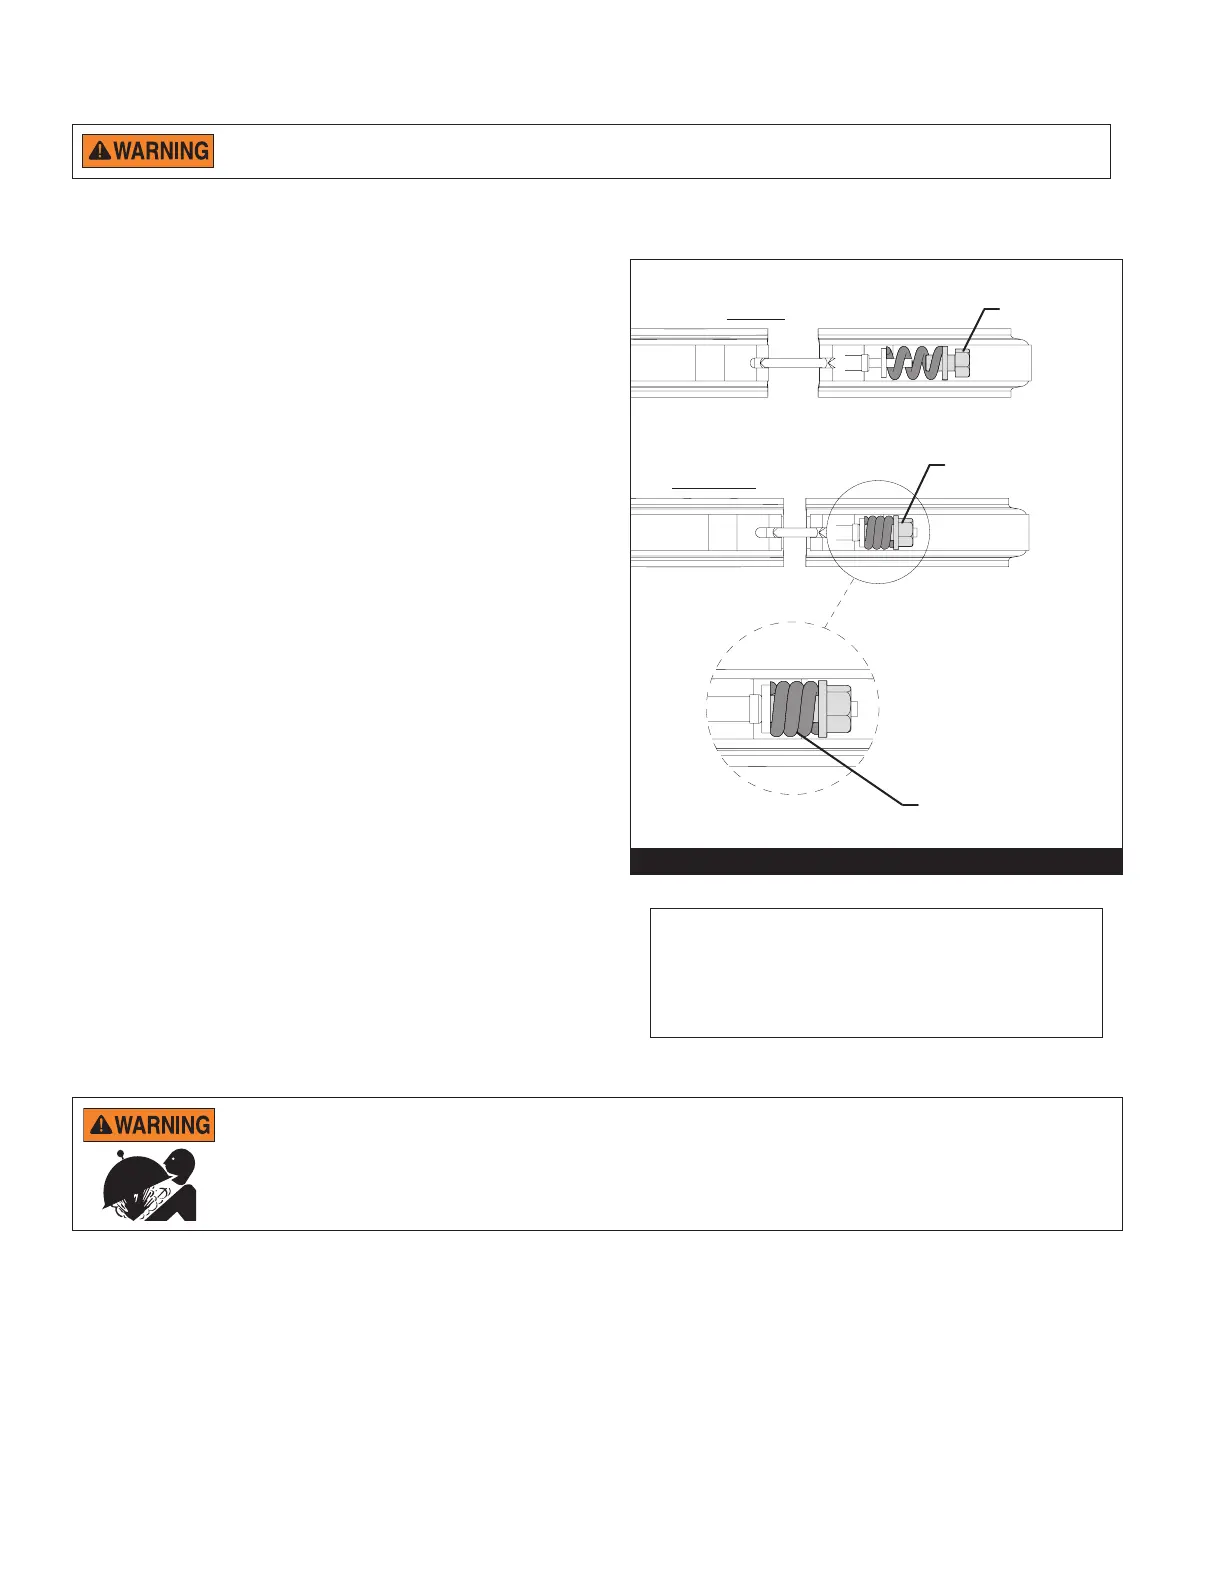
Note: Check the spring coils at least once a
month to ensure proper tension. If spring coils
do not touch then shut o pump and relieve
pressure and tighten the nut and tap lter clamp
until the coils touch.
Reinstalling the Filter Lid and Clamp Ring
RECOMMENDED EQUIPMENT:
• Socket Wrench
• 7/8-inch Socket
• Socket Extender (if needed)
• Rubber Mallet
PROCEDURE:
1. Ensure the O-ring is clean and properly seated on the
tank bottom. Seat the lter lid onto the tank bottom so
the O-ring ts in between the tank halves.
2. Hold the ends of the clamp ring apart and place over
both upper and lower tank anges. Bring the ends of
the lter clamp together.
3. Insert the T-bolt through the other side of the clamp and
hold together.
4. Place the small washer onto the T-bolt.
5. Place the spring, large washer and barrel nut onto the
T -bolt and tighten the nut by hand. Ensure the clamp
ring ts easily on the tank anges.
6. After tightening by hand:
a. Use a 7/8-inch socket wrench to tighten further.
b. Tap around the entire clamp ring with a rubber
mallet (or similar tool) multiple times to t the
clamp properly.
c. Continue to tighten until the spring coils touch.
d. Tap around the entire clamp again and verify the
spring coils remain touching. If not, continue to
tighten the nut.
Note: The clamp is installed correctly only when the
spring coils remain touching after tapping the clamp. See
FIGURE 6.
7. Close the drain plug at the bottom of the lter.
8. Follow Start-Up Instructions, page 6 exactly.
Follow these instructions exactly to prevent the lid from separating from the lter during system start-up or operation.
DO NOT tighten the nut or attempt to adjust the clamp ring or lid while the system is turned on or under pressure. This could
cause the lid to separate from the lter.
TIGHTEN WITH
7/8" WRENCH
HAND TIGHTEN
ONTO T-BOLT
SPRING COILS
TOUCHING
FIGURE 6
CLAMP RING,
OPEN POSITION
CLAMP RING,
CLOSED POSITION
 Loading...