5
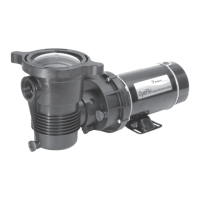
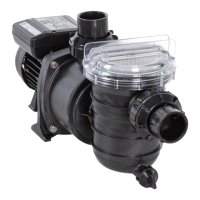
OPTIFLO Aboveground Pool Pump Installation and User's Guide
ENGLISH
4. Use extreme care when handling the mechanical seal. The mating seal surfaces are polished and are easily
damaged.
5. The mechanical seal can be changed without disconnecting piping by removing 4 bolts (see item 14 on page 7)
and pulling the motor with OptiFlo
®
Aboveground Pool Pump seal plate and impeller assembly away from front
pump housing body.
6. Removeimpellerandrotatingportionofsealbyholdingmotorshaftandrotatingtheimpellercounter-clockwise
when facing the shaft extension on the motor.
7. The rotating portion of the seal can now be removed from the impeller. Clean the impeller hub and lubricate
withsoapywater.Wipeoshiningcarbonsealingsurfaceofnewmechanicalsealwithacleantissuetoremove
oilyngerprintsorotherforeignmaterials.Thenewrotatingsealcanbepressedbackontotheimpeller.
8. Toremovethestationaryceramicsealseat,rstloosenthefourmotorboltswhichrunthroughtheentirelength
ofthemotorintothesealplate.Removethesealplatefromthemotor.Presstheceramicseatandrubbergasket
out of the seal plate.
9. Clean the seal plate seal area and lubricate with soapy water. Press the new ceramic seal and gasket into the
sealplate,beingsureitisfullyseated.Wipeotheceramicsealingsurfacewithacleantissuetoremoveoily
ngerprintsorforeignsubstances.
10. Place the seal plate on the motor and carefully align the four motor through bolts. Secure the seal plate onto the
motorbeingcarefulnottoovertightenthebolts.Graduallybringboltsuptonaltightnessbymovingacrossin
a criss-cross pattern.
11. Check the position of the mechanical seal set in the seal plate and ensure the motor shaft is in the center of the
seal set.
12. Screwtheimpellerwithnewrotatingsealontothemotorshaft.Rotatethemotorshafttomakesuretheimpeller
is not touching the seal plate.
13. CleanthesealplateO-ringandchecktomakesureitisinposition.Replacethemotorandsealplateonthefront
pumphousingbodyandboltintopositionwith4bolts.Graduallybringboltsuptonaltightnessbymoving
across in a criss-cross pattern.
14. Refertoinitialstart-upprocedurestorestartthepump.
SECTION V. WINTERIZING PROCEDURE
NOTICE
Allowing the water to freeze in pump will damage the pump and cause potential water damage/flooding and
potential property damage.
1. Drain all water from pump housing and piping when freezing temperatures are expected. A drain plug is provided
to drain the pump. If the pump has a strainer pot both the strainer drain plug and the housing drain plug should
be removed. If pump has no strainer pot then only remove the housing plug.
2. If the pump can be removed and placed in an inside dry location this should be done.
3. For an outdoor unprotected location it is best to protect the equipment in a weatherproof enclosure.
4. Do not wrap the motor with plastic because condensation could form inside the motor.
5. In installations where the pump cannot be drained a 40% propylene glycol 60% water solution will protect to
-50°F (-45.6°C).
NOTICE
Do not use anti-freeze solutions except propylene glycol, as other anti-freeze is highly toxic and will damage
the pump.