9
5
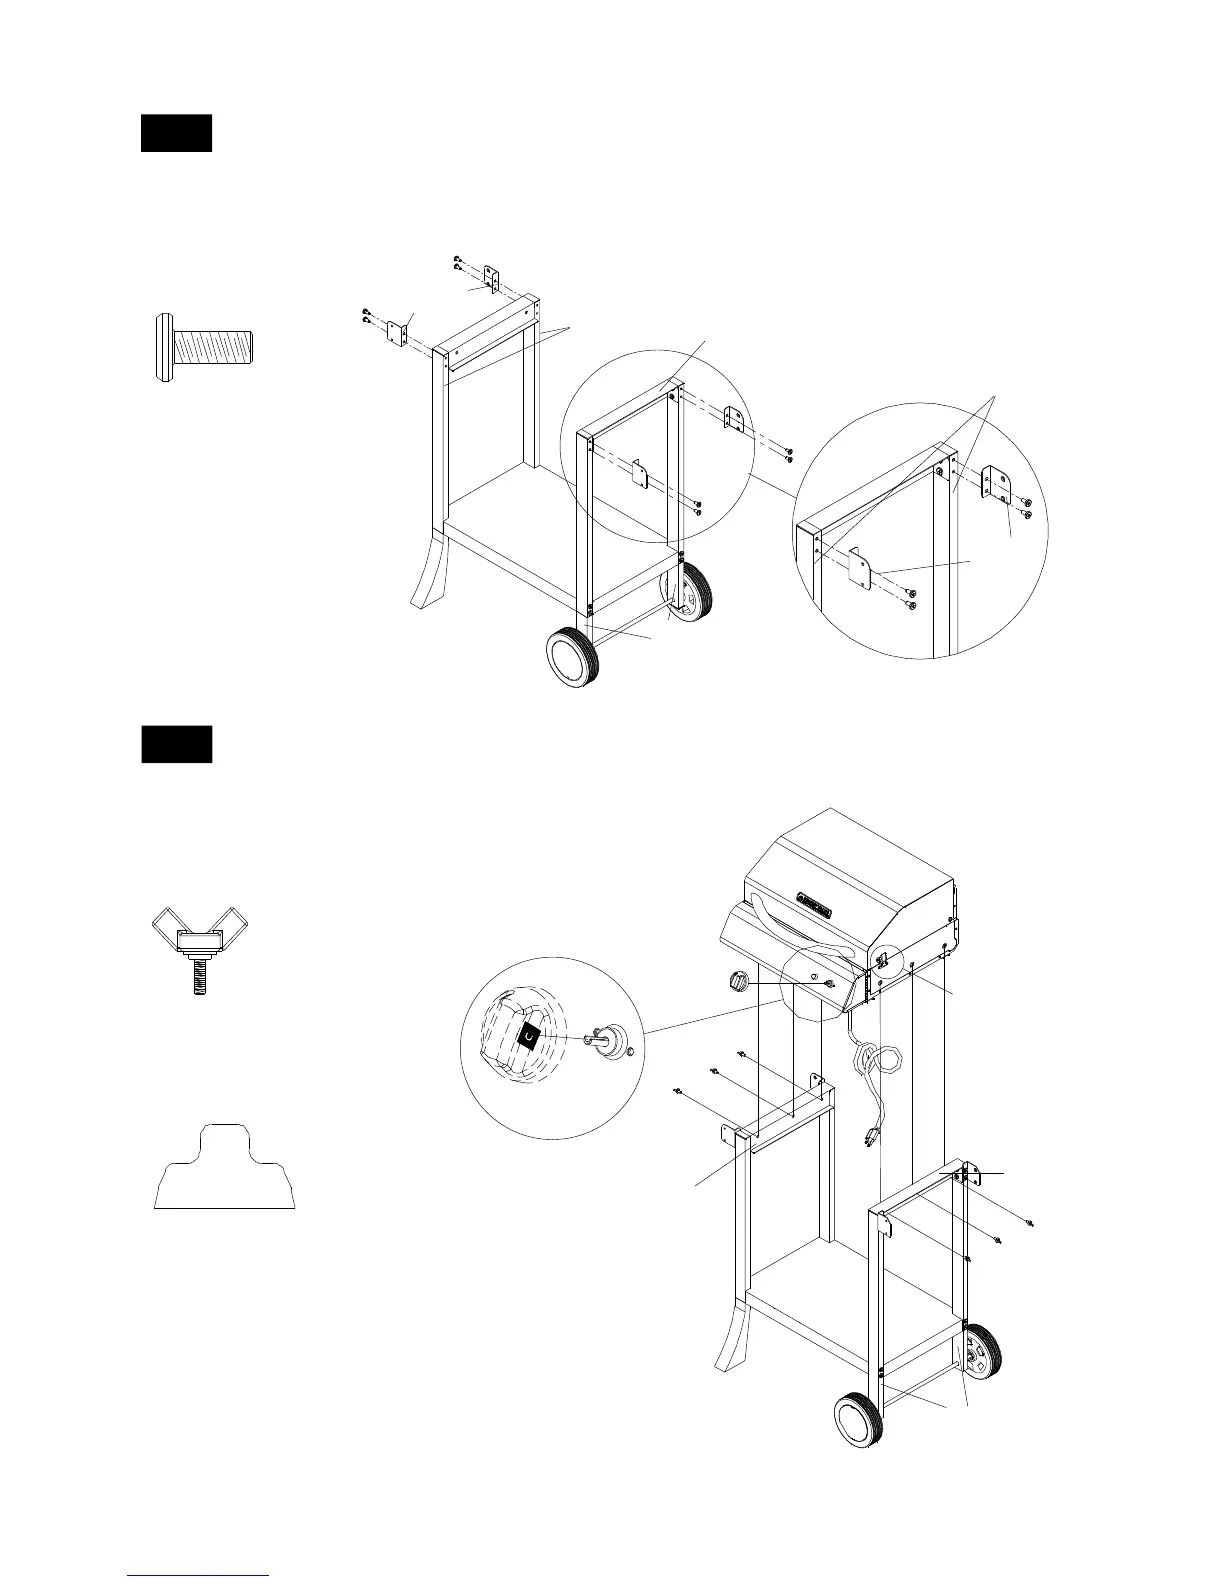
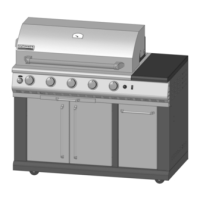
Install Side Shelf Brackets (Fig. 5)
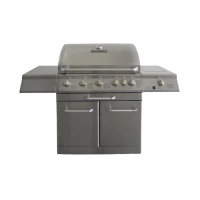
Wing Bolt
1/4 in. x 5/8 in.
Qty. 6
Part # S233G04104
Control Knob for
Electric Burner
Qty. 1
Part # PD13010050
Scale: 1:2
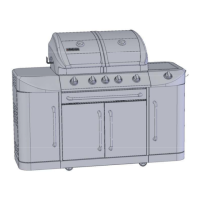
Install Grill Head and Control Knob (Fig. 6)
6
Fig. 6
1.
2.
3.
1.
2.
3.
LF
Side Shelf
Brackets
Lower Left
Cart Legs
LR
Lower Right
Cart Legs
Cart Bottom
Shelf
RR
RF
Side Shelf
Brackets
Upper Left
Cart Legs
Upper Right
Cart Legs
Right Bowl
Bracket
3.
Fig. 5
Phillips Head Screw
1/4 in. x 1/2 in.
Qty. 8
Part # S112G04084
Lower Right
Cart Legs
Right Bowl
Bracket
Grill Head
Upper/Lower
Lid Latches
Cart Bottom
Shelf
Lower Left
Cart Legs
Left Bowl
Bracket
Control
Knob
Attach the Side Shelf Brackets, (RF/RR) to the Upper Right
Cart Legs.
Insert 4 Phillips Head Screws 1/4 in. x 1/2 in. and tighten
securely.
Repeat steps for Left Side Shelf Brackets to Upper Left Cart
Legs.
Place Grill Head onto Bowl Bracket.
Tighten securely using 6 Wing Bolts 1/4 in. x 5/8 in. from
underside of Left and Right Bowl Brackets.
Attach Control Knob as shown.